
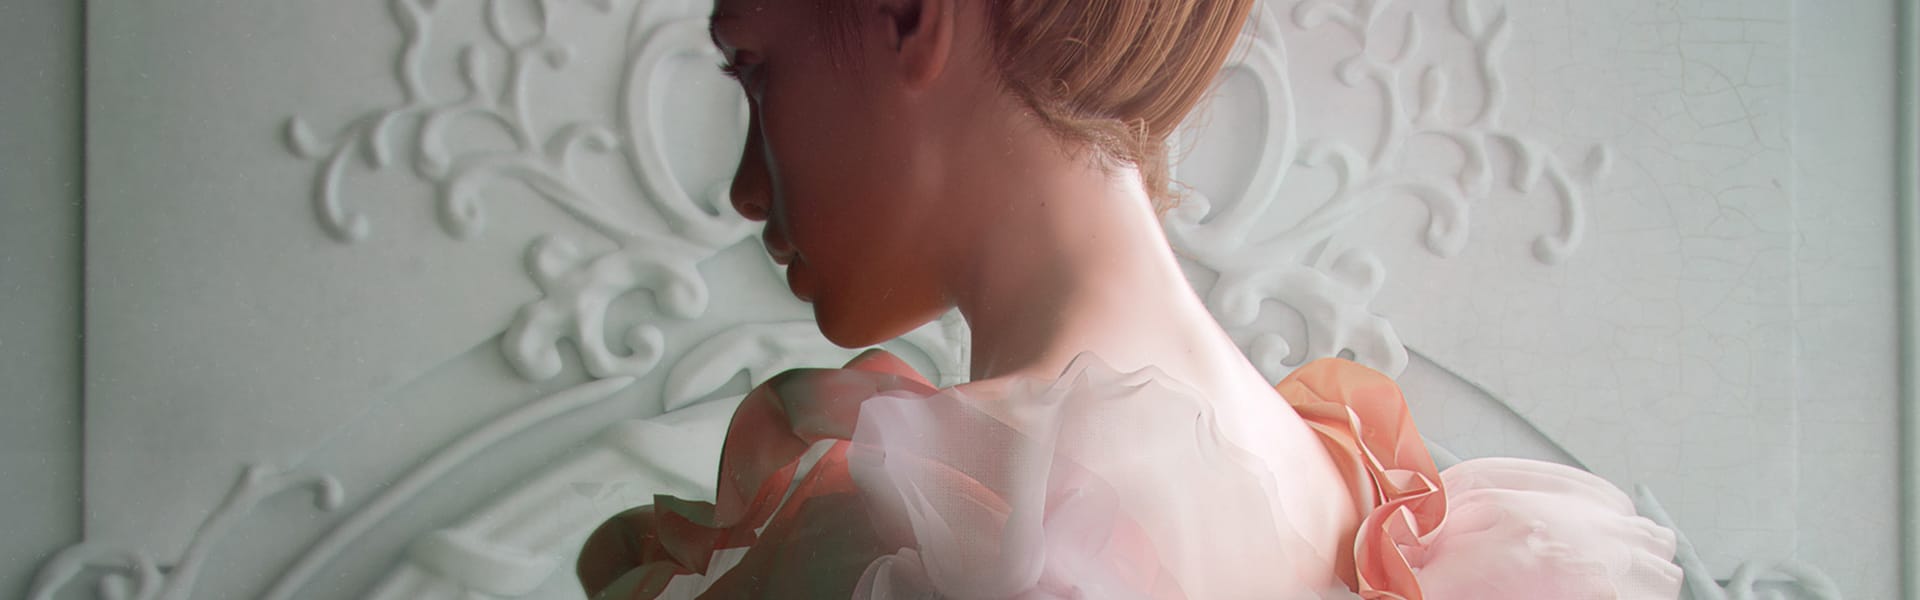
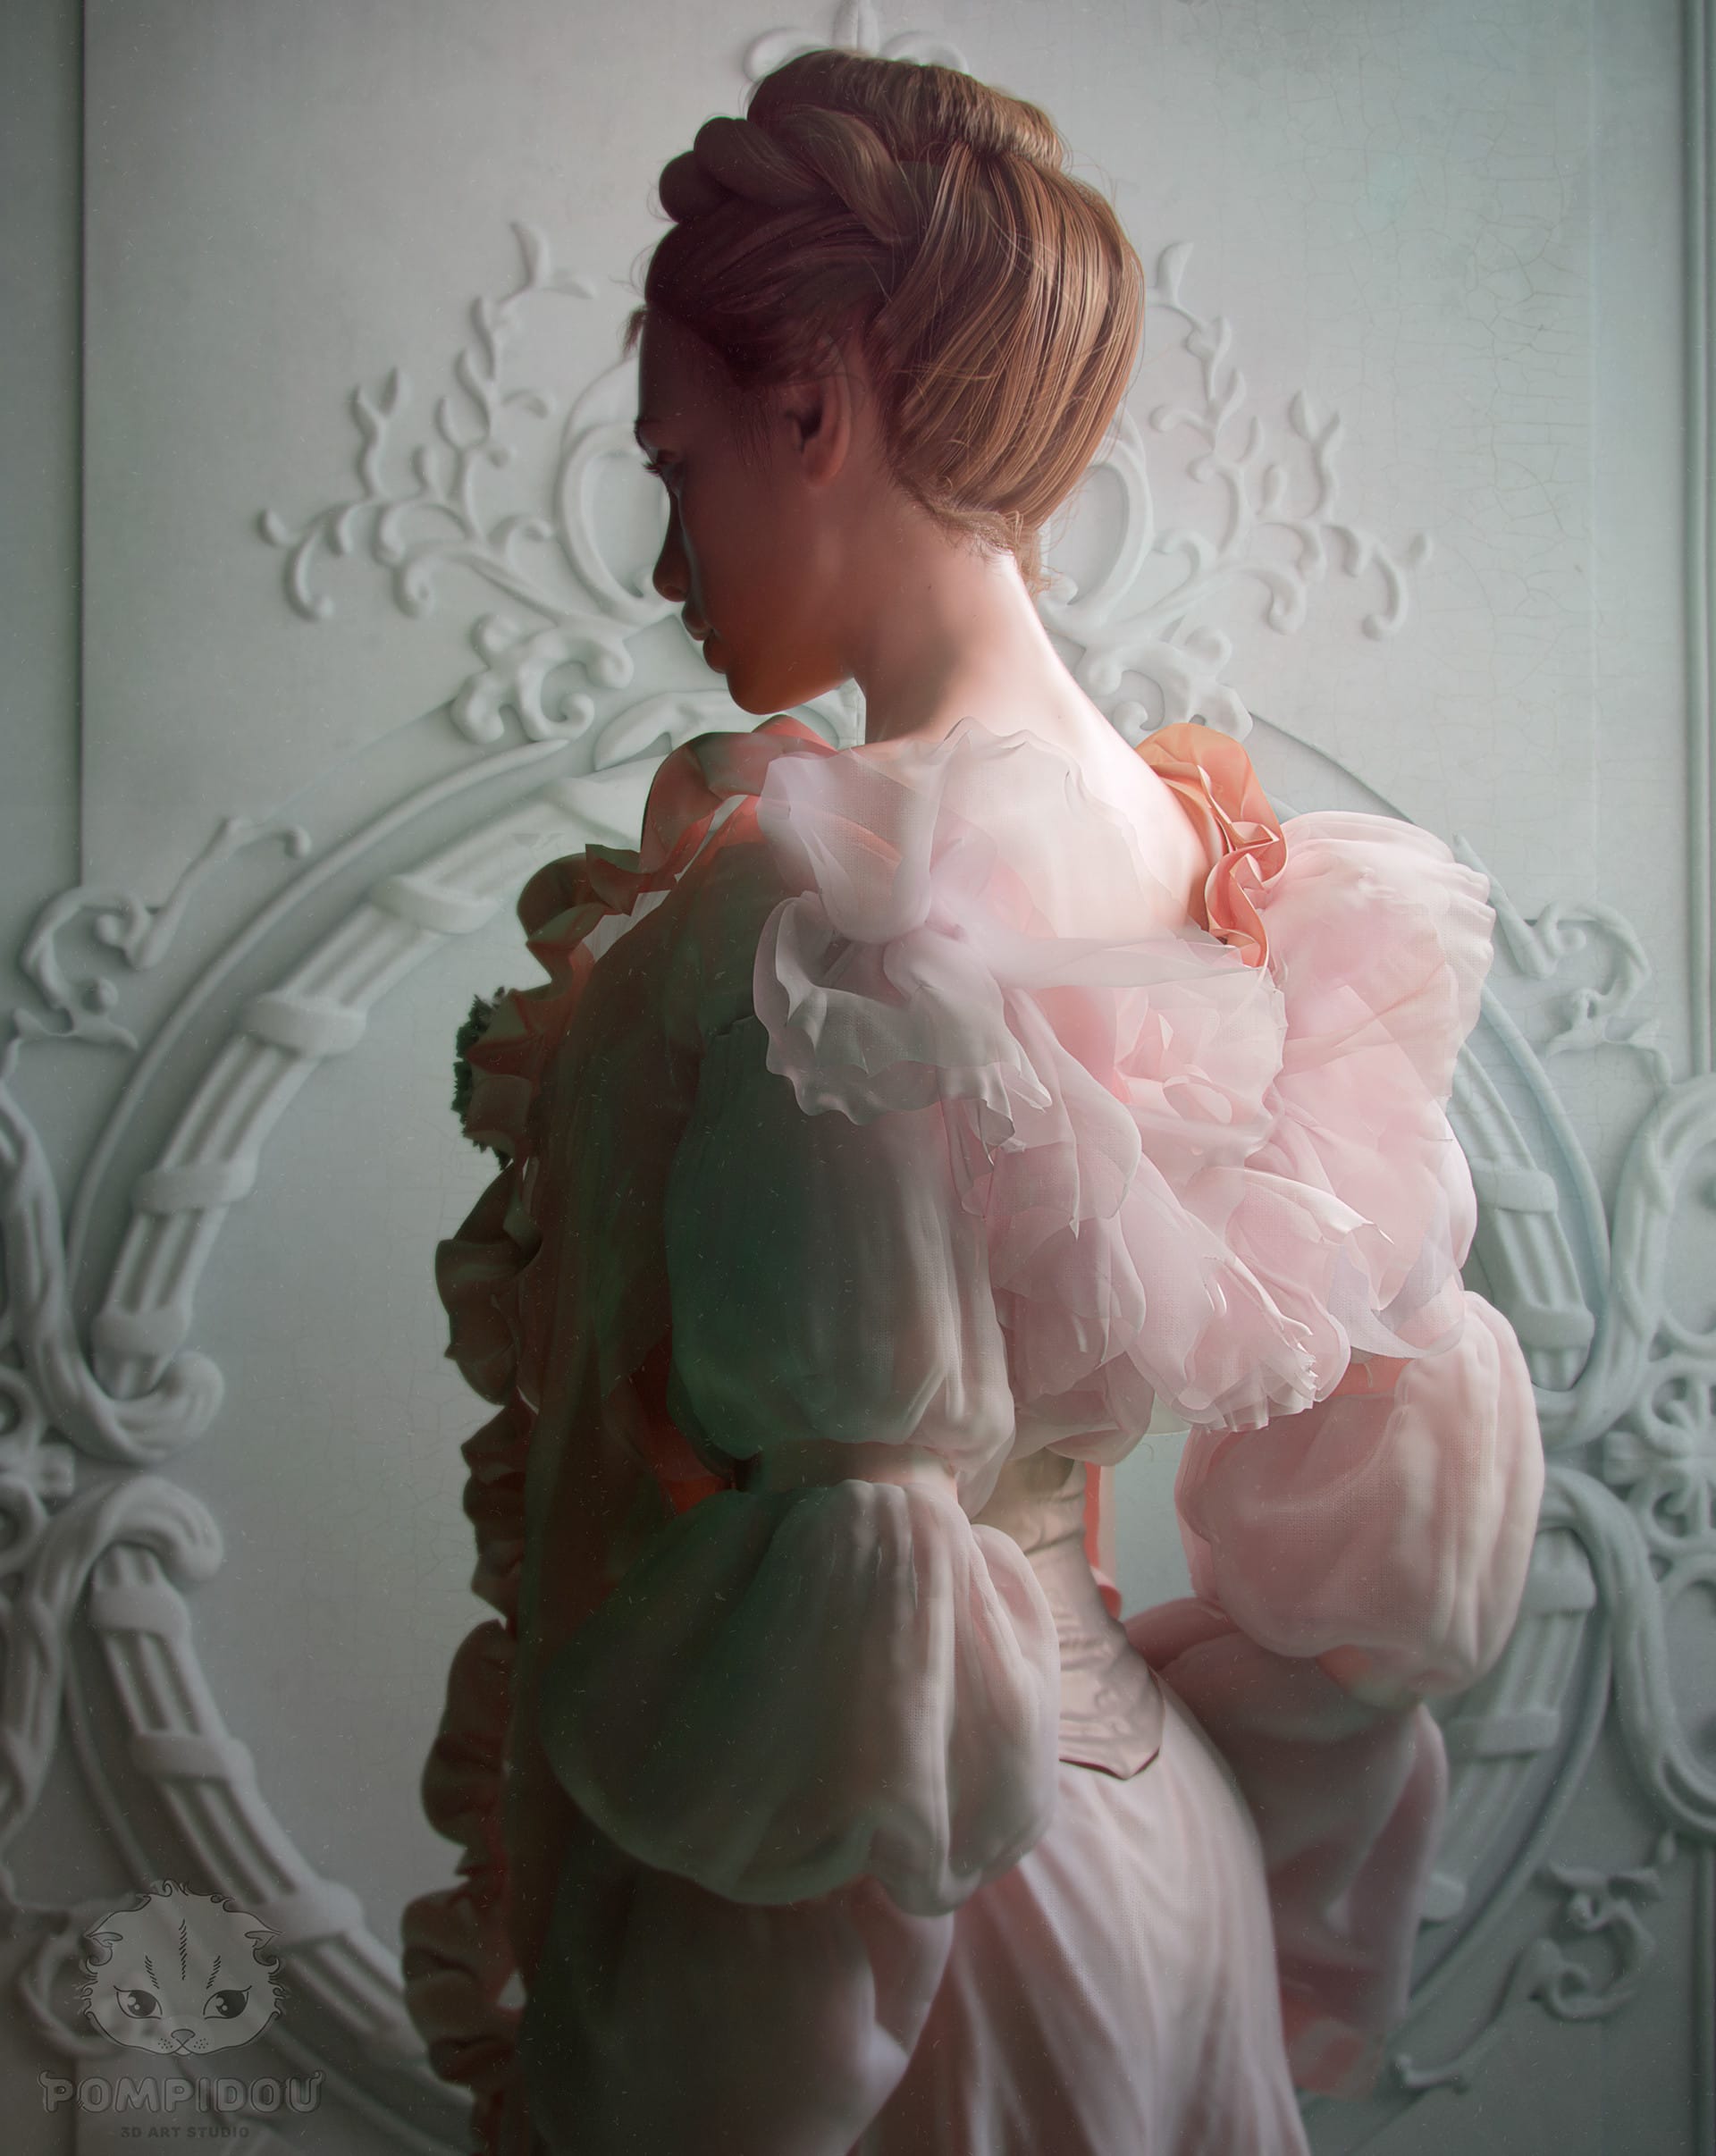
Inspired by the Old Masters, Marianna Yakimova wanted to celebrate her new V-Ray skills with a 3D illustration that showcases beautiful fabric and lighting.
Using the brief of a perfume commercial for a floral fragrance, the illustration is delicate and romantic; everything from the graceful hairstyle to the texture of the elegant dress was designed to represent flowers, from bud to bloom.
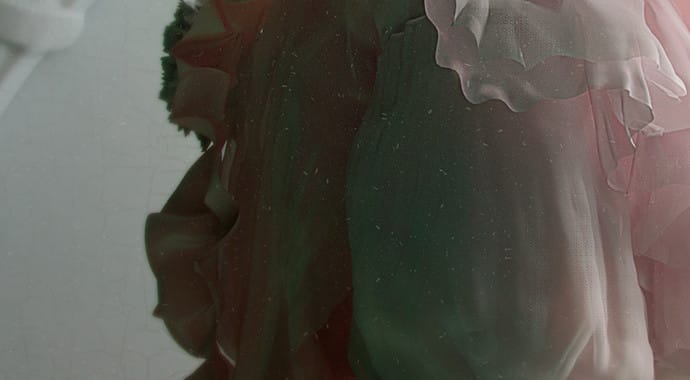
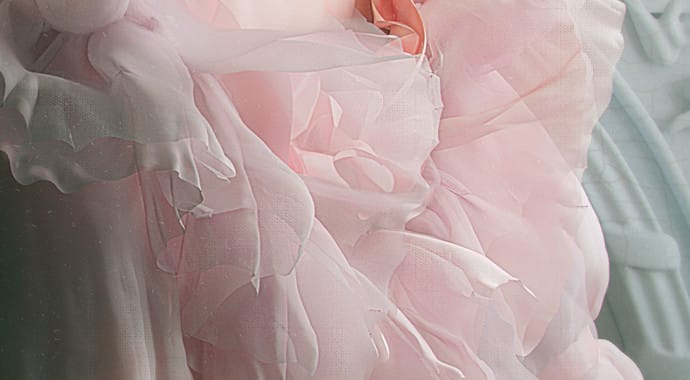
Aiming for maximum realism, great attention to detail needed to be paid to the hair and dress — in particular the translucent, chiffon-like fabric. The color palette and light balance of the image also had to work together to create a classic and fresh mood, and the clever composition adds an element of privacy, even secrecy.
In this making of article, Marianna walks us through the creation of her charming 3D illustration.
PINK DRESS

Tools used: ZBrush, 3ds Max, Marvelous Designer, Ornatrix, V-Ray
Modeling the character
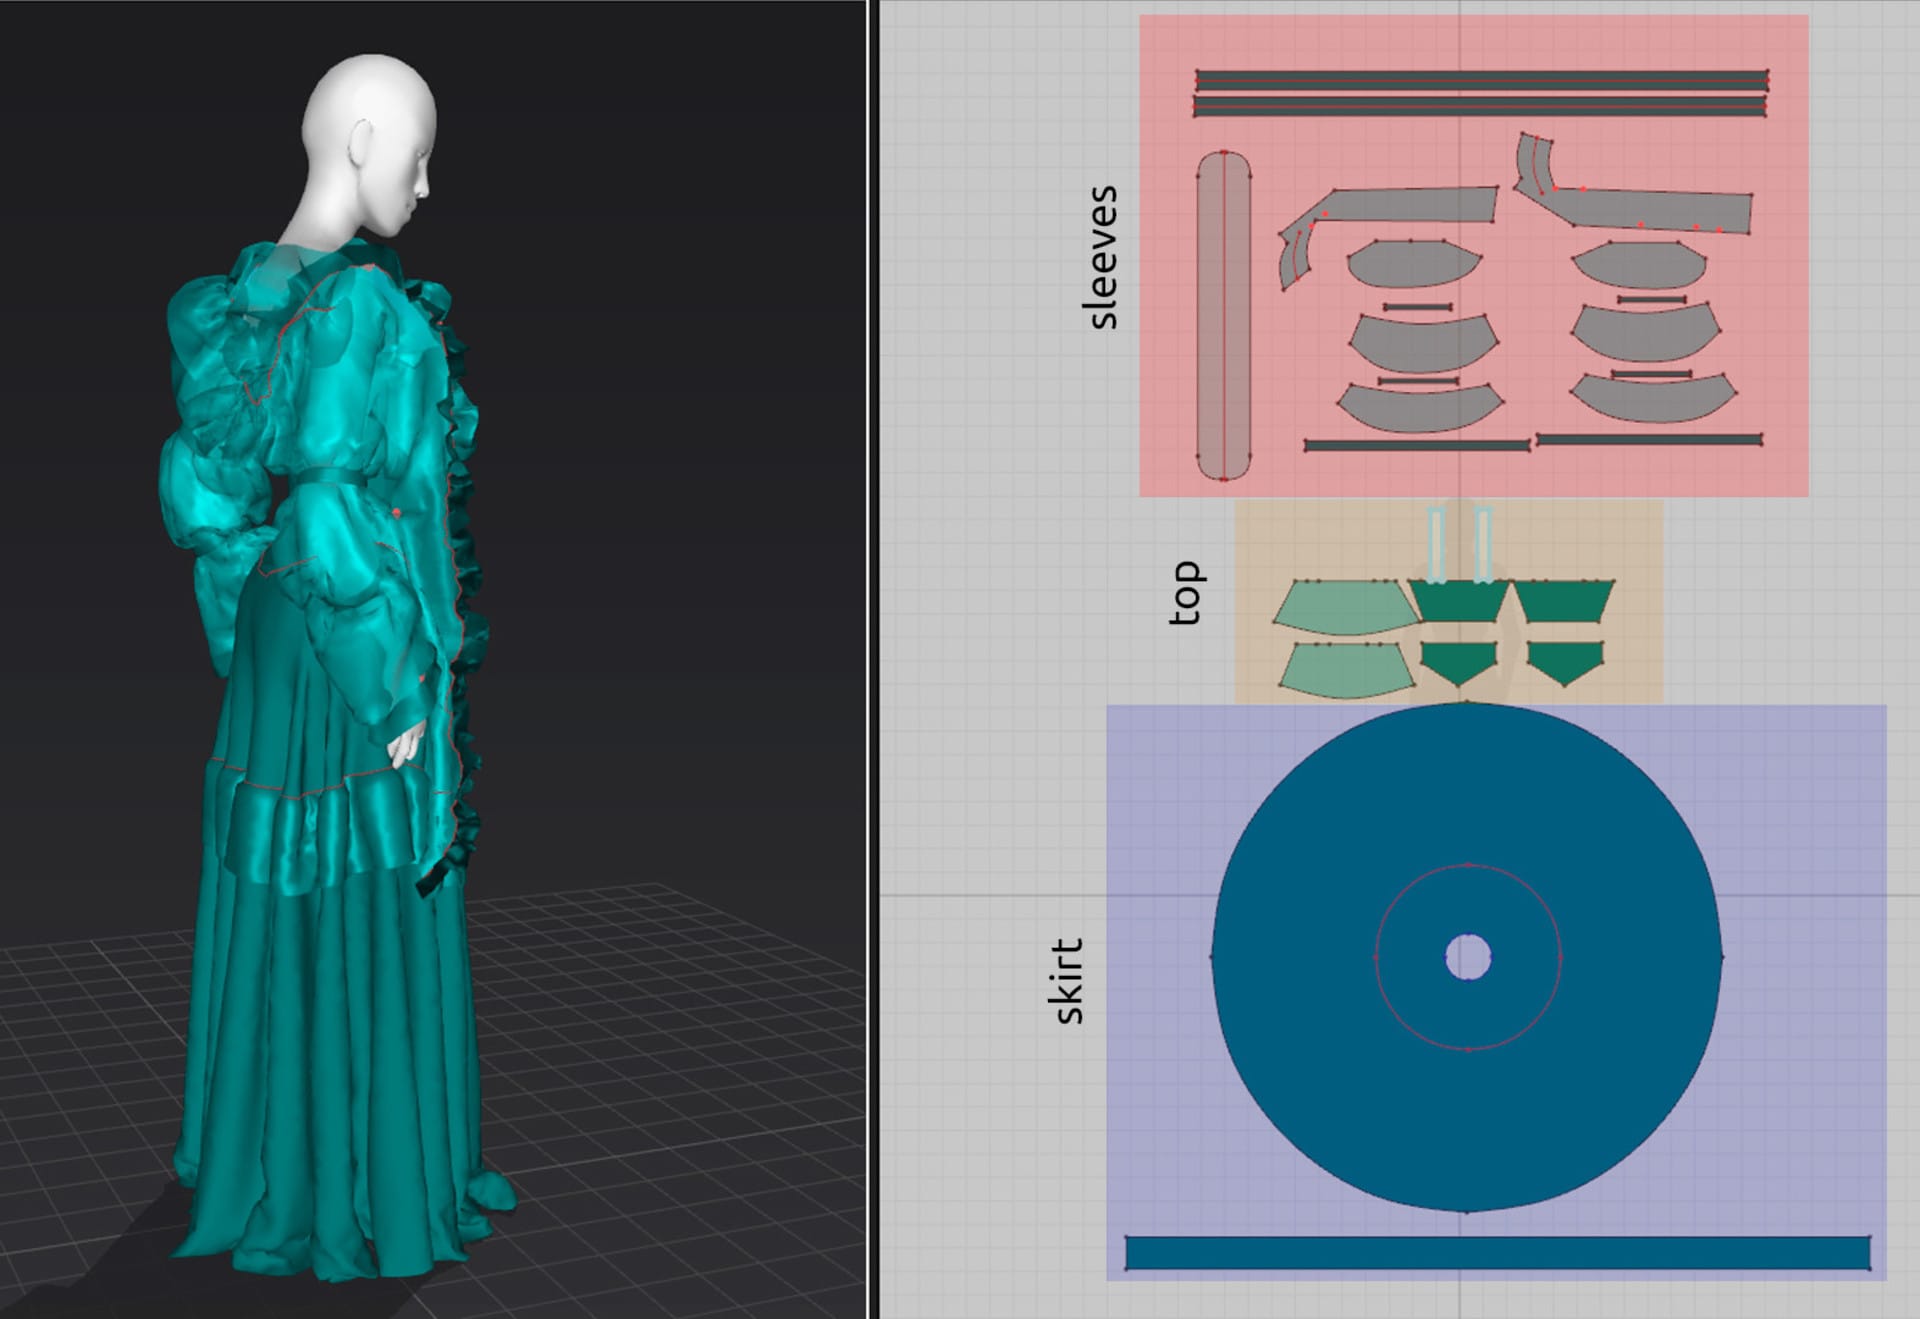
I started out with a custom base mesh, which was pre-rigged for posing. I was able to sculpt the base forms on top with just enough detail for me to achieve accurate cloth simulations in Marvelous Designer.
Recently, people have been asking me why I spend so much time sculpting my character bodies when no one is going to see them underneath the clothing. Well, it’s simple: without establishing the correct body form, the clothing just won’t be able to hang properly over the body — which will ultimately make the final render look unrealistic.
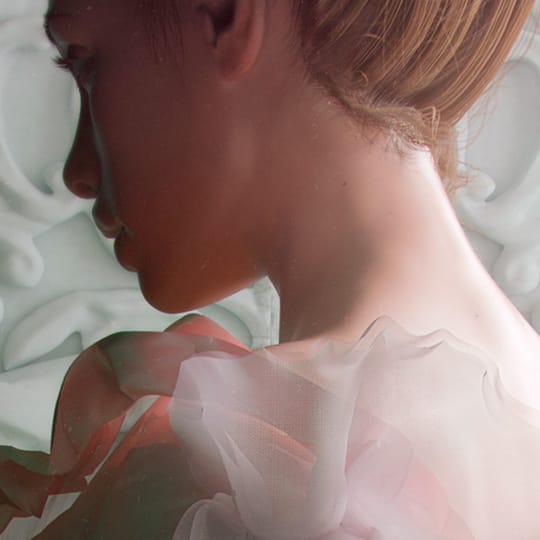
The dress was created using Marvelous Designer as the next step, where I used real-world tailor patterns for the utmost realism. Once happy with the simulated fabrics, I continued to perfect the clothing by sculpting additional details in ZBrush. As well as ensuring the fabrics were accurate, I also paid close attention to detail of the character’s face.
With the base model done, accurate cloth simulation achieved, and facial details sculpted, it was time for my favorite part: setting up the scene and figuring out the lighting using V-Ray. I particularly love this stage as it’s where I can really take the time and space to improvise and push my creativity.
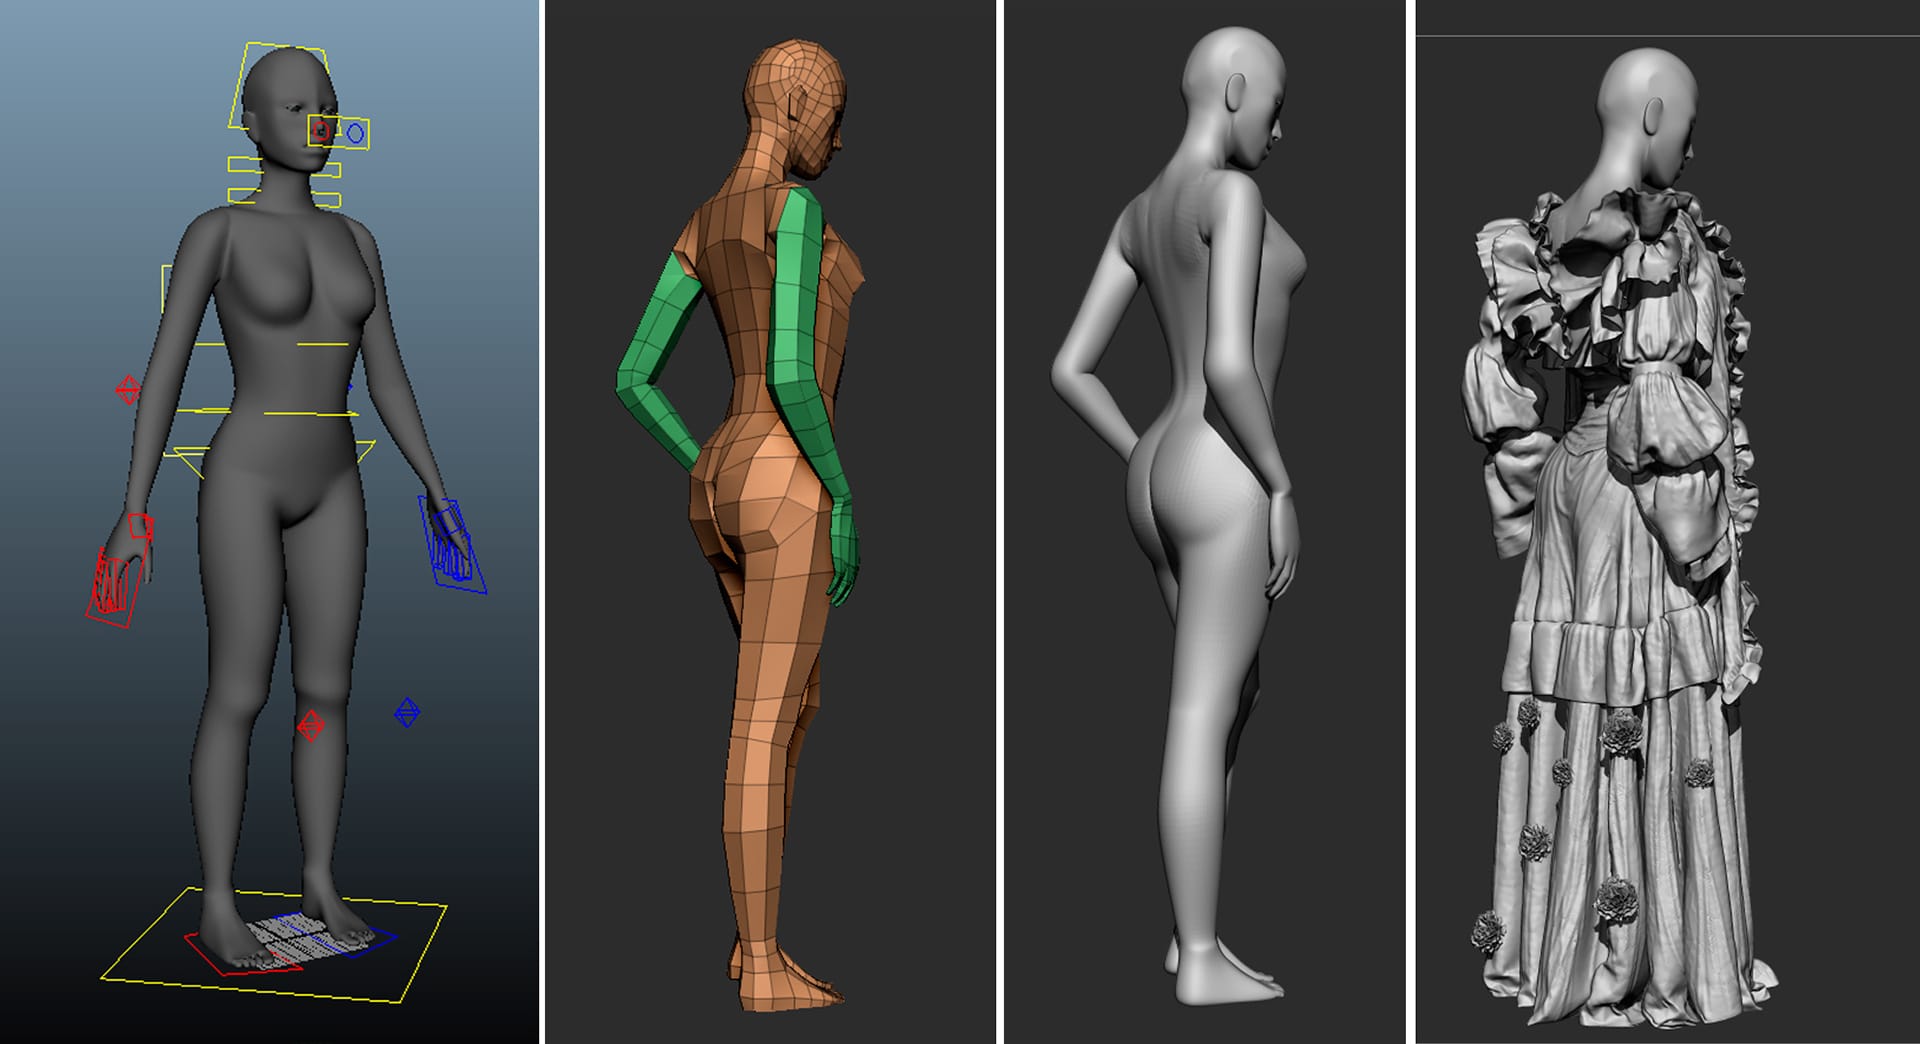
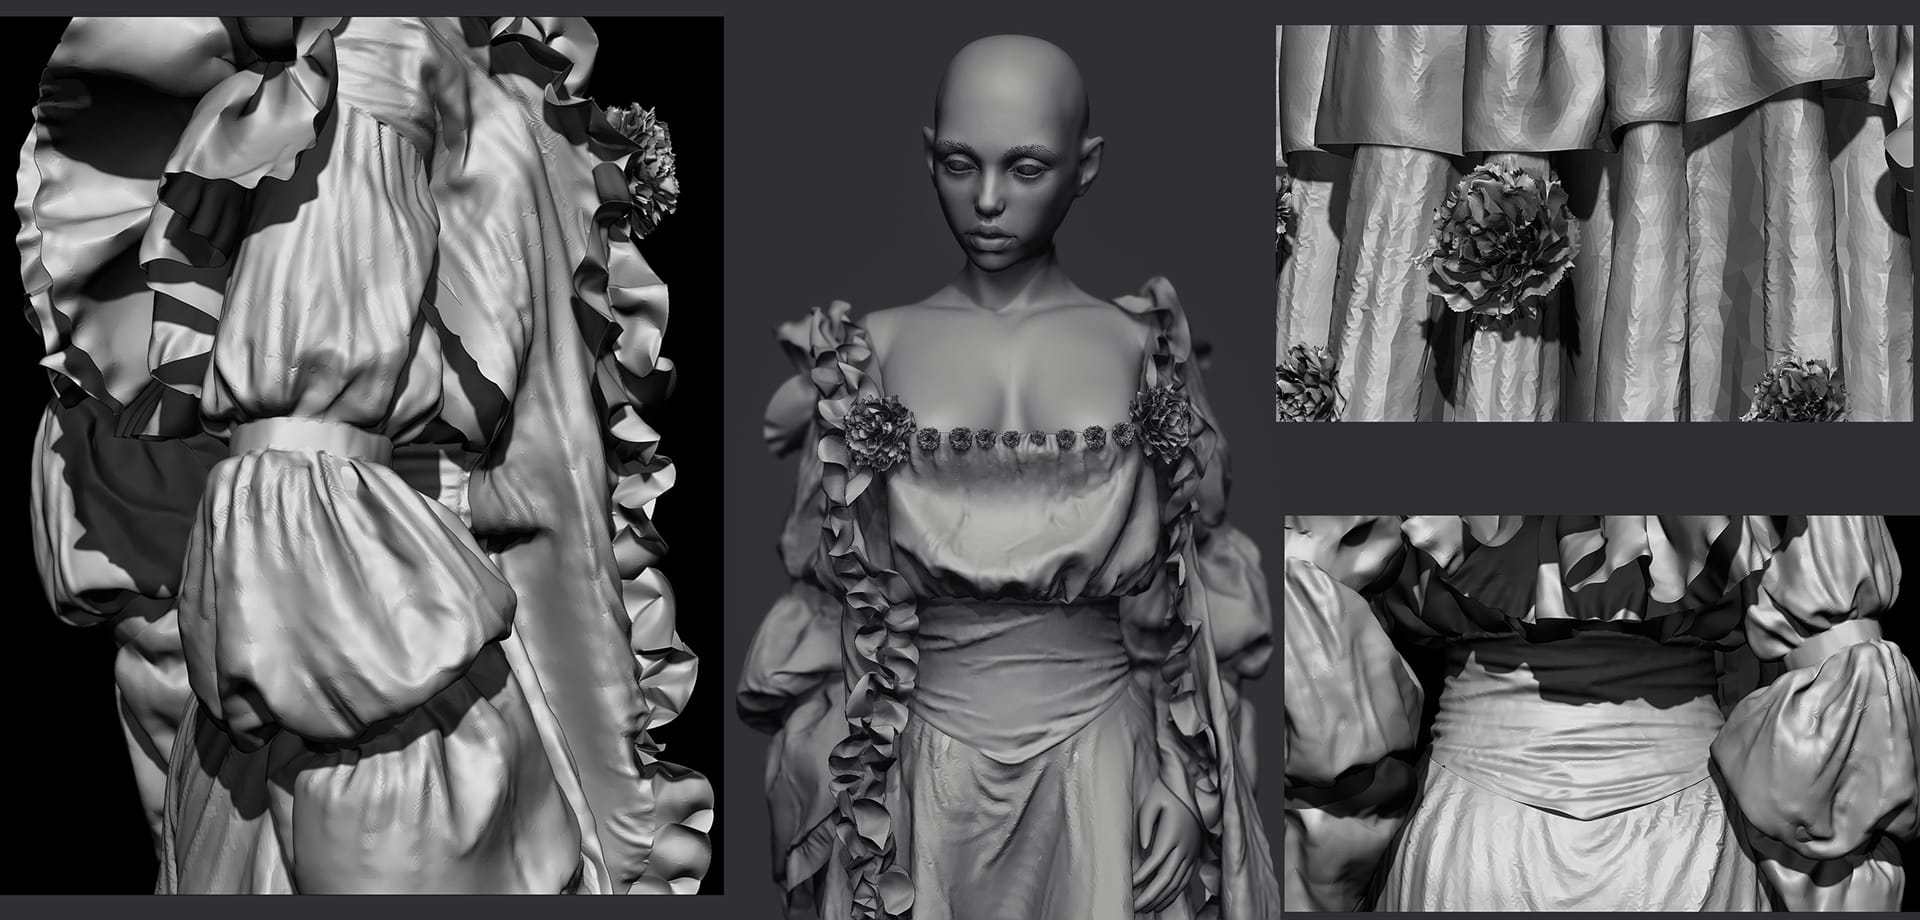
It's important to lay the foundations: By making the body underneath the garments accurate, the clothing will be able to hang and drape properly over the body and ultimately help you to achieve a realistic result.
Materials and textures
For the fabric material, I used some simple presets from a material library that I gained access to through Learn V-Ray, the Authorized Training Center where I took courses that significantly improved my rendering skills. My only secret is to use the Falloff map in the Diffuse slot with some input curve adjustments.
To create the semi-transparent fabric on the sleeve, the key here was to layer transparent fabrics on top of another. This way, by using multiple transparent objects I was able to create a magical look of depth.

Simple is better. The great material presets that Learn V-Ray teaches and gives access to as part of its training was a huge influence in the creation of this piece.
Camera setup
My composition is simple: we have a character standing in the center of the frame; from there, I mostly use light to enhance the composition, and take advantage of the background to draw further attention to the character.
My camera settings are standard, which I also learned through a tutorial by Learn V-Ray.
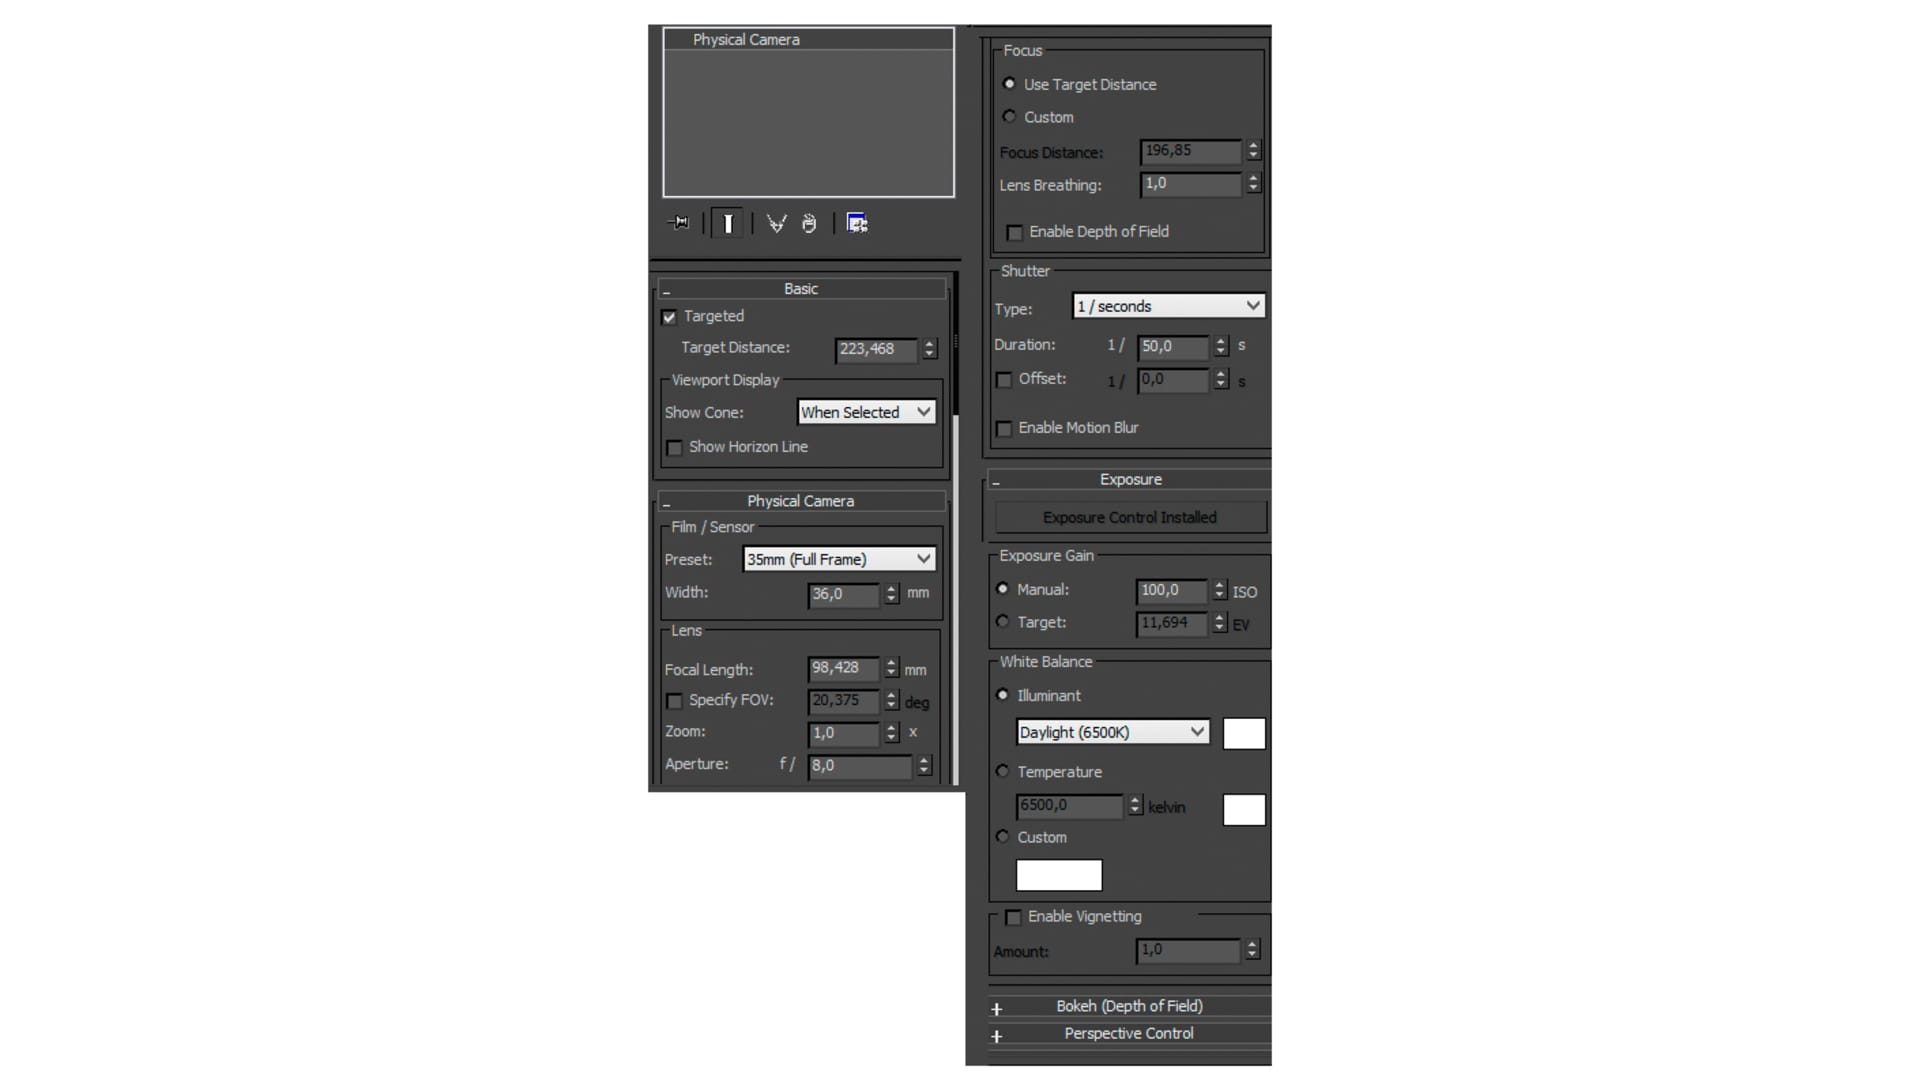
These simple camera settings intentionally direct focus onto the character.
Lighting
The main principle here was to work on contrast: I wanted a dark silhouette on a light background, with warm light against cooler fill light. The camera setup is classic three-point lighting. I used the Skylight Portal for daylight, a Dome light for the fill light and a V-Ray Rectangle light for the background.
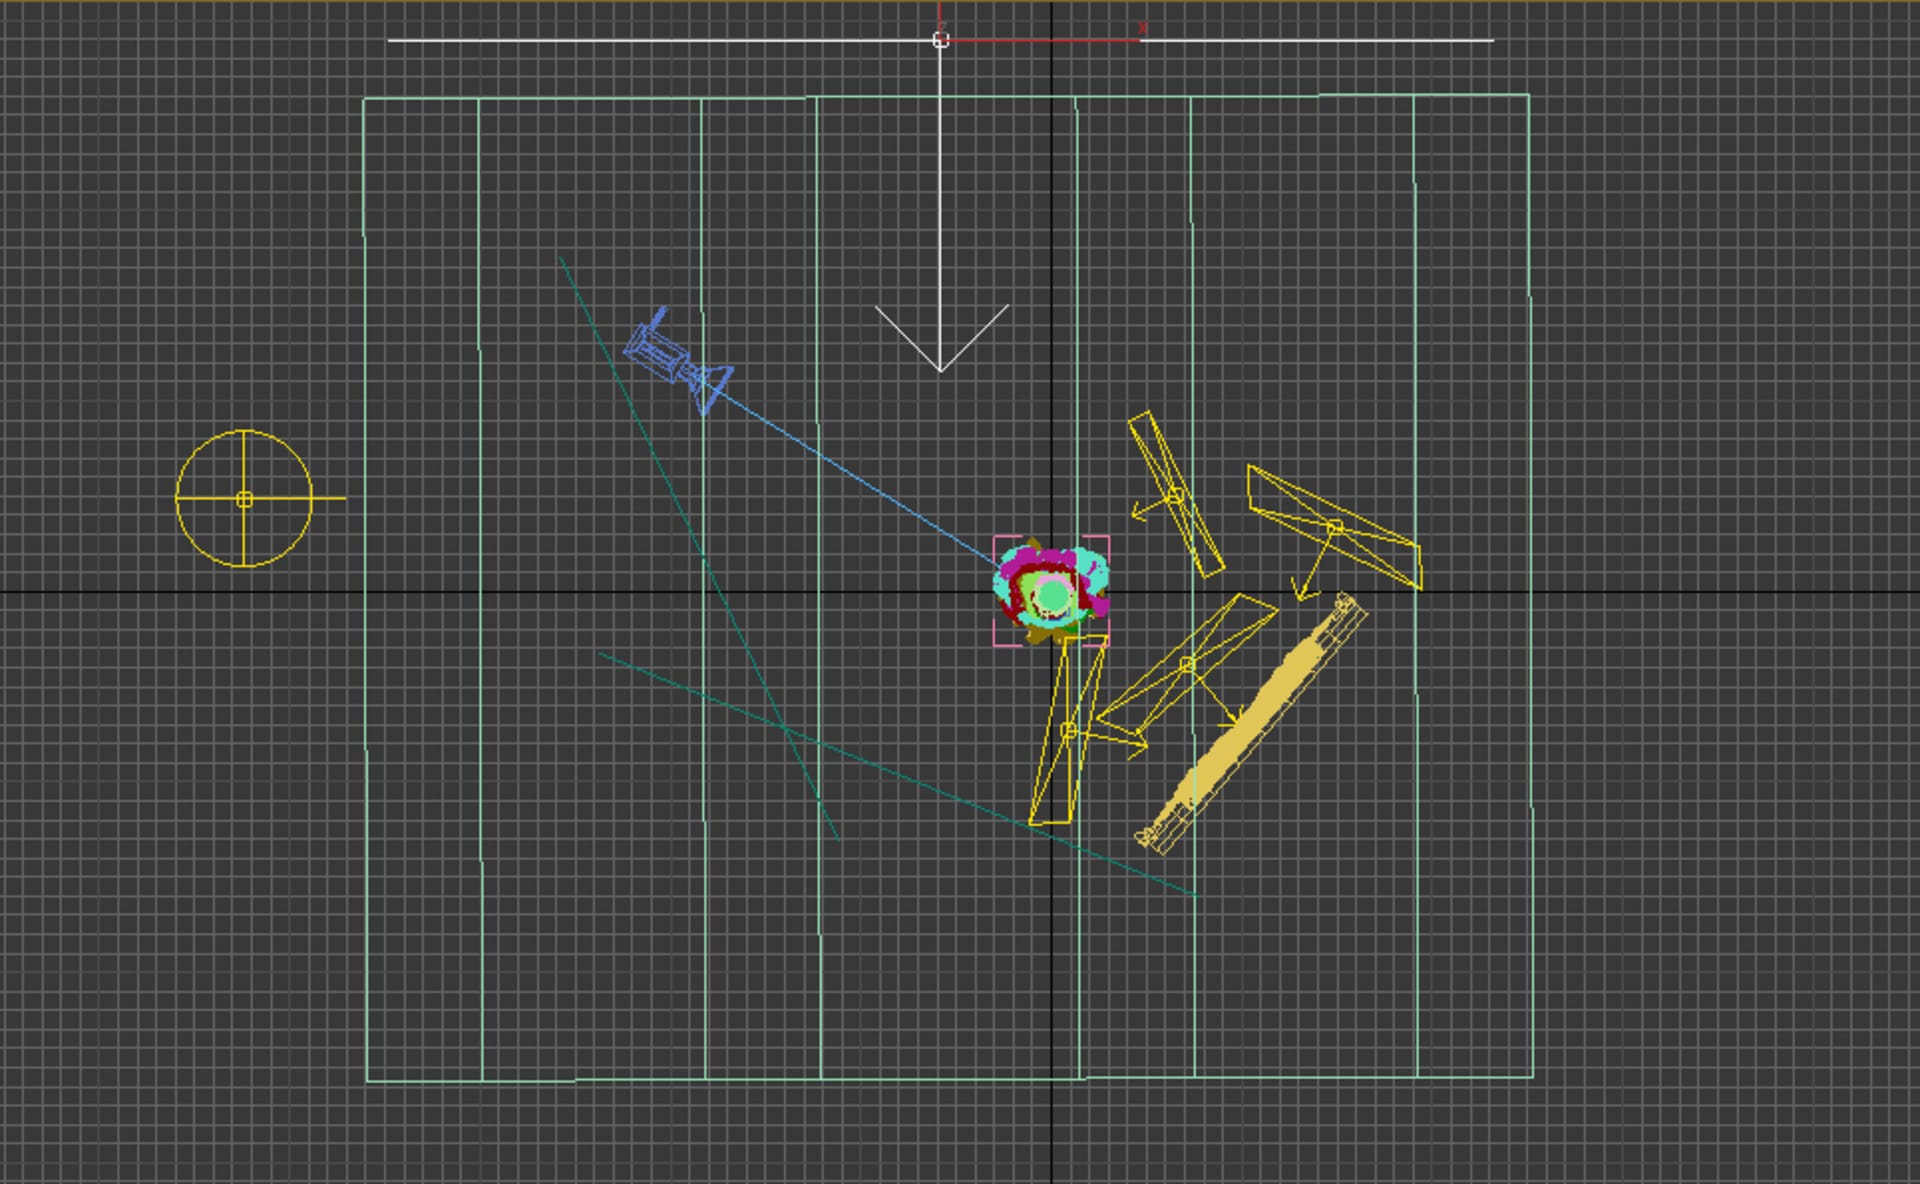
Classic three-point lighting setup: Skylight Portal, Dome light and V-Ray Rectangle light.
Rendering
There was nothing particularly special about my rendering settings. In my opinion, simpler is always better — which is another important piece of advice I gathered from Learn V-Ray. Keeping things simple, I rendered out a few passes and prepared for the post-production stage.
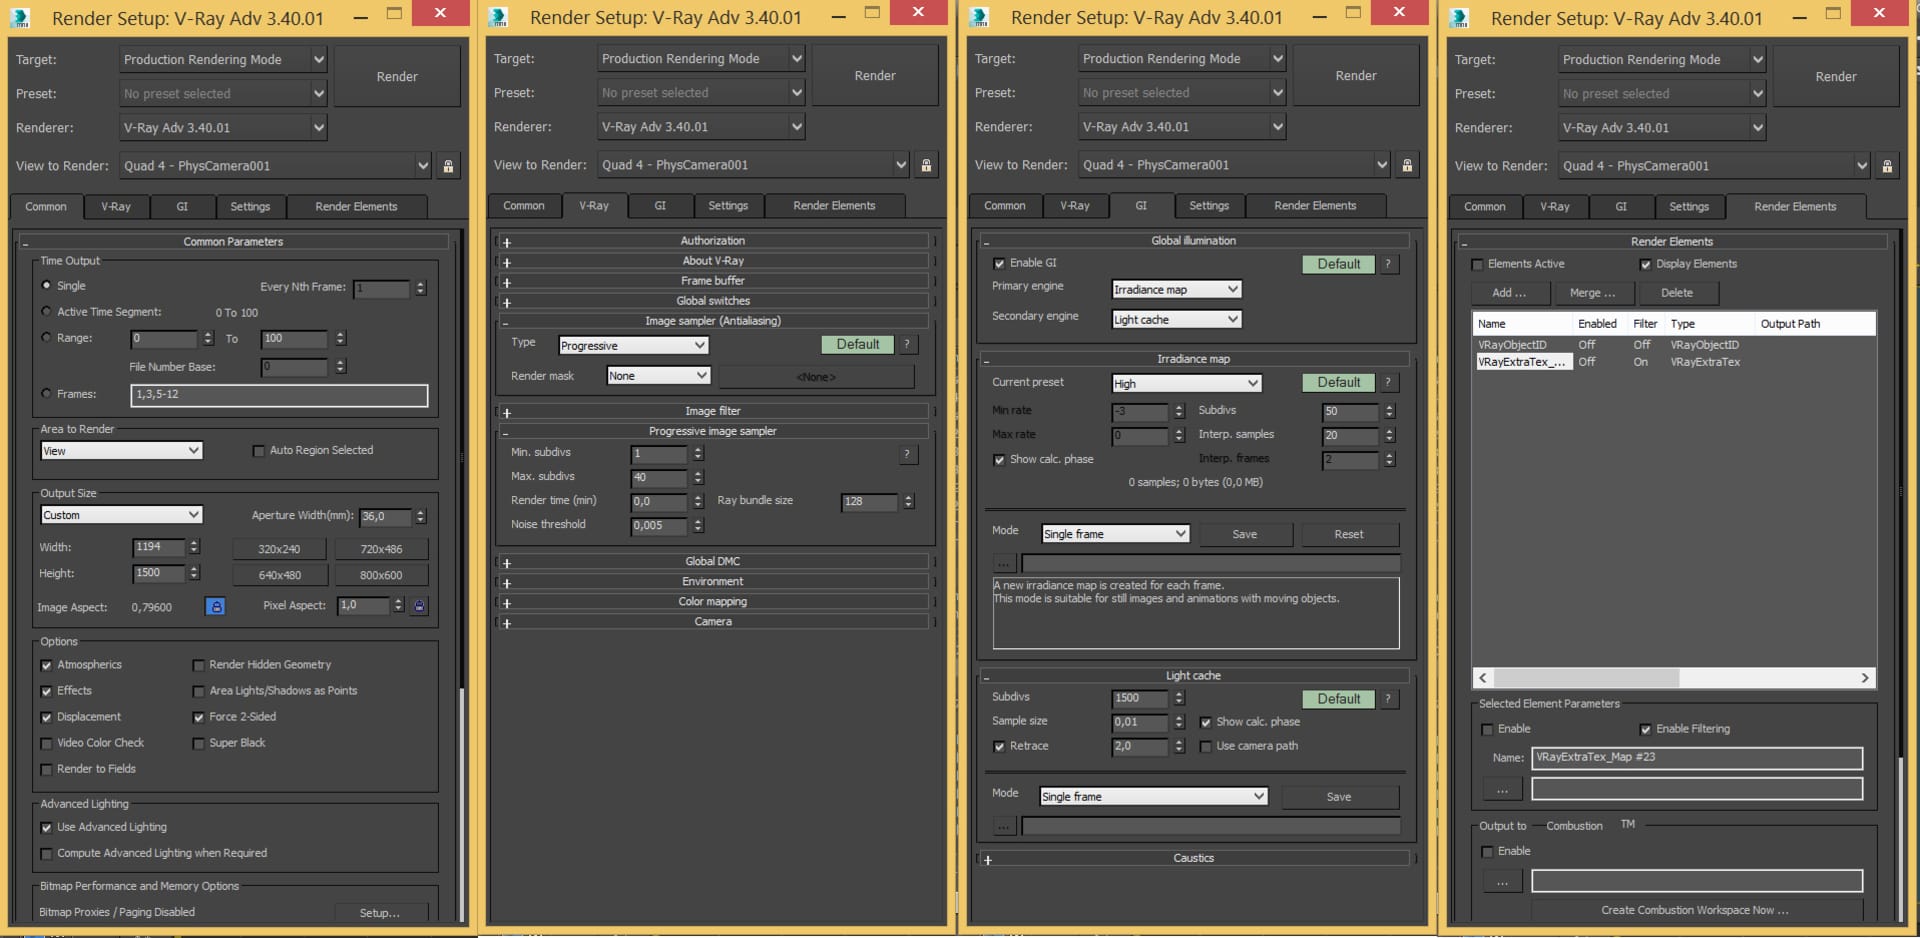
You don't need complicated render settings to achieve great results. These render settings are purposefully simple!
Post-production
Here, I took my render passes into Photoshop and manipulated the light and shade around the edges of the frills of the dress, to help them stand out a little better in the final illustration. I also played with the trick of using saturated colors against disaturated ones to draw even more attention to the dress. My main goal at this stage was to use the light and contrast to place as much attention as possible on the center of the image.
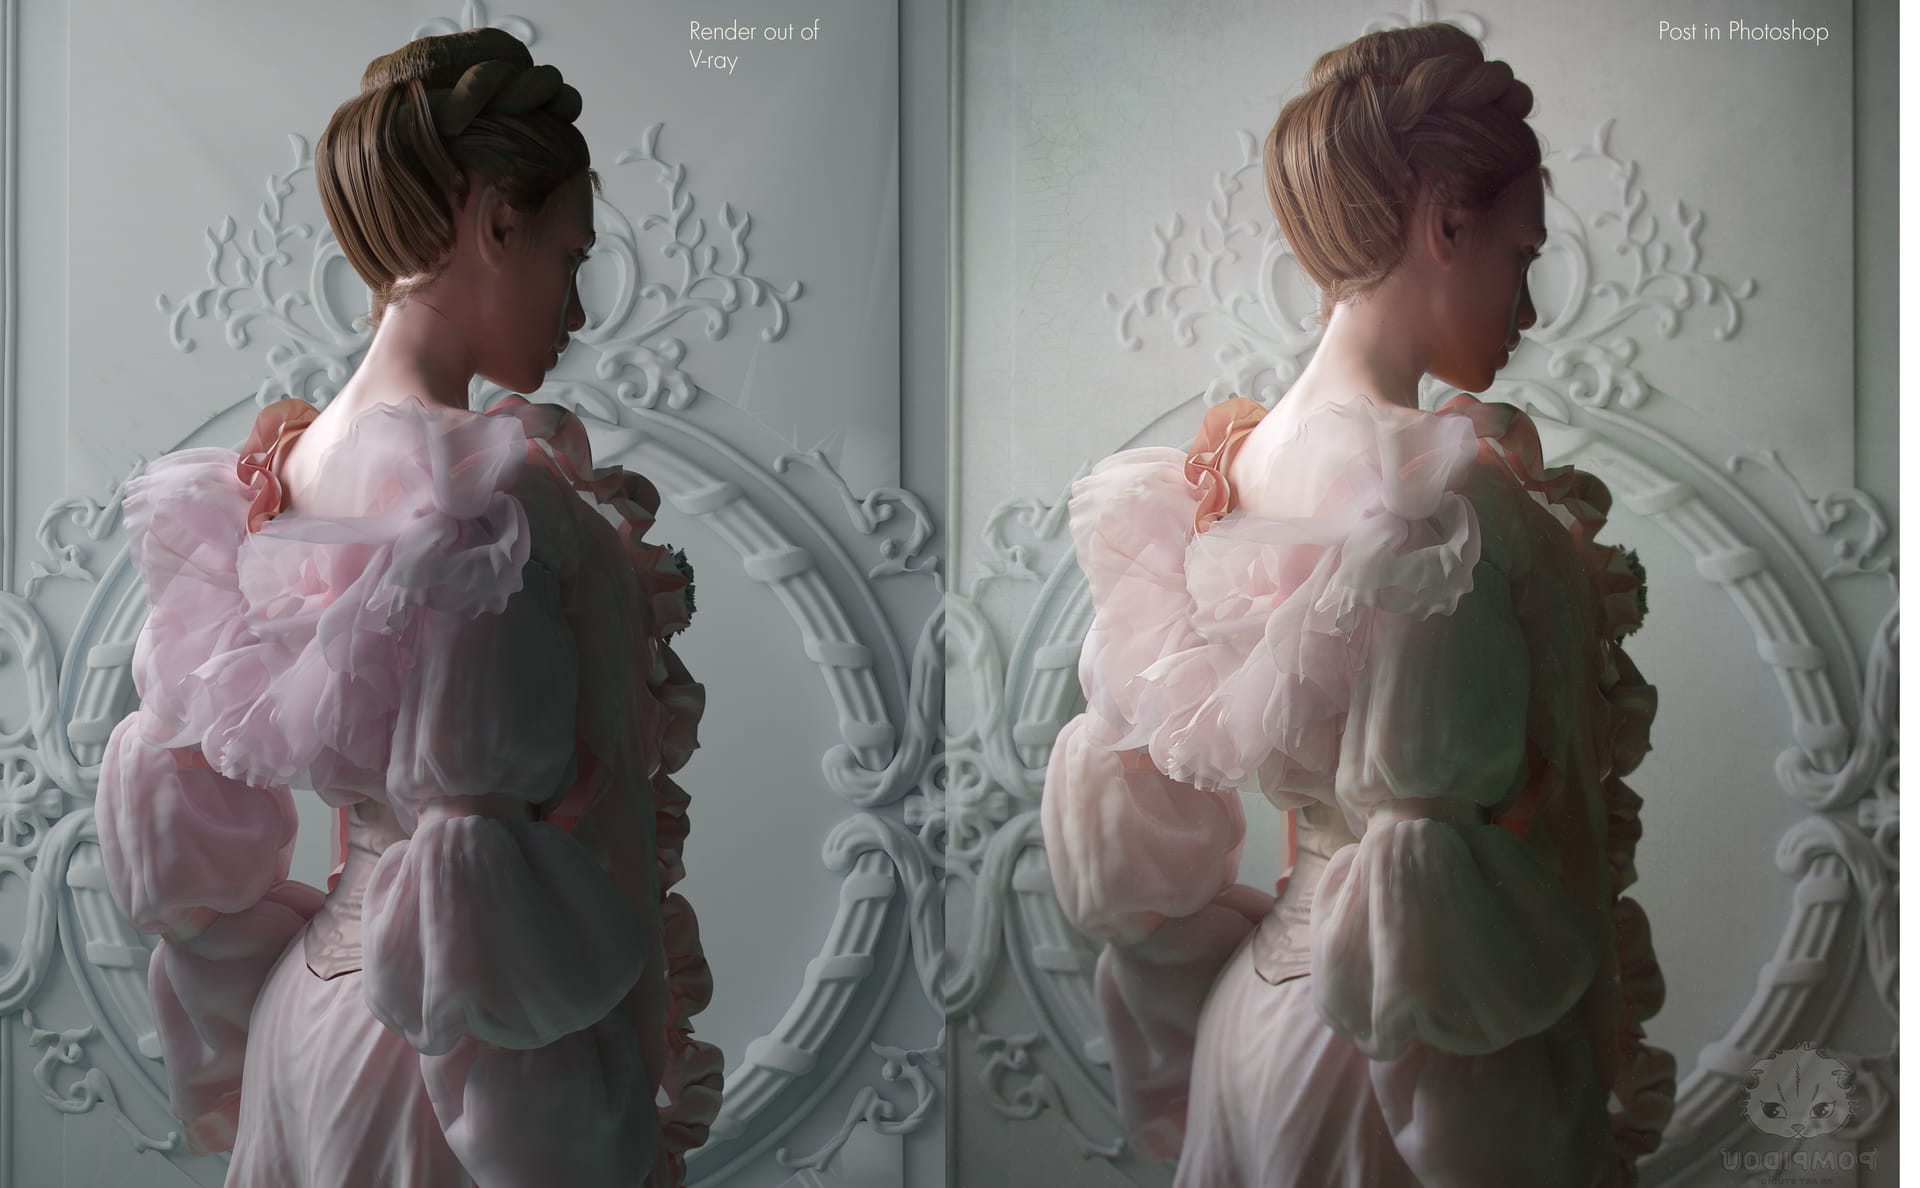
You can use light and contrast to draw attention to areas of an image; in this image, all eyes have to be on the character.
And that’s a wrap!
I was really happy with the outcome of this piece, particularly because I overcame many challenges to get to this stage. Having learned 3D and tried many software programs over the years, it felt very rewarding for me to make an illustration where I felt that I fluently exploited 3D tools like ZBrush, Marvelous Designer, Ornatrix and V-Ray. What’s more, the reaction from the community about this image has been so positive, and an even greater reward for me.
In upcoming projects, I plan to work on even more realistic visualizations — and beautiful fabrics!
About Marianna Yakimova
CEO and Art Director, 3d art-studio Pompidou
Marianna started working in 3D while studying design and academic art at Moscow State University. She was impressed that people her age were so advanced in computer graphics, so she decided to catch up by learning 3D as an art tool. Self-taught, Marianna learned ZBrush as her first application; she later moved into 3ds Max and then eventually added V-Ray to her toolkit.
Having now been using V-Ray for two years, Marianna searched for an official V-Ray Authorized Training Center where she could learn essential skills for her workflow. “I highly recommend all newcomers to V-Ray do the same,” Marianna says. “After learning how to render and present my work effectively, I felt encouraged to establish my own art studio, 3d art-studio Pompidou. And the principals that I learned I can now show new artists that come to work in my studio. Learn V-Ray’s courses are in multiple languages; I watched the English versions, which were narrated by the Licensed V-Ray Trainer, Ciro Sannino.”