
Discover where to find amazing free SketchUp textures and learn best practices for using them in your next project with our comprehensive guide.
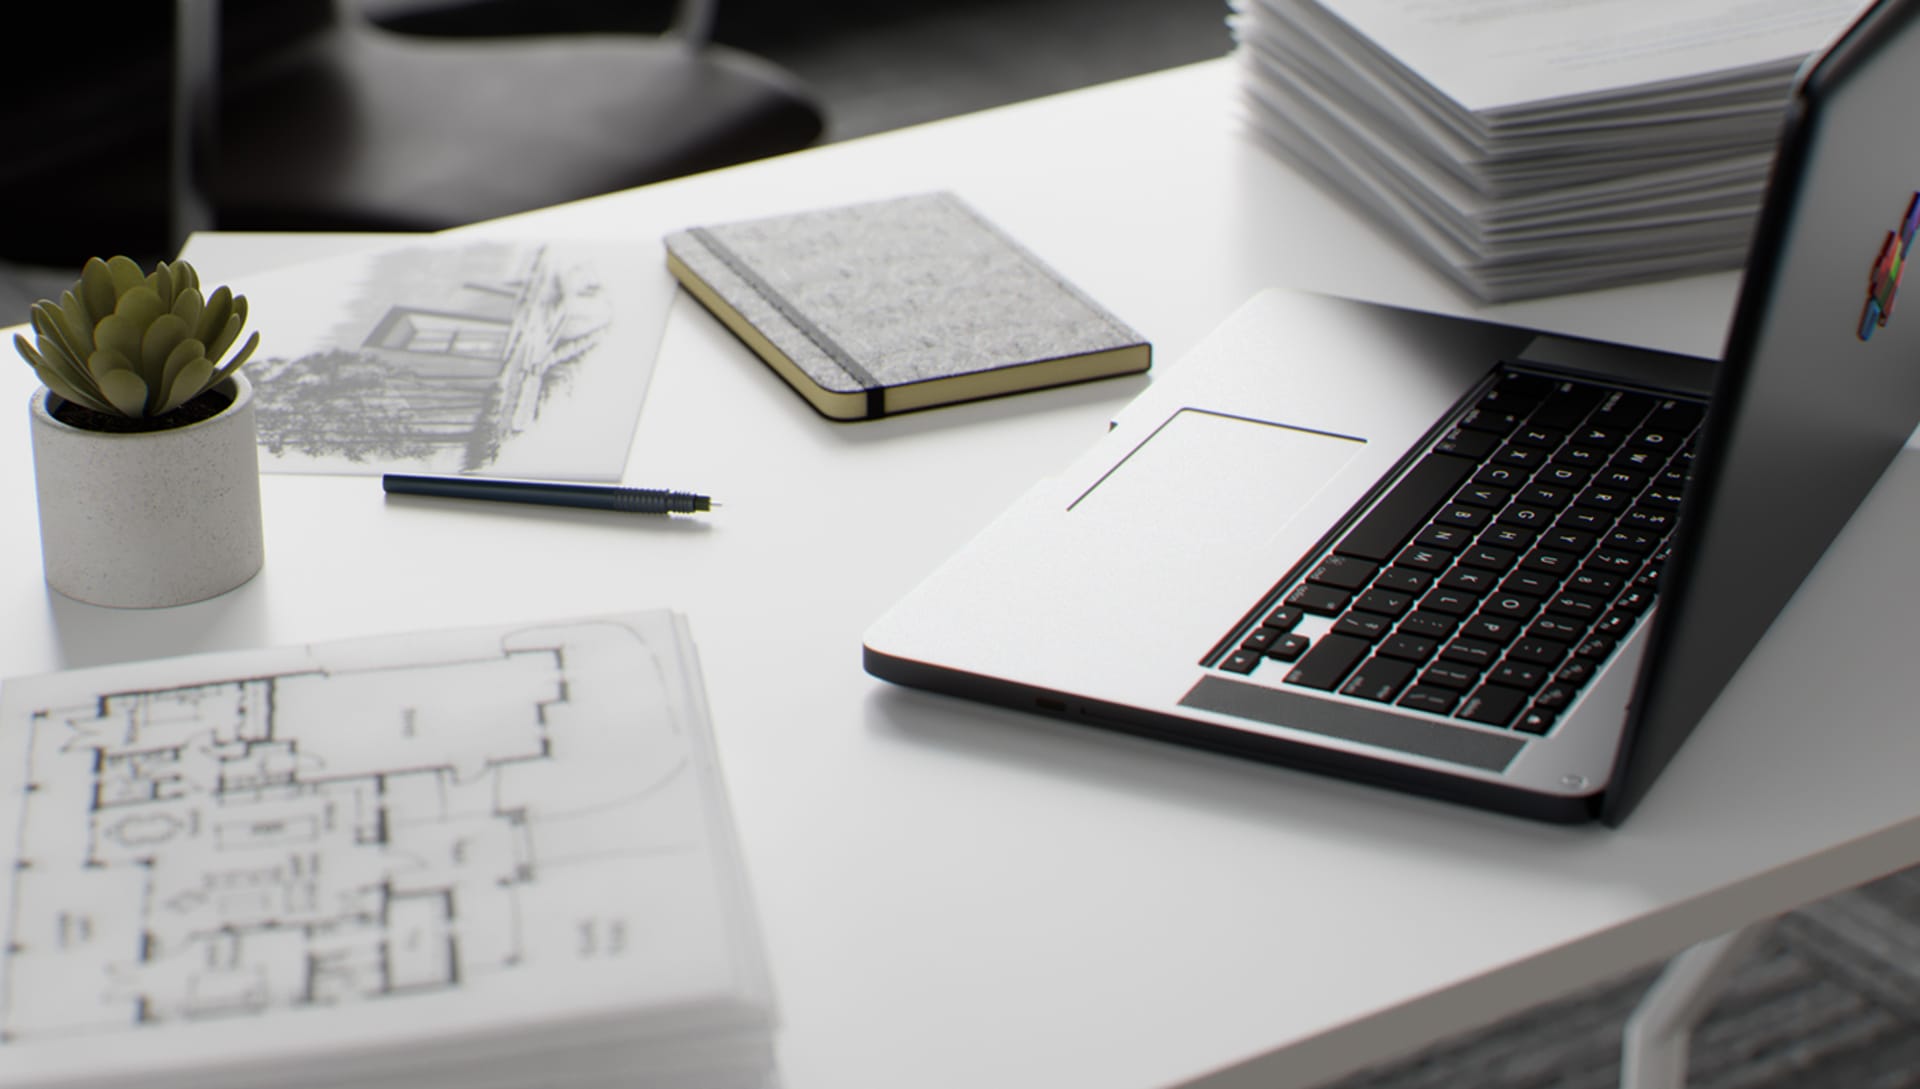
When it comes to making your render stand out in V-Ray for SketchUp, there are many important elements to keep in mind, including textures. Selecting the right texture for your SketchUp models can enhance a particular furniture piece, add flair and character to the surrounding space, lead the viewer’s eye, and help them connect with your visual story.
Luckily, finding the perfect textures doesn’t need to be a pain. SketchUp includes several default textures in the Materials panel, but if you're looking for more, this article will show you several sources for free textures. We’ve compiled a list of places where you can find amazing free SketchUp textures for your models as well as some best practices for using them in your next project.
Table of contents
Lifelike textures in Chaos Cosmos >
Free SketchUp textures >
Seamless textures >
Stone textures >
Metal textures >
Concrete textures >
Wood textures >
Fabric textures >
How to download and import the textures into SketchUp >
Licensing information >
Advice for applying textures in SketchUp >
How to edit and customize your textures in SketchUp >
Best practices for using textures >
Showcase your models with textures >
Lifelike textures in Chaos Cosmos
Chaos Cosmos, a vast library of high-quality assets and materials, offers a wide array of free textures that are specifically curated to elevate your archviz scene building.
Applying Chaos Cosmos textures will bring depth, photorealistic detail, and authenticity to your archviz models. These textures are meticulously crafted to accurately mimic the properties and characteristics of materials such as wood, concrete, metal, and fabric. With their help, you can create a visual experience that closely resembles the look and feel of real materials.
Go ahead and explore the newest Cosmos assets and get inspired for your next project!
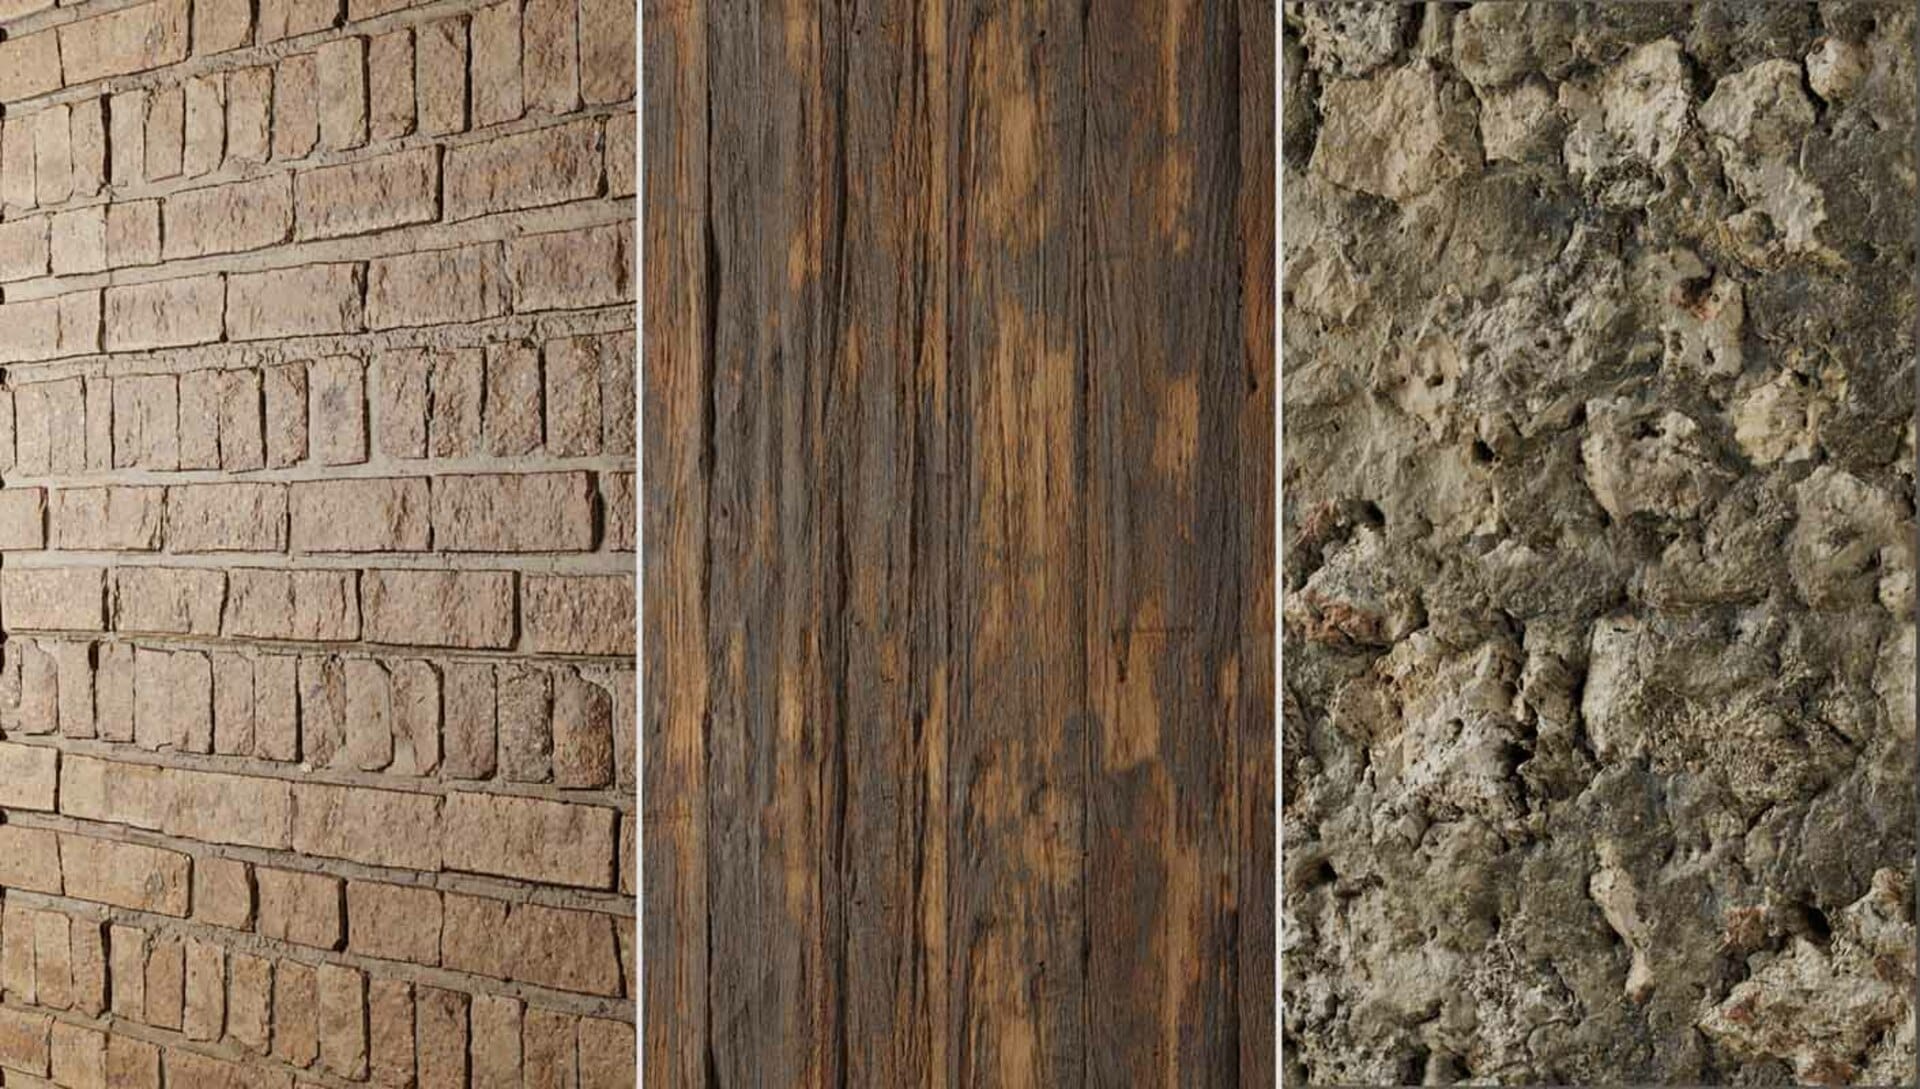
Free SketchUp textures
Apart from Chaos Cosmos, there are various digital libraries you can use to add materials according to your scene requirements. The textures they offer fall into six major categories:
- Seamless
- Stone
- Metal
- Concrete
- Wood
- Fabric
Most sites don’t require registering for an account, and you can download the texture as a compressed picture file (usually in a .zip format) in a few clicks.
Seamless textures
Seamless textures are unique and valuable in 3D modeling for several reasons. Firstly, they provide realism and detail by mimicking real-world materials. Secondly, they offer efficiency and consistency as they can be seamlessly repeated across large-scale or repetitive textures without visible seams or distortion. Thirdly, seamless textures provide flexibility and customization options, allowing for easy scaling, rotation, and adjustment to fit different models.
Lastly, each and every seamless texture in your scene can be optimized for performance, ensuring quick loading and rendering in real-time applications. These qualities make seamless textures an ideal choice for enhancing the visual appeal and quality of 3D models.
To find the perfect texture for your scene, you can visit resources like Poly Haven, 3DTextures, and 3DXO. These websites offer a wide range of high-quality free seamless textures, that can be downloaded individually or as ZIP files.
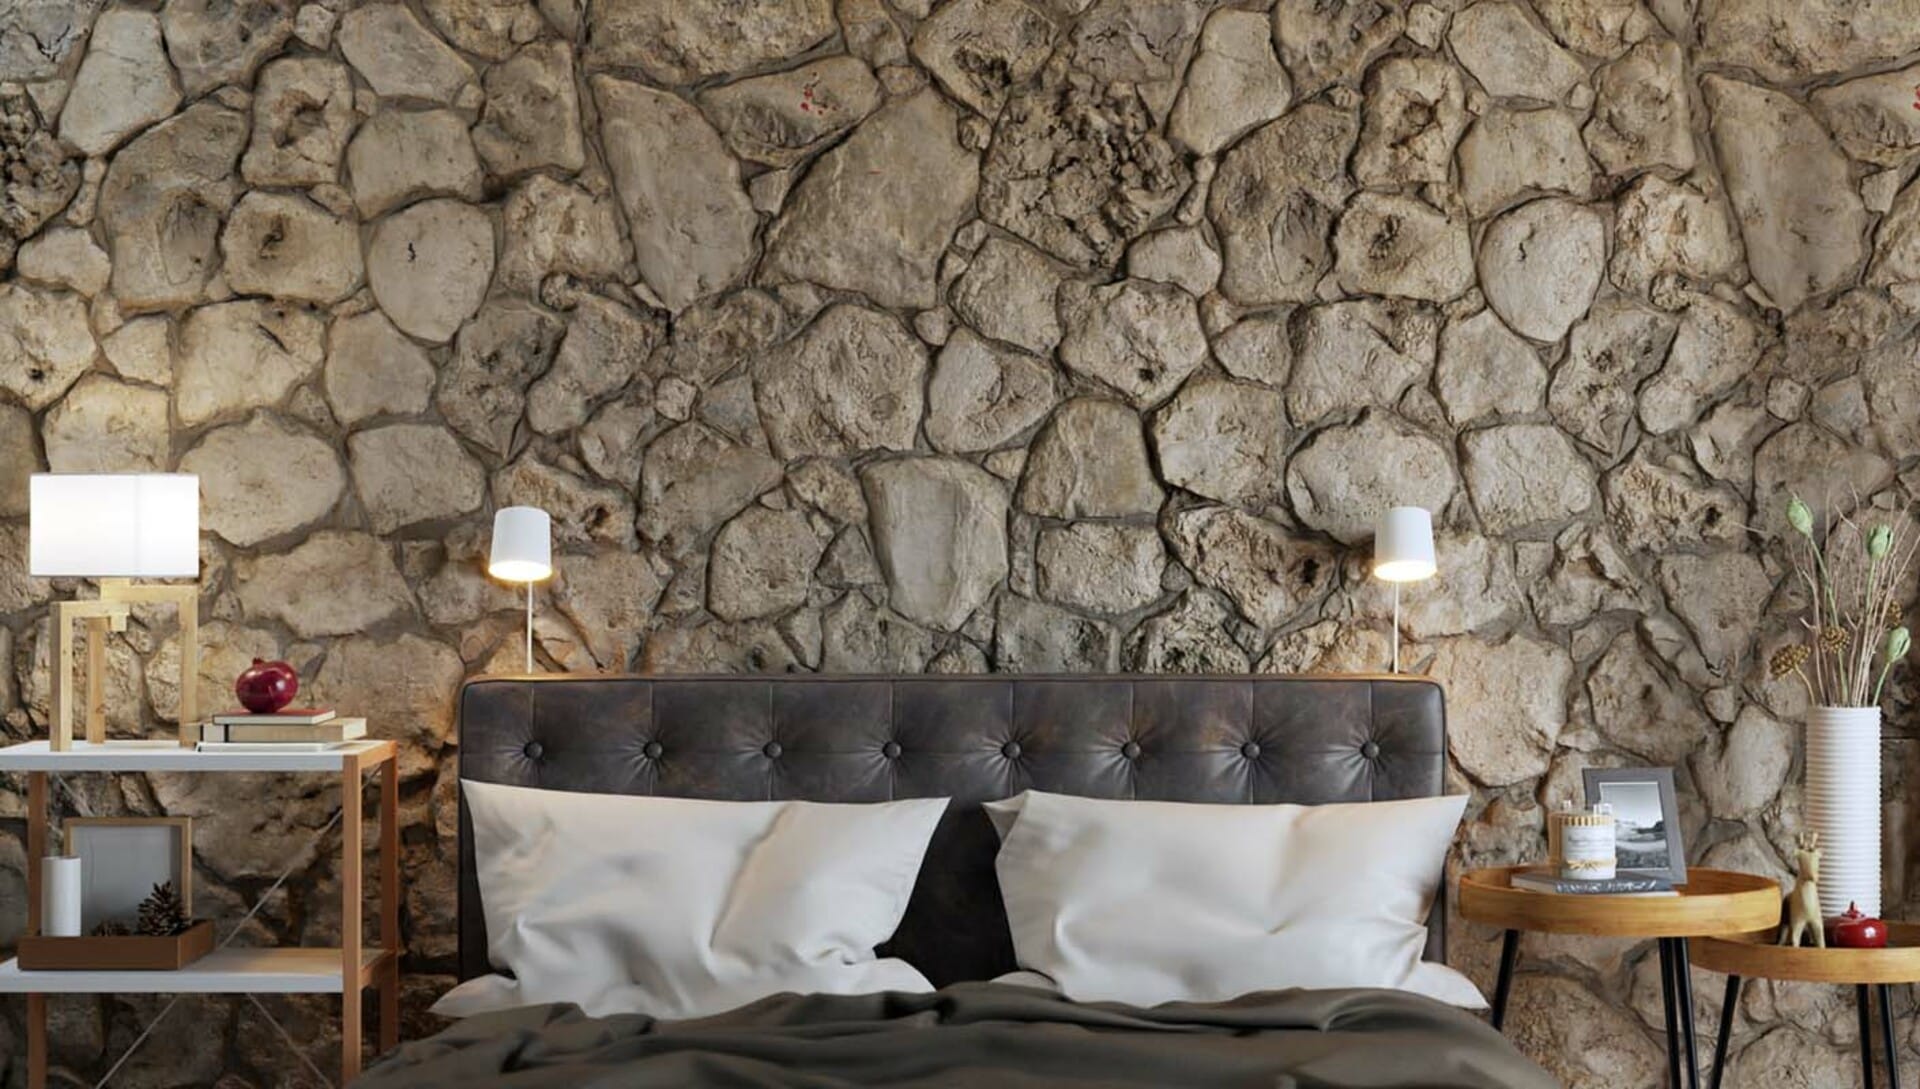
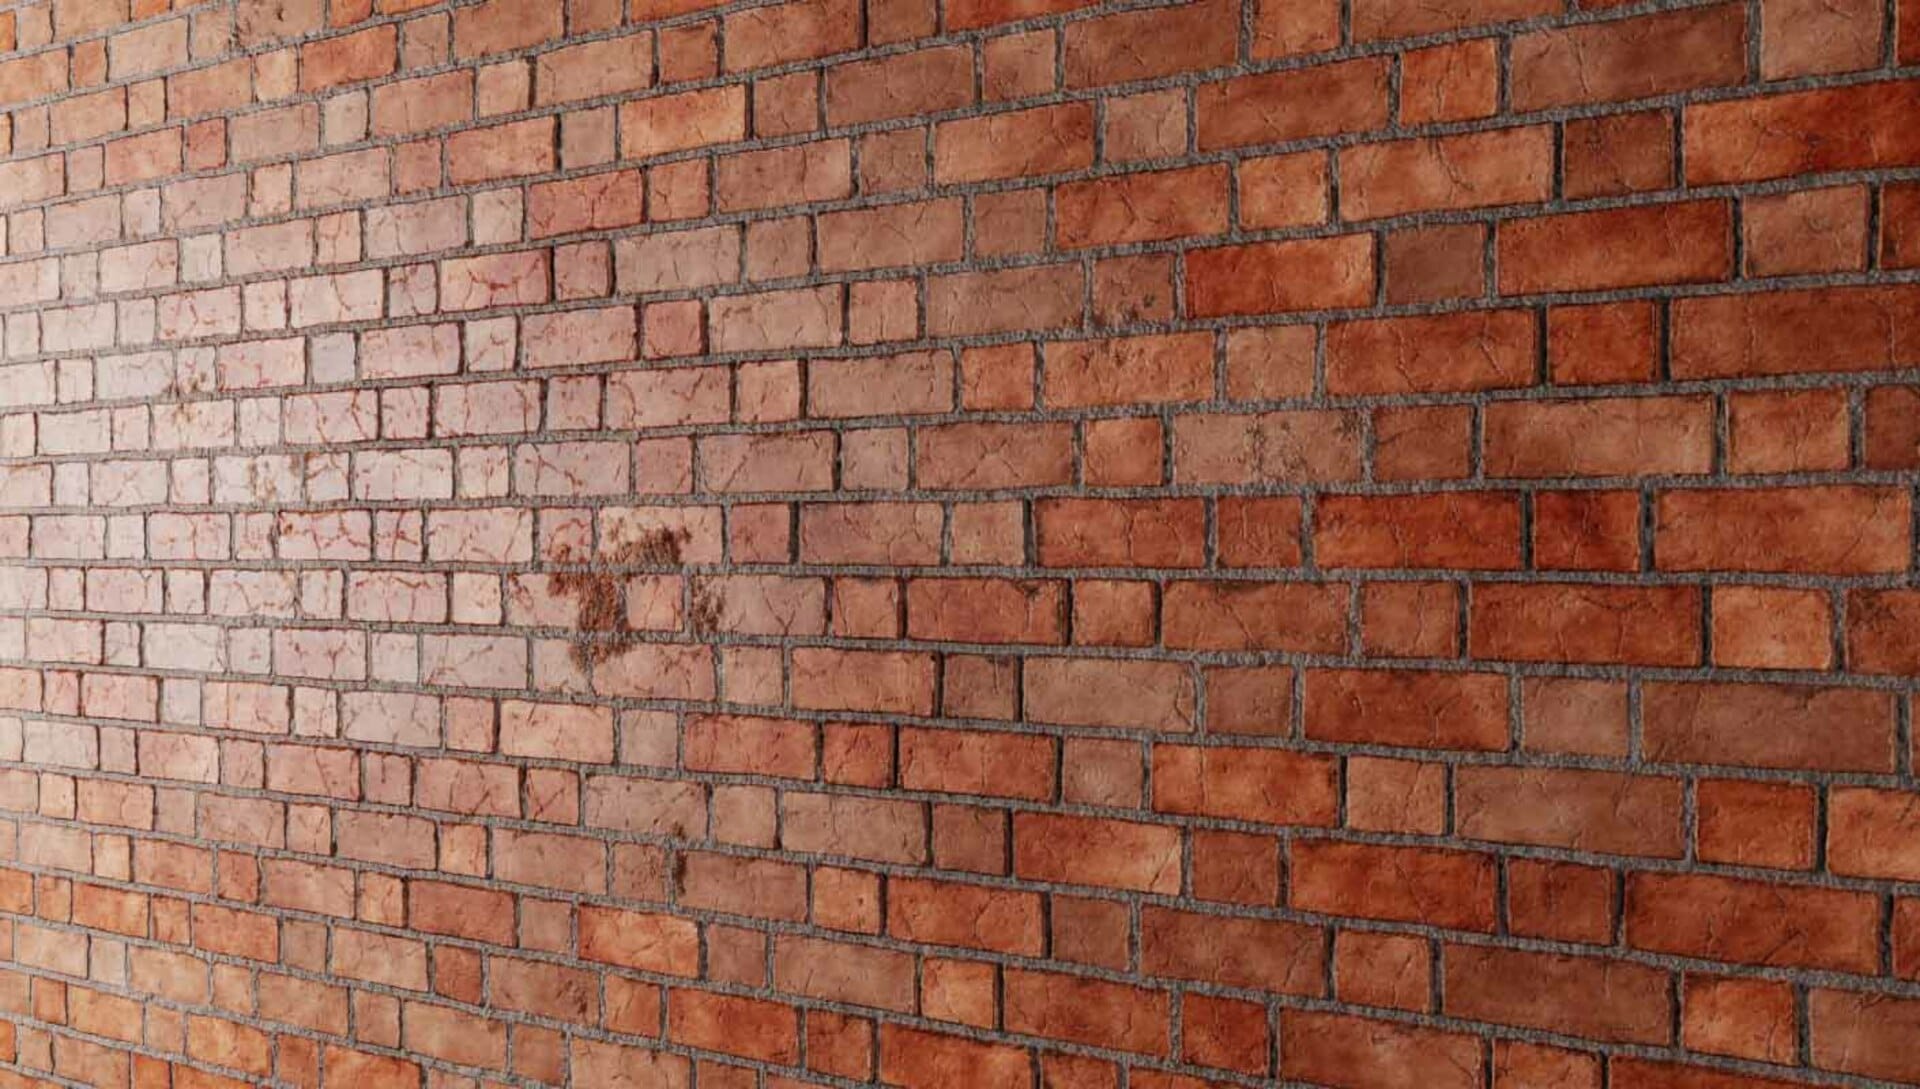
Stone textures
Stone textures are significant in both architectural and natural modeling as they add realism, depth, and visual interest to 3D models. Such textures play a big role in architecture as they're used to recreate various building materials, conveying a sense of timelessness, durability, and elegance. In natural modeling, stone textures are essential for creating realistic landscapes and geological formations, enhancing the environment authenticity and believability.
Stone textures can depict different types of rocks, such as marble, granite, limestone, or sandstone, each with its unique characteristics and visual properties.
Types of stone textures and their unique characteristics
There are various stone textures you can download. Here are some common types and their unique characteristics:
- Marble
Marble textures often feature smooth surfaces with intricate veining patterns. They are associated with luxury, elegance, and sophistication. Marble textures can range from white to various shades of gray, beige, or even vibrant colors.
- Granite
Granite textures typically exhibit a granular appearance with a mix of different-sized mineral grains. They are known for their durability, strength, and natural beauty. Granite textures can have a wide range of colors, including black, gray, pink, or brown.
- Limestone
Limestone textures often display a porous and sedimentary appearance. They can range from light beige to gray or even darker shades. Limestone textures are commonly used to depict natural formations like cliffs, caves, or ancient structures.
- Sandstone
Sandstone textures feature a grainy and textured surface, resembling compacted sand grains. They can come in shades of yellow, red, brown, or gray. Sandstone textures are frequently used to represent desert landscapes, canyons, or historical buildings.
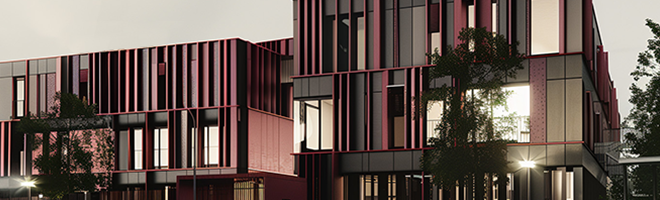
Metal textures
In architectural and furniture modeling, the importance of metal textures lies in their versatility and appealing appearance. When applied in architectural modeling, these textures recreate the visual aspect of diverse metal surfaces, allowing for the simulation of real-world elements and conveying a sense of modernity and industrial aesthetics.
In furniture modeling, these textures give a sleek and sophisticated look, particularly for designs that include metal components or structures.
Types of metal textures and their unique characteristics
Let's explore the most common types of metal textures you can download:
- Brushed metal
Brushed metal textures feature fine parallel lines or scratches on the surface, created by brushing the metal in a specific direction. This texture gives the metal a distinctive linear pattern and a matte appearance. Brushed metal textures are often associated with a modern and industrial aesthetic.
- Polished metal
Polished metal textures have a smooth and reflective surface, resembling a mirror-like finish. They provide a high-gloss appearance and can create a sense of luxury and sophistication. Polished metal textures are commonly used to depict materials like stainless steel or chrome.
- Rustic metal
Rustic metal textures showcase the weathered and aged look of metal surfaces. They often feature rust, patina, or other signs of corrosion, adding character and a sense of history to the models. Rustic metal textures are popular in designs that aim to evoke a vintage or industrial ambiance.
- Perforated metal
Perforated metal textures exhibit a pattern of small holes or perforations on the surface. They are commonly used in architectural modeling to represent metal screens, facades, or decorative elements. Perforated metal textures can add visual interest and allow for interesting light and shadow effects.
Concrete textures
Concrete textures are important in architectural and industrial modeling because they make 3D models look more real and attractive. In architectural modeling, these textures imitate the look of concrete surfaces, allowing architects and designers to visualize and communicate their concepts effectively.
Concrete textures convey a sense of modernity, strength, and industrial aesthetics. In industrial modeling, concrete textures are essential for creating realistic representations of structures and infrastructure, adding authenticity and detail.
Types of concrete textures and their unique characteristics
You can download different kinds of concrete textures, giving you lots of choices for your designs. Here are a few popular types and what makes them special:
- Smooth concrete
Smooth concrete textures have a sleek and polished appearance, often associated with modern architecture. They exhibit a uniform surface without visible imperfections or texture variations.
- Rough concrete
Rough concrete textures feature a coarse and uneven surface, replicating the look of weathered or aged concrete. They can have variations in texture, with visible aggregate or small cracks, adding a sense of realism and character.
- Exposed aggregate
Exposed aggregate concrete textures showcase the natural beauty of materials such as stones or pebbles, embedded in the surface. They provide a textured and visually interesting finish, often used in outdoor applications like sidewalks or driveways.
- Stamped concrete
Stamped concrete textures mimic the appearance of materials like brick, tile, or wood, by imprinting patterns onto the concrete surface. They offer versatility and can be customized to achieve various aesthetic effects.
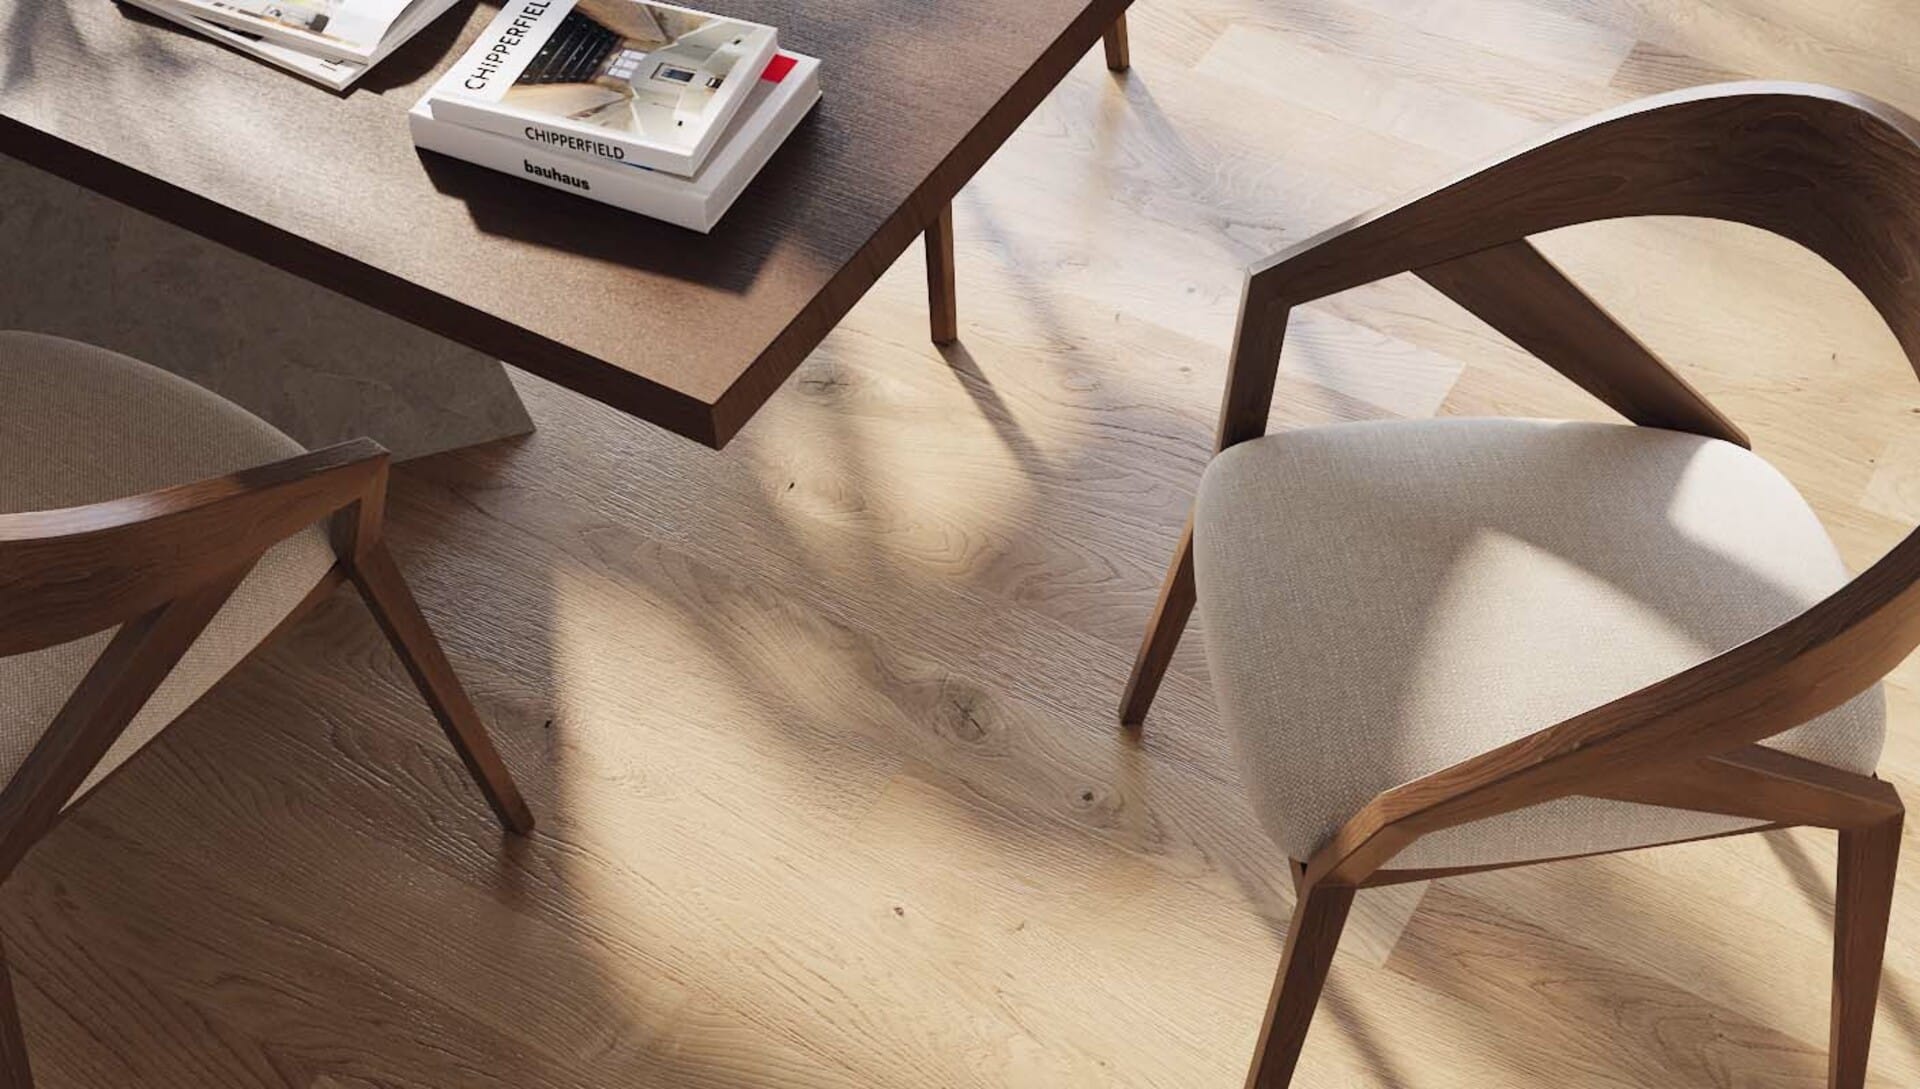
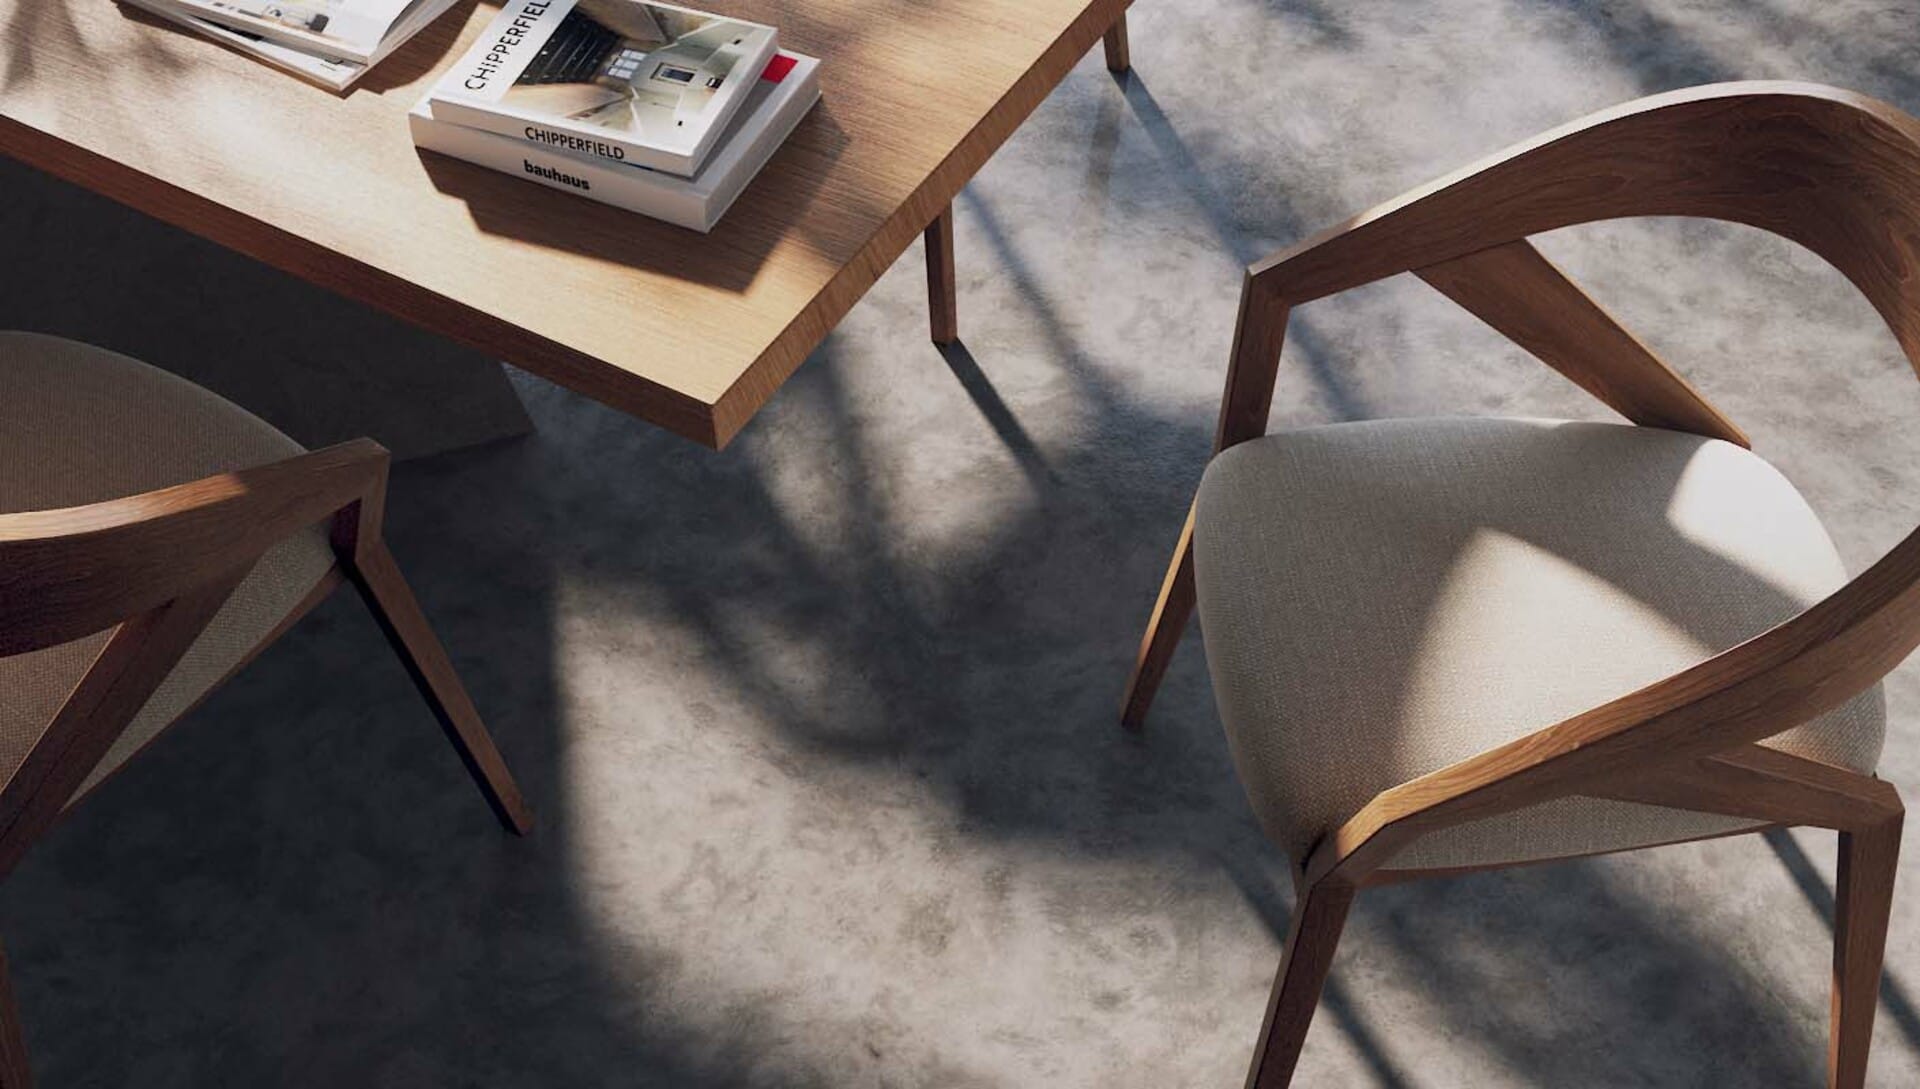
Wood textures
Wood textures offer natural beauty, warmth, and versatility. Used in architectural modeling, they create a sense of comfort and can be used to evoke different styles, from rustic to contemporary.
Wood textures give a realistic and inviting look to furniture models, enhancing their overall aesthetic. They are used to depict materials like oak, mahogany, walnut, or pine. Wood textures can be applied to tables, chairs, cabinets, or any other furniture piece that features wooden components. They add a touch of elegance to many interior design styles.
Types of wood textures and their unique characteristics
Here are the main types of wood textures and what makes them unique:
- Oak
Oakwood textures feature a prominent grain pattern with distinctive rays and knots. They can range from light to dark shades, offering a classic and timeless look. Oak textures are versatile and can be used in various design styles, from traditional to contemporary.
- Mahogany
Mahogany wood textures exhibit a rich, reddish-brown color with a straight or interlocking grain pattern. They have a luxurious and elegant appearance, often associated with high-end furniture and architectural elements.
- Walnut
Walnut wood textures showcase a range of brown tones, from light to dark chocolate. They have a straight or wavy grain pattern with occasional knots, providing a sophisticated and natural look. Walnut textures are commonly used in furniture and cabinetry.
- Pine
Pinewood textures have a lighter color with a straight grain pattern. They can range from pale yellow to light brown, offering a more casual and rustic aesthetic. Pine textures are often used in country or cottage-style furniture and architectural elements.
Downloading wood textures
You can download wood textures for free from Poly Haven. When browsing around, it's good to know that each texture links to a section of similar assets, so you get even more options to choose from in the drop-down menu. The website provides various wood textures, such as oak, mahogany, walnut, or pine, allowing you to enhance your architectural and furniture modeling projects.
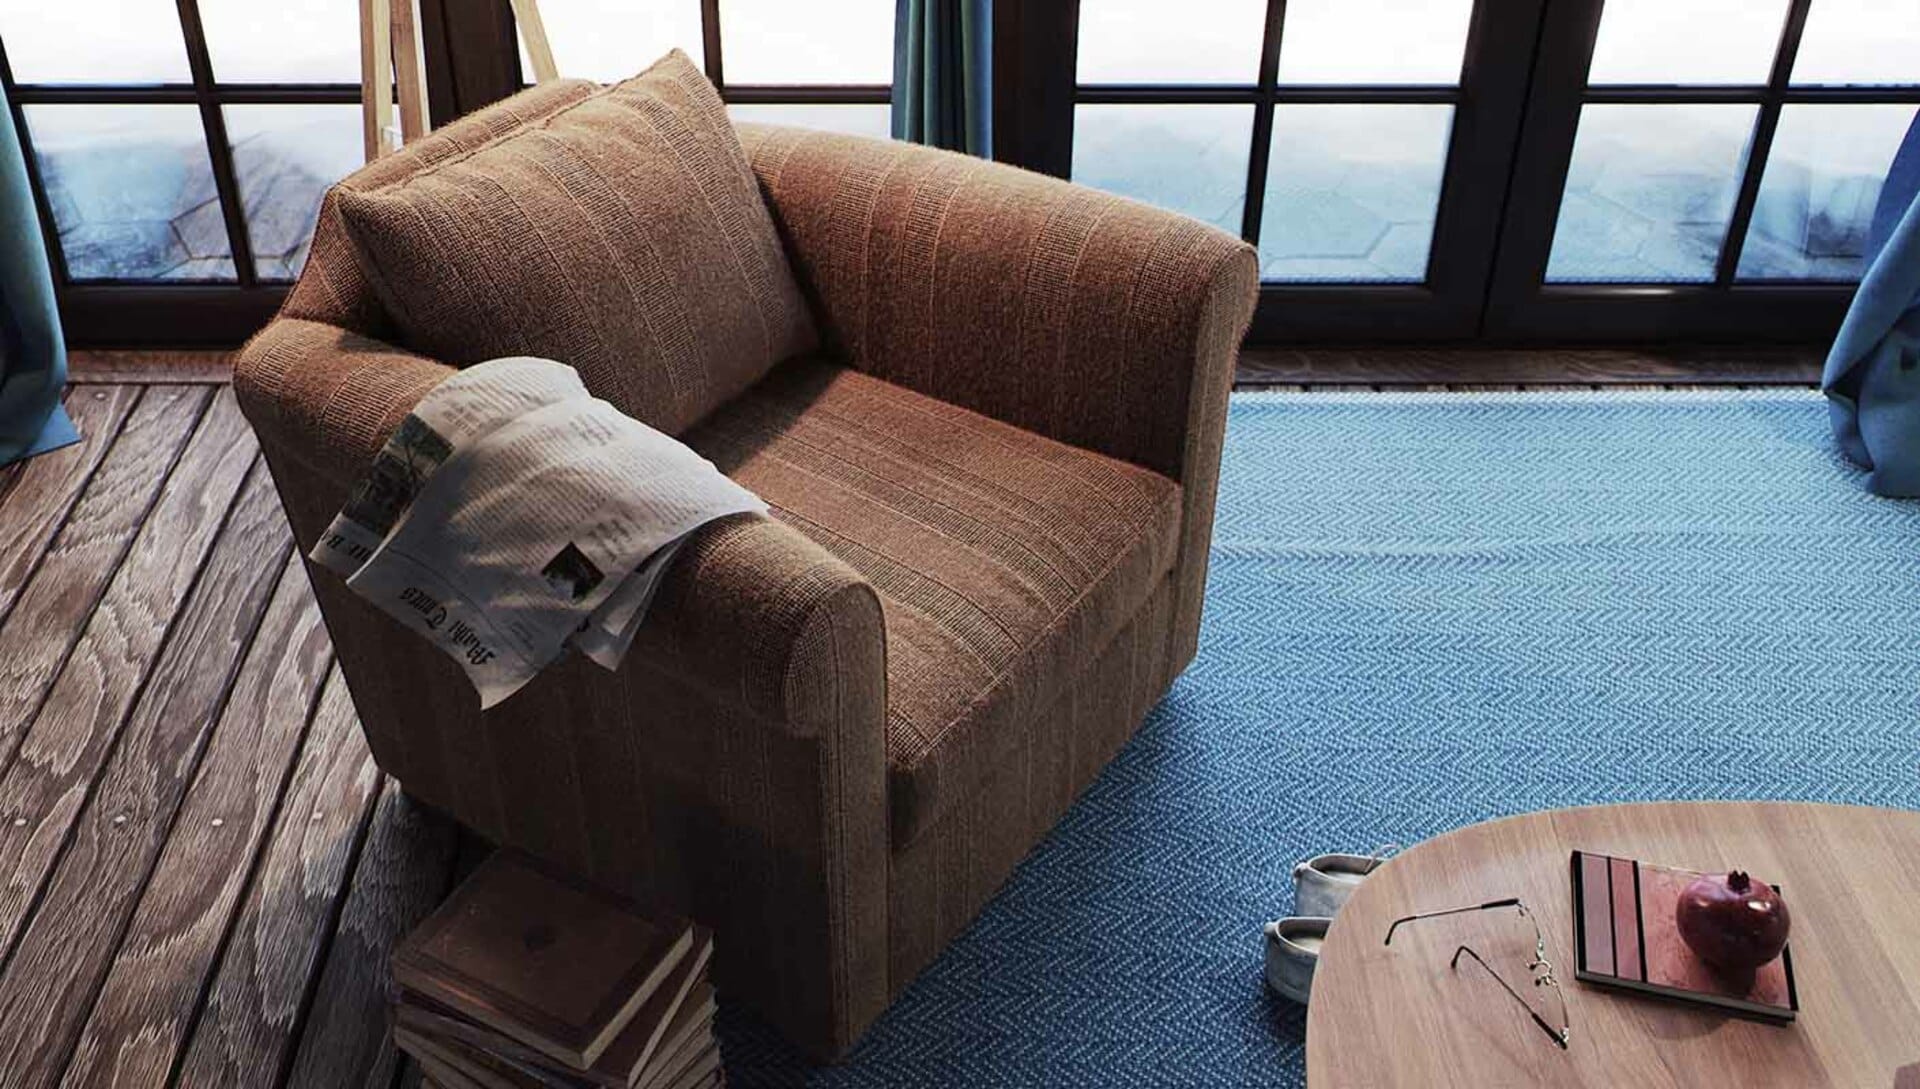
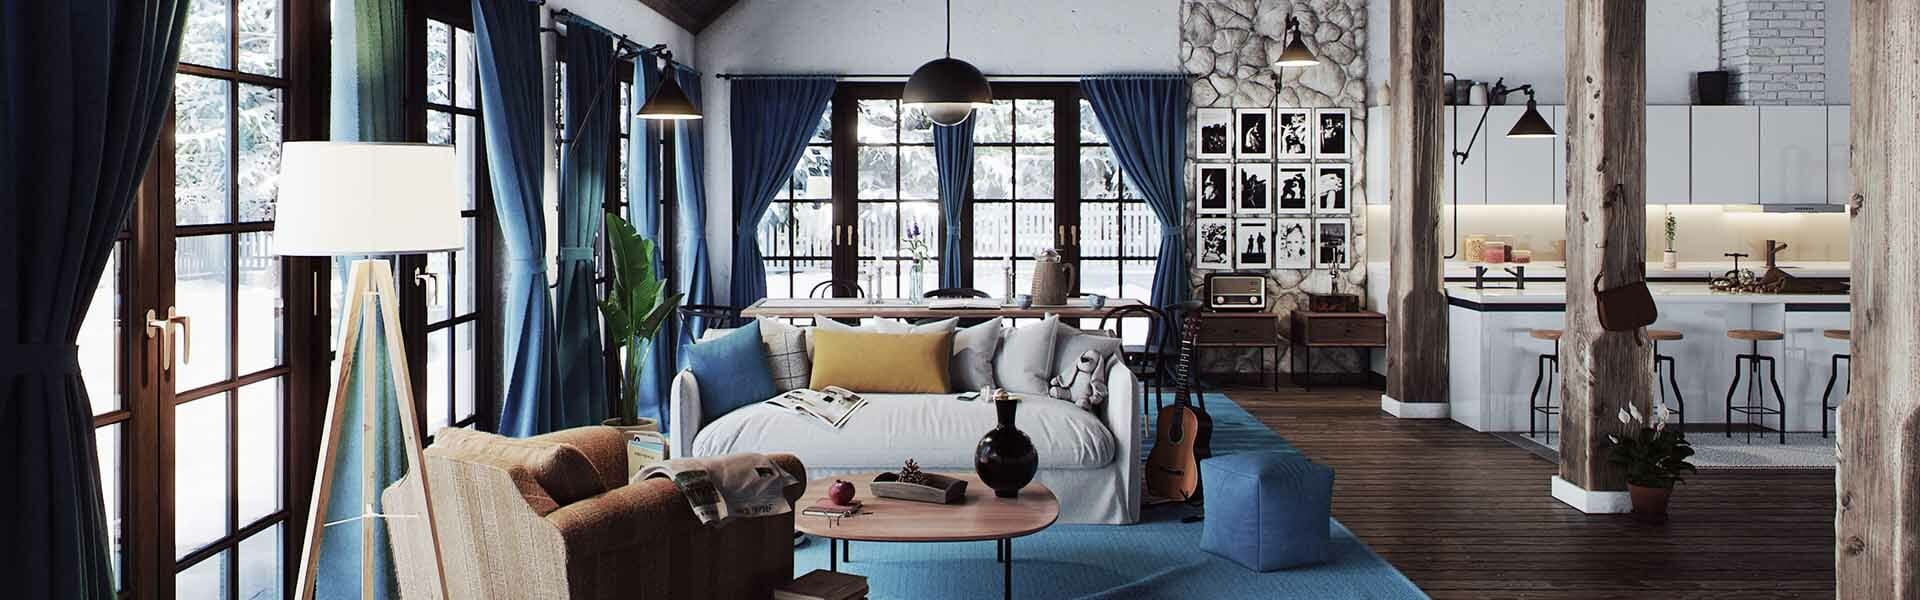
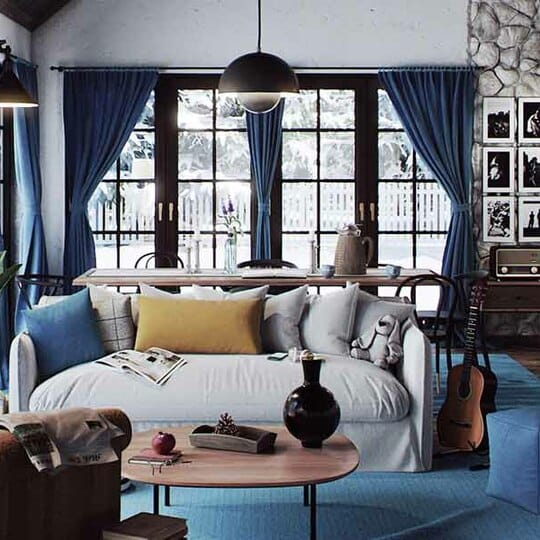
Fabric textures
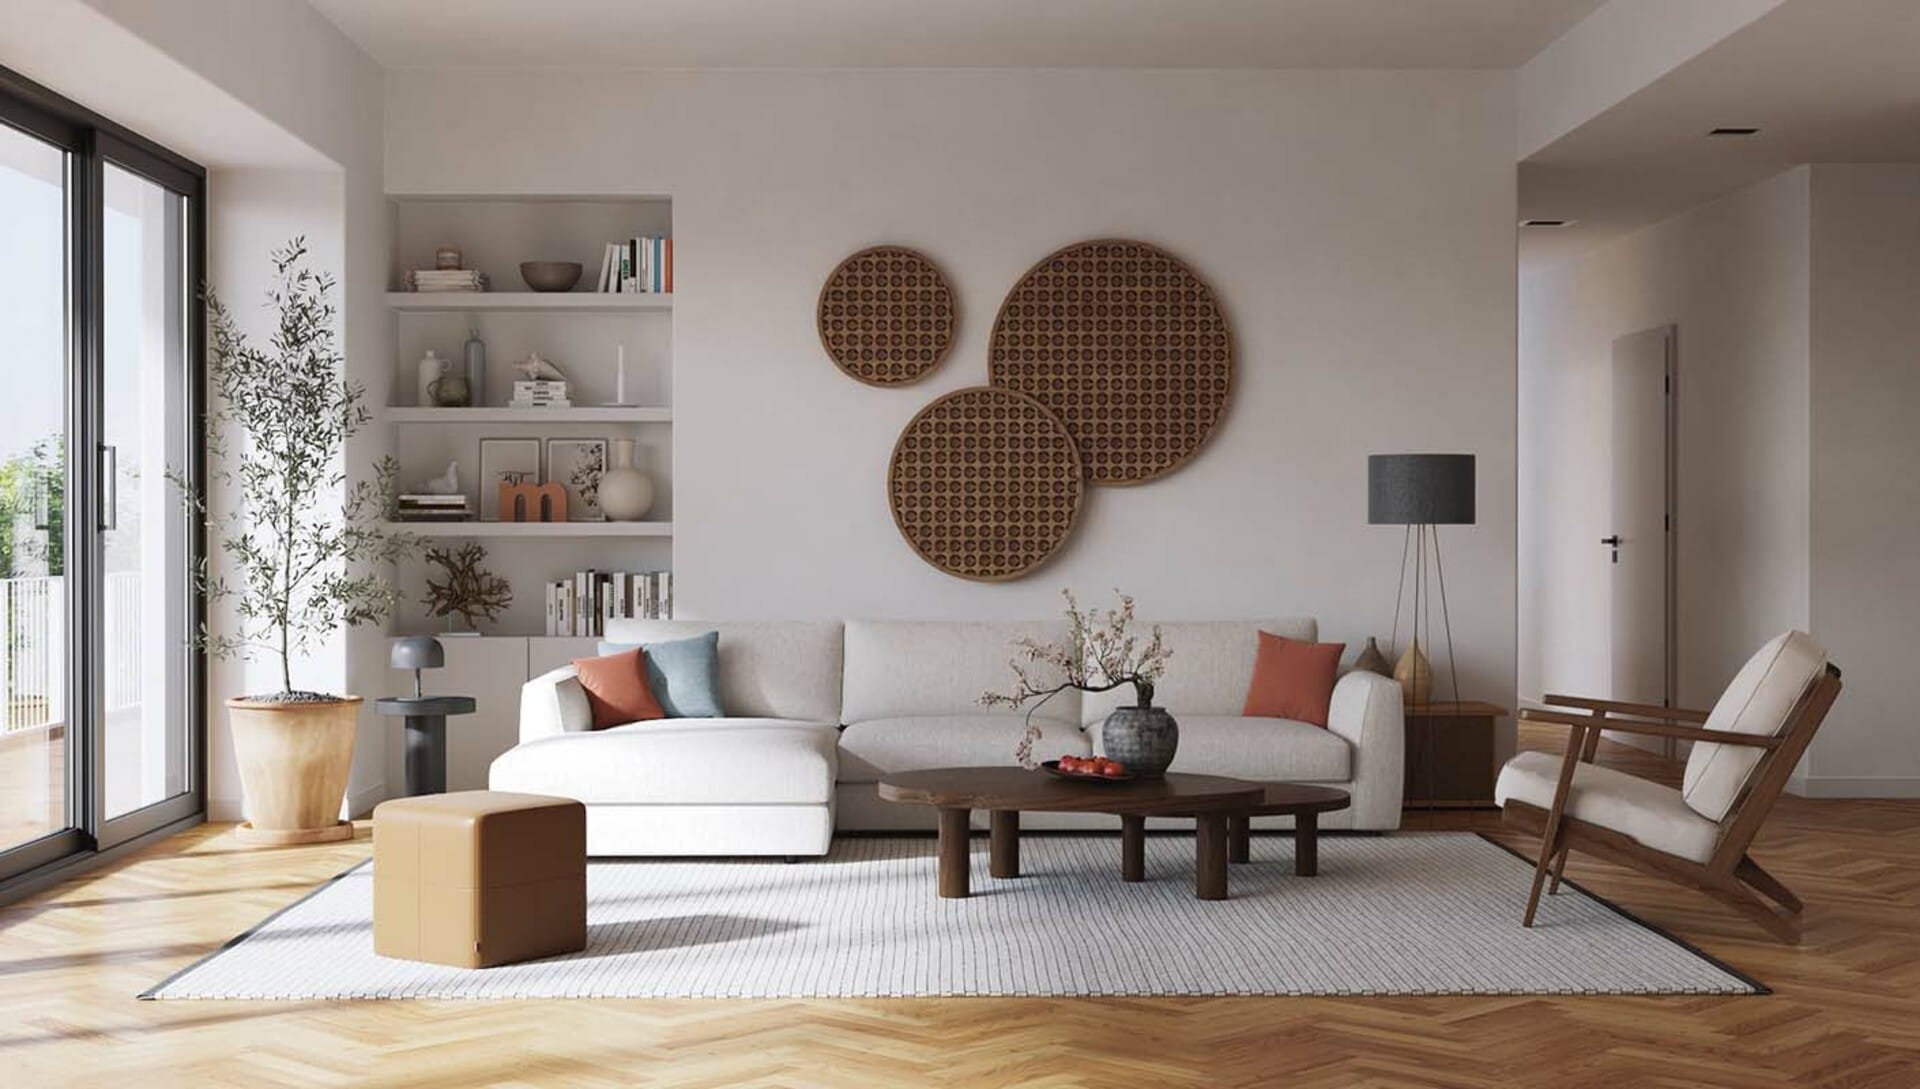
Fabric textures play a crucial role in interior design, adding depth, warmth, and visual interest to any space. In SketchUp, a popular 3D modeling software, fabric textures are essential tools that allow designers to create realistic and immersive environments. These textures bring life to furniture, draperies, upholstery, and other fabric-based elements within a virtual space, enabling designers to accurately visualize their ideas before bringing them to life.
By incorporating fabric textures into their SketchUp models, interior designers can accurately communicate their vision to clients, ensuring that every detail is captured. The ability to experiment with different fabric textures helps designers make informed choices about color schemes, patterns, and material combinations. This level of realism and precision allows clients to experience the ambiance and tactile qualities of fabrics, aiding in decision-making processes and ensuring that the final design matches their expectations.
Types of fabric textures and their unique characteristics
There are a variety of fabric textures for you to choose from, each one with its own physical characteristics:
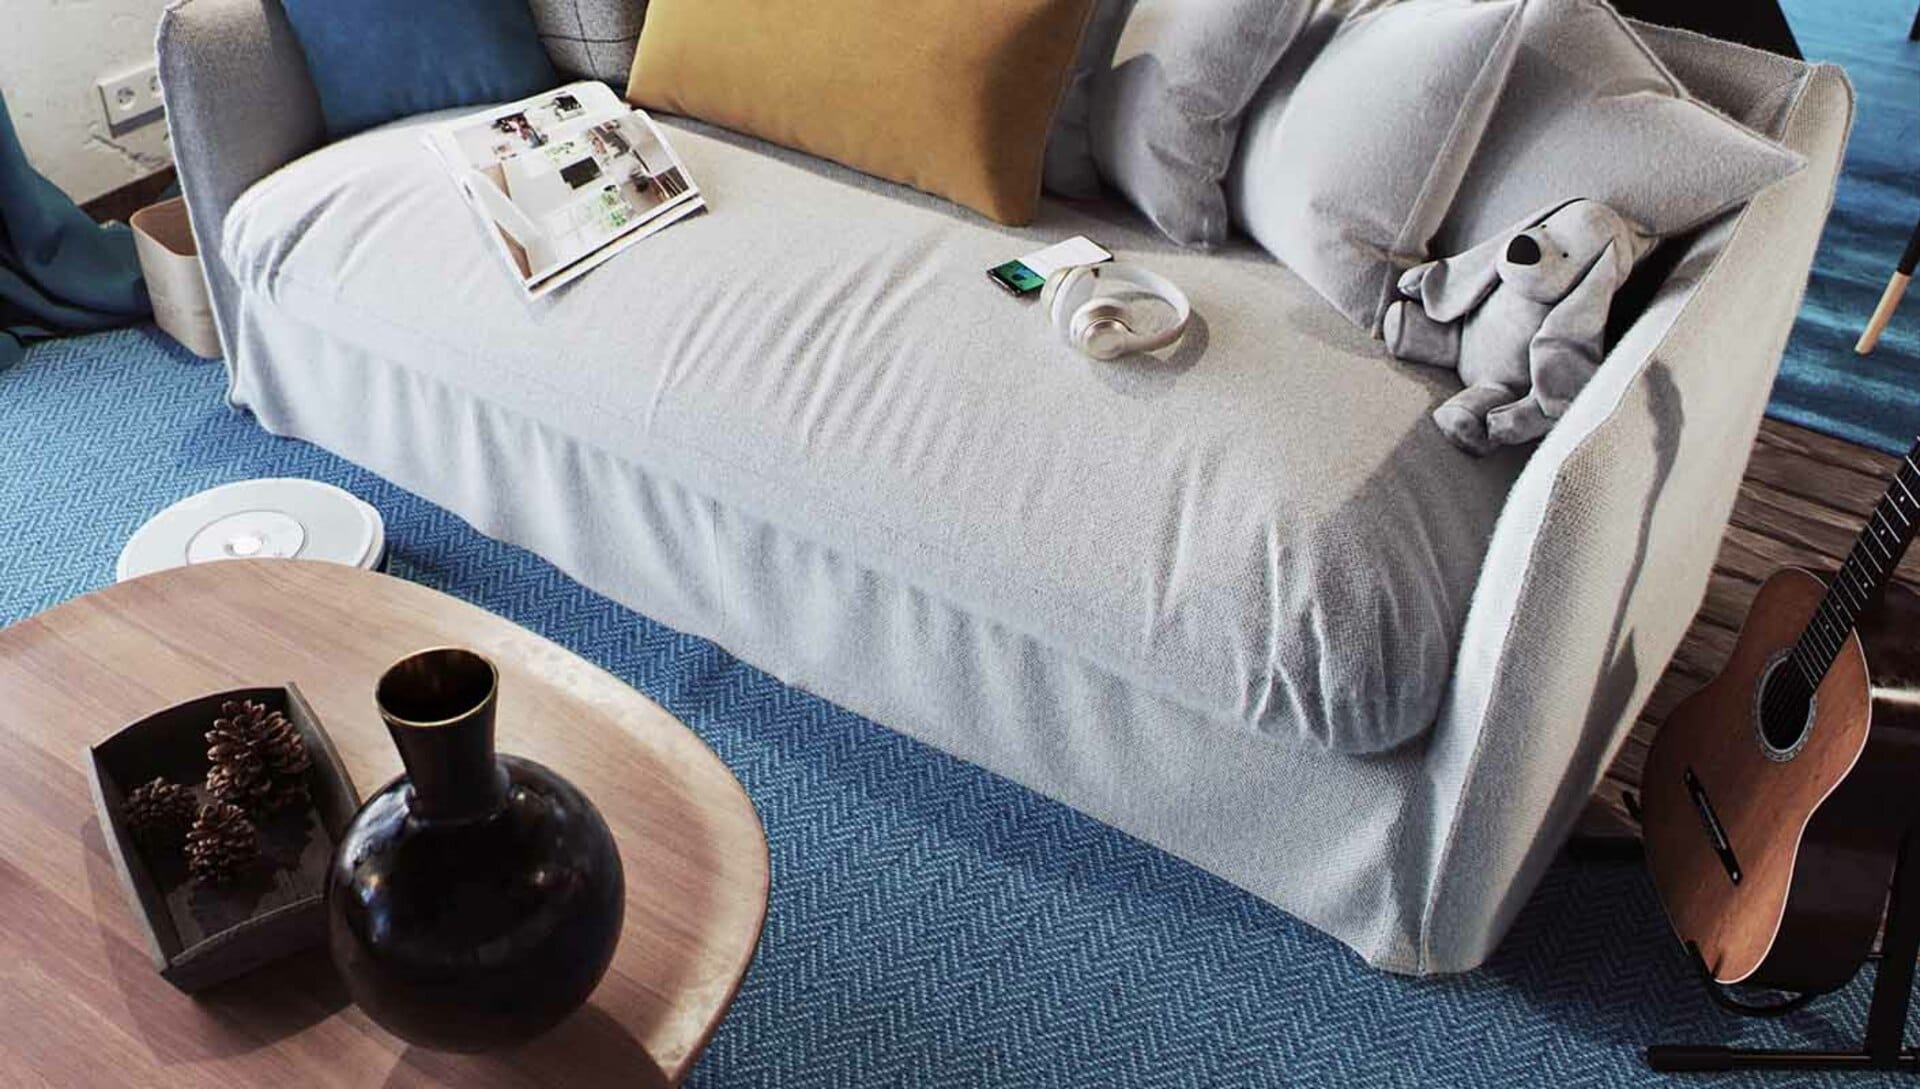
- Cotton
Cotton fabric textures are known for their softness, breathability, and versatility. They are commonly used for upholstery, curtains, and bedding. Cotton textures in SketchUp bring a cozy and inviting feel to interior spaces.
- Velvet
Velvet fabric textures exude luxury, elegance, and a sense of opulence. With their rich and smooth texture, they're often used for upholstery, draperies, and cushions. In SketchUp, velvet textures add a touch of sophistication and glamour to any design.
- Linen
Linen fabric textures offer a more relaxed and natural look. With their distinctive weave pattern, linen textures are ideal for creating a casual and airy atmosphere. They are commonly used for curtains, tablecloths, and upholstery. SketchUp's linen textures bring a sense of comfort and simplicity to interior designs.
- Silk
Silk fabric textures are synonymous with luxury, beauty, and refinement. Known for their lustrous appearance and smooth texture, they add a touch of elegance to any space. In SketchUp, silk textures create a sense of sophistication and a visually stunning impact.
Downloading fabric textures
For higher-quality downloads of fabric textures, designers can visit websites specializing in texture resources, such as Poly Haven, Texture Fabrik, or SketchUp Texture Club. These platforms provide a vast collection of fabric textures in different resolutions and formats compatible with SketchUp.
How to download and import the textures into SketchUp
To learn how to download and import textures into SketchUp, as well as manage materials and tweak them, simply follow these step-by-step instructions:
1. Find a resource
Search for websites or platforms that offer free textures for download. The resources we suggested in this article are a good start. Choose a resource that provides the type of textures you are looking for.
2. Navigate to the textures and browse around
Once you have chosen a resource, browse through their collection of textures. Look for the specific type you want to download. For example, if searching for a wood texture, consider what would complement your scene best – oak, mahogany, walnut, or pine.
3. Download the texture
Click on the download button or link provided for the wood texture image file you want for your SketchUp material. The texture image file will typically be in a common image format like JPEG or PNG. Save the file to a location on your computer where you can easily access it later.
4. Open a model in SketchUp
Launch SketchUp on your computer. Either create a new model or open an existing one in SketchUp.
5. Access the Materials Window
In SketchUp, go to the "Window" menu and select "Materials" to open the Materials window. This window allows you to manage and apply textures to your model.
6. Import the texture
In the Materials window, click on the "Create Material" button. A dialog box will appear.
7. Assign the texture
In the dialog box, click on the small folder icon next to the "Color" option. This will open a file browser window.
8. Locate the texture file
Navigate to the folder location where you saved the downloaded wood texture file. Select the file and click "Open" to import it into SketchUp.
9. Apply the texture
Once the texture is imported, it will appear in the Materials window. To apply textures to your model, you can use the Paint Bucket tool. Start by selecting the Paint Bucket tool from the toolbar. When you do, the Materials panel will appear. You can choose a materials collection from the drop-down list. From there, simply click on the material you want to use. Now, go back to the drawing area and click on the face or faces where you want to apply the selected material.
10. Make any adjustments
If needed, you can adjust the scale, rotation, or other texture properties using the options in the Materials window.
Licensing information
It is essential to adhere to the licensing agreements of all the materials and respect the rights of the texture creators each time you save materials to use in your projects. If you have any doubts or questions about the licensing terms, it is recommended to reach out to the resource or the texture creator for clarification.
Some common licensing terms you may come across include:
- Royalty-free
Royalty-free licenses typically allow you to use the textures in your projects for free without needing to pay additional fees or royalties. However, there may be restrictions on the redistribution or reselling of the textures.
- Attribution
Some licenses may require you to provide attribution to the original creator of the textures when using them in your projects. This could involve including a credit or acknowledgment in your work.
- Non-commercial vs. commercial use
Some licenses may restrict the use of textures for commercial purposes, while others may allow both personal and commercial use. Make sure to understand the licensing terms to ensure compliance with any restrictions.
Remember, licensing terms and conditions can change, so it's always a good practice to review the specific information provided by the resource you are downloading the files from.
Advice for applying textures in SketchUp
Consider the following tips and tricks for achieving realistic texture mapping in SketchUp:
- Texture scaling
Adjust the texture scale to match the surface size.
- Texture rotation
Experiment with rotating the texture to achieve the desired look. This can be particularly useful for surfaces with diagonal or irregular patterns.
- Texture blending
Use blending modes or opacity settings to blend textures seamlessly with the underlying surfaces. This can help create more realistic and natural-looking images of materials.
- Texture mapping plugins
Explore plugins or extensions available for SketchUp that offer advanced texture mapping features. These plugins can provide additional tools and options for precise texture control.
Remember to save your SketchUp model regularly to preserve the applied textures, and make sure to adhere to any licensing agreements associated with the image files used.

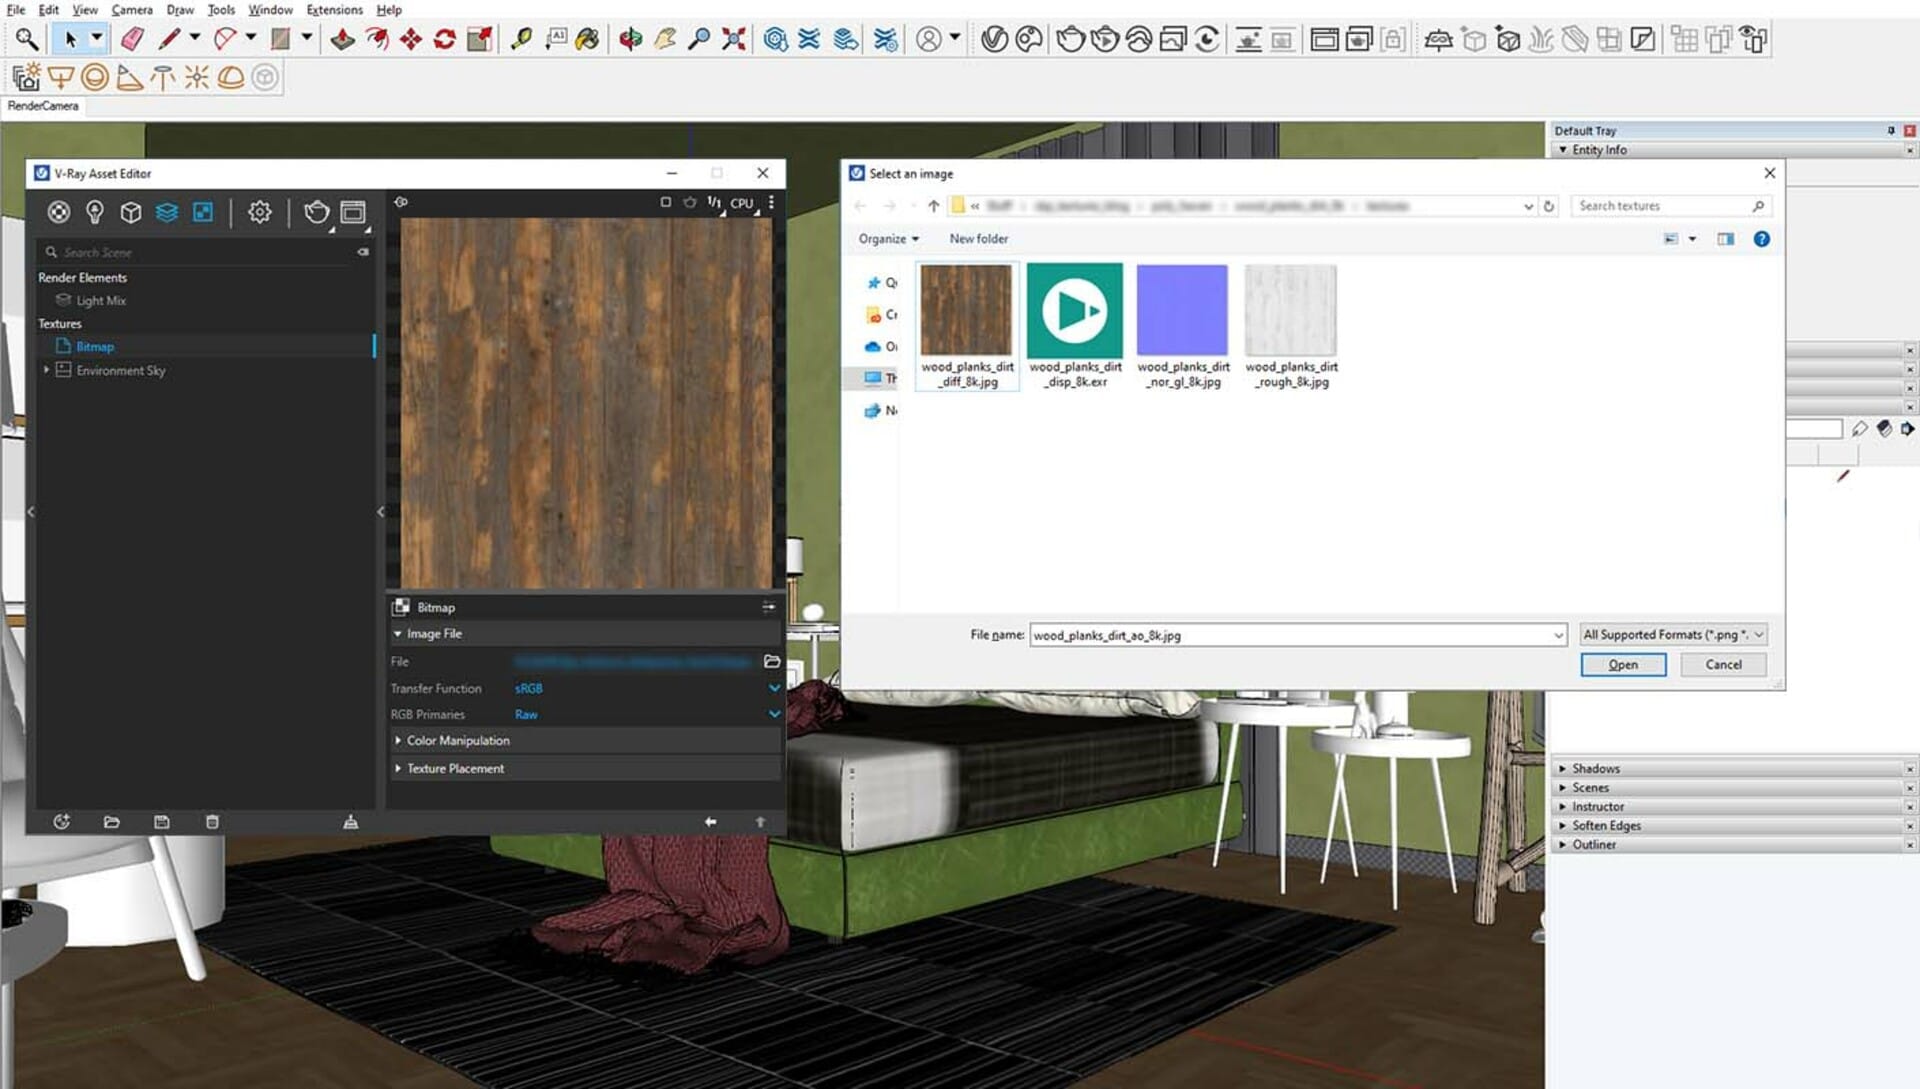
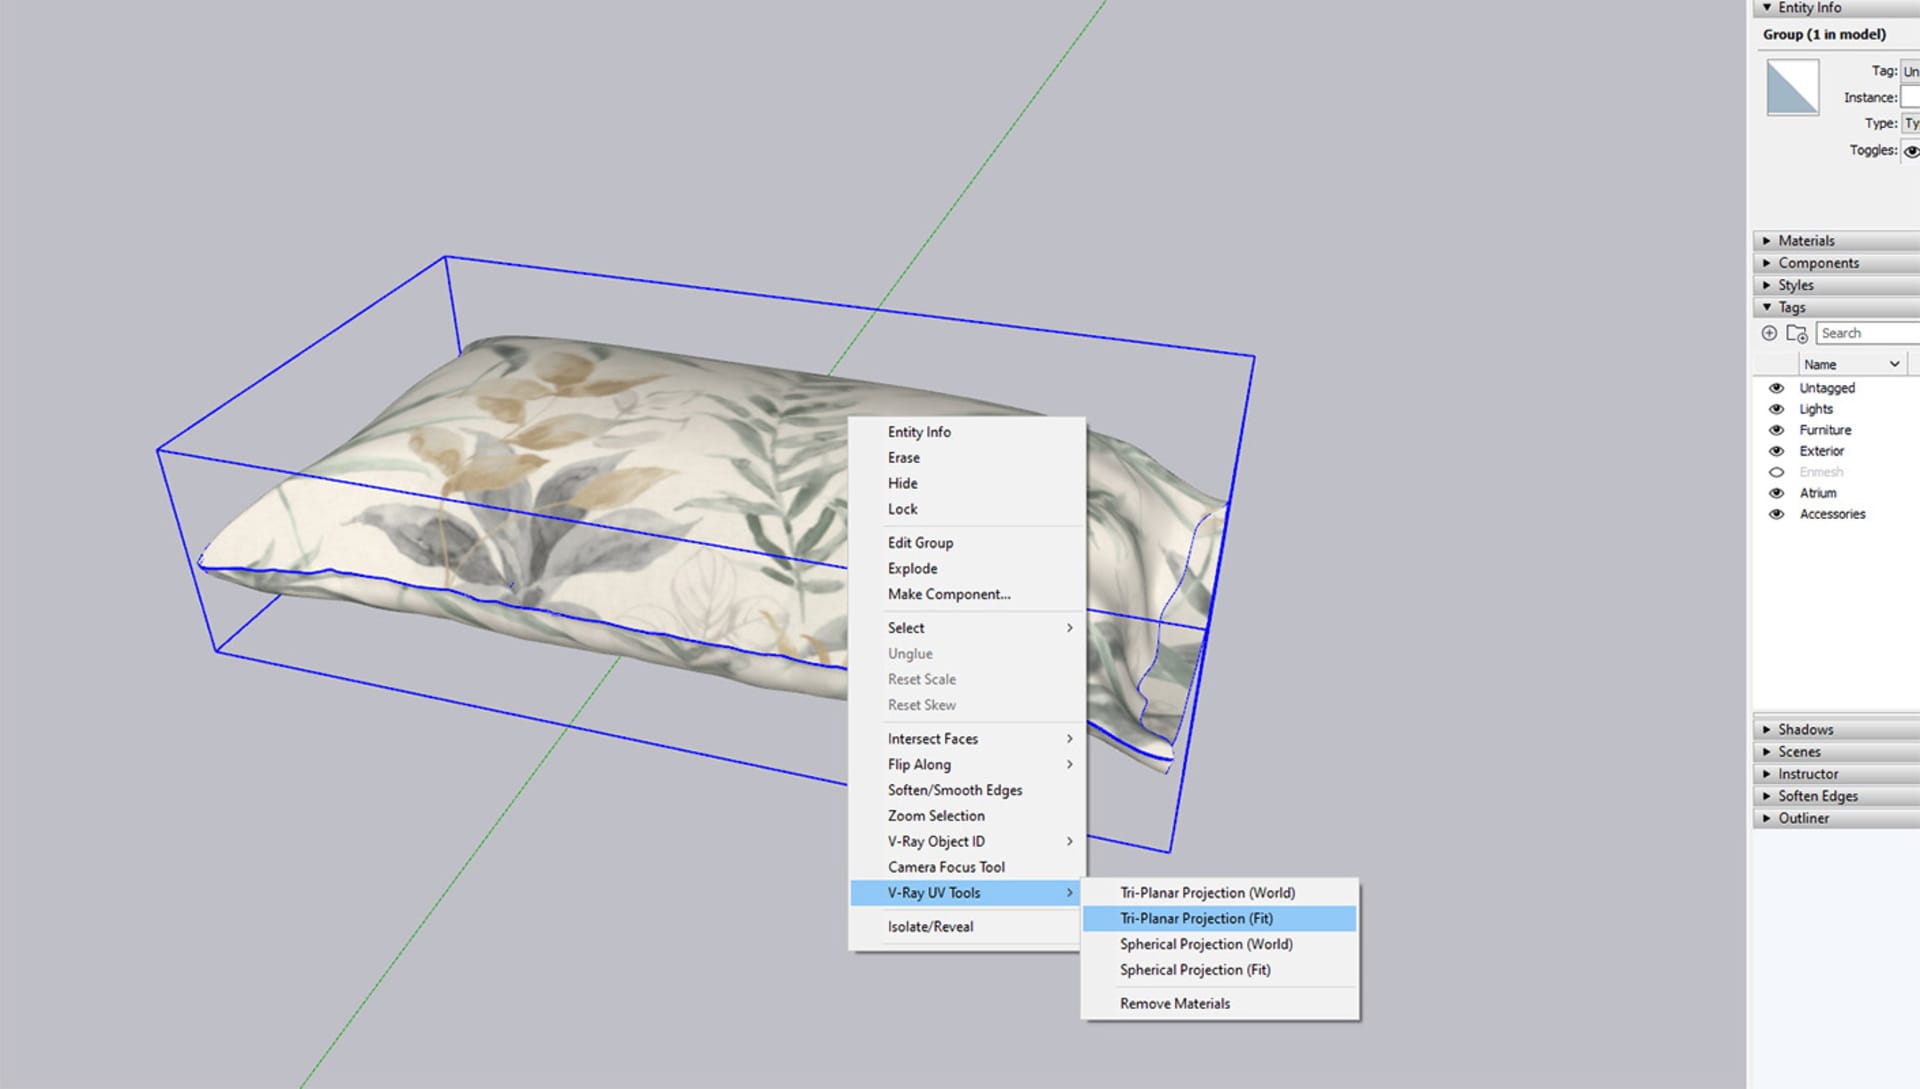
How to edit and customize your textures in SketchUp
To edit and customize textures directly within SketchUp, you can use the V-Ray Asset Editor to modify various properties. Here's a guide on how to make modifications to textures in SketchUp using the V-Ray Asset Editor:
- Open SketchUp: Launch SketchUp on your computer.
- Access the V-Ray Asset Editor: In SketchUp, go to the "Extensions" top menu bar and select "V-Ray" to open the V-Ray toolbar. Click on the "Asset Editor" button to open the V-Ray Asset Editor window.
- Select the material: In the V-Ray Asset Editor, navigate to the "Materials" tab. Select the material that contains the texture you want to edit.
- Edit texture properties.
In the Material Editor section of the V-Ray Asset Editor, you can modify various texture properties:
- Color corrections
You can apply color corrections to the texture by using the "Mix Color" option. This allows you to blend color on top of the texture or mix two textures together, such as creating a corduroy jeans effect.
- Value (transparency) blend
Adjust the texture transparency by using the "Value Blend" option. This allows you to control the opacity.
- Pattern randomness
To add randomness to the texture placement, you can adjust the UVW placement using the available options in the V-Ray Asset Editor. This helps create a more natural and varied appearance.
- Curve modifier
Use the curve modifier to make corrections to the texture. This allows you to adjust the brightness, contrast, or other properties using a curve graph.
- Apply the modified texture
Once you have made the desired modifications, click the "Apply" button in the V-Ray Asset Editor to update the material in your SketchUp model.
Remember to experiment with different settings and adjustments to achieve the desired look for your textures. It's also a good practice to save your SketchUp model regularly to preserve the modifications.
Best practices for using textures
When using textures in your 3D models, it's important to follow best practices to maintain model performance and efficiency. Here are some tips:
1. Optimize texture sizes
Large texture sizes can consume significant memory and impact performance. Resize your textures to an appropriate resolution that balances visual quality and performance. Consider using compressed textures and texture streaming techniques.
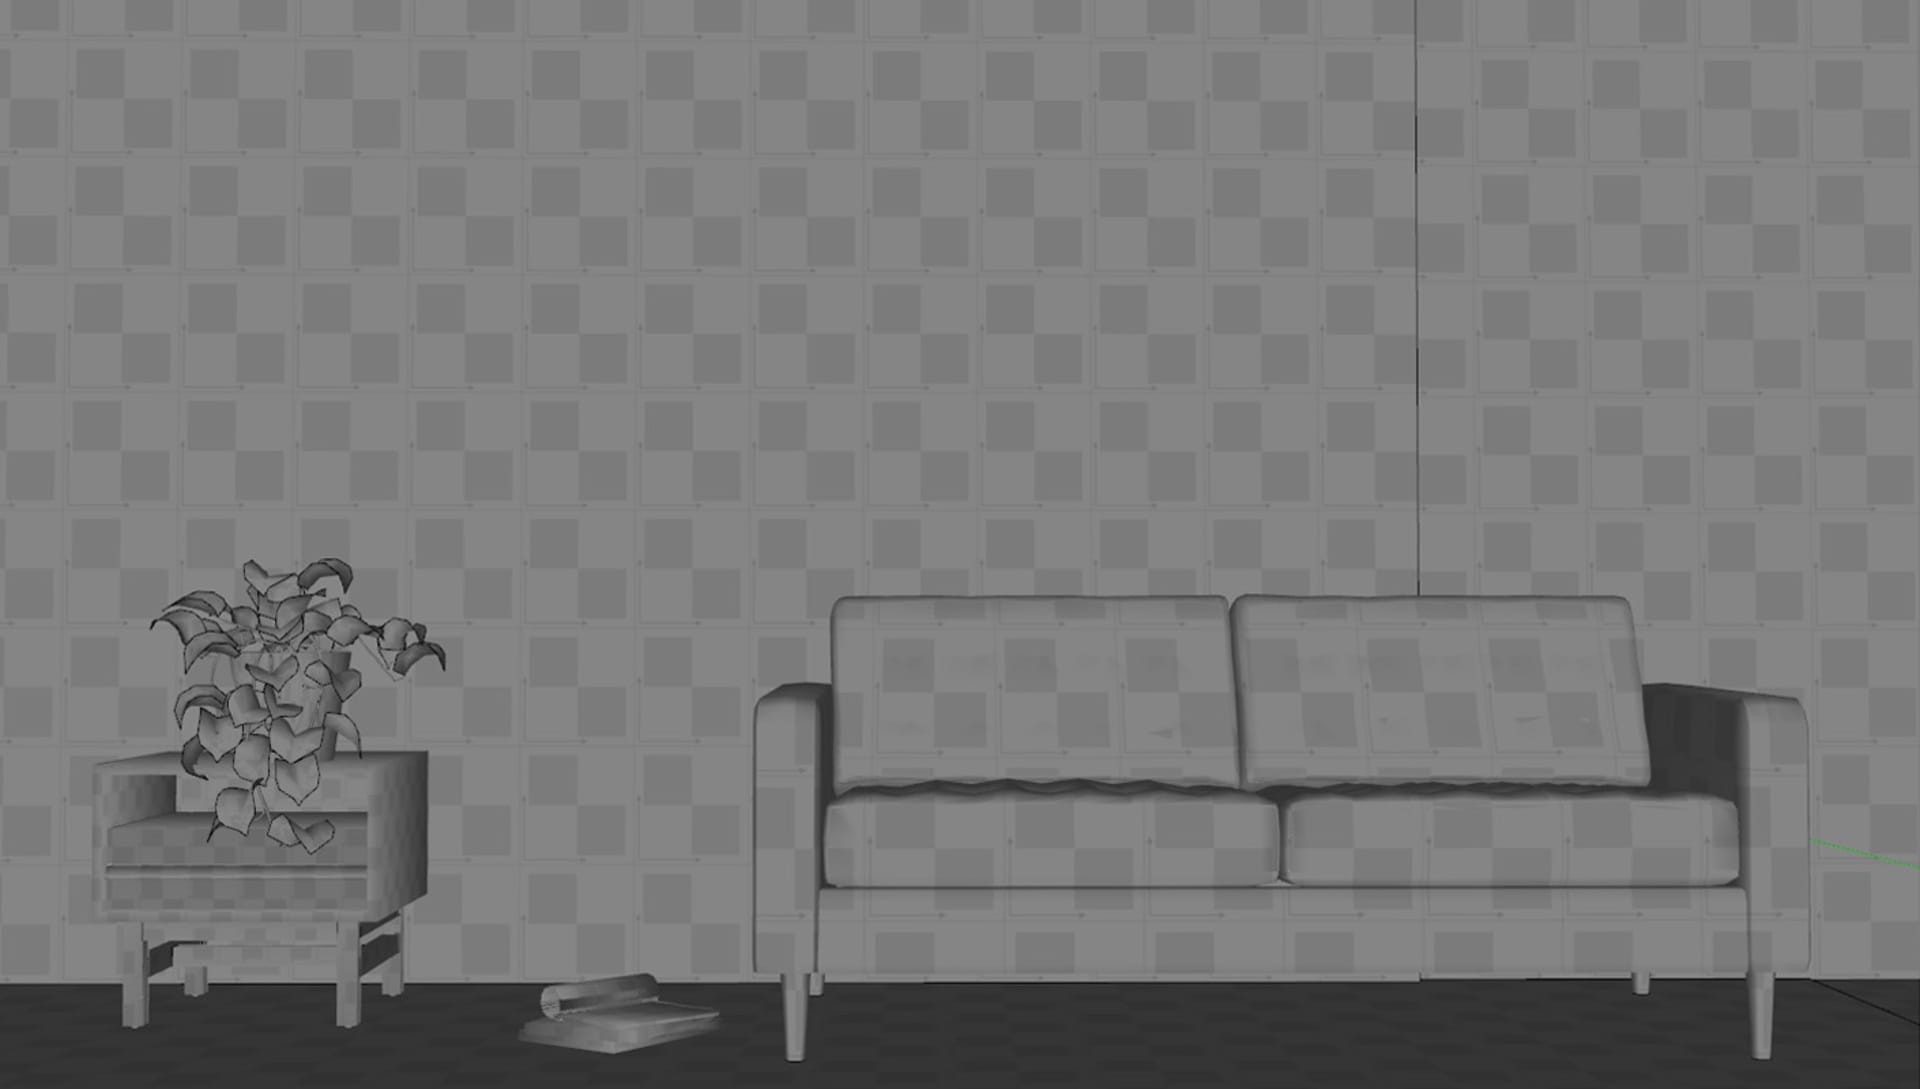
2. Proper UV mapping
UV mapping is the process of unwrapping the 3D model's surface to apply textures accurately. Ensure it's done correctly to avoid issues like texture stretching or distortion. Use UV mapping tools in your modeling software to adjust and optimize the UV layout.
3. Avoid tiling artifacts
When using tiled textures, pay attention to the seams where the textures repeat. Adjust the UV mapping or use techniques like texture blending or decal placement to minimize visible seams and tiling artifacts.
4. Texture atlases
Combine multiple textures into a single image, known as a texture atlas. This reduces the number of draw calls and improves performance. Additionally, consider using the alpha channel of textures for additional information or optimization purposes.
5. Level of detail (LOD)
Implement LOD systems that automatically swap between high and low-poly versions of a model based on the distance from the camera. This helps maintain visual quality while reducing computational load.
6. Regular testing
Test your models and textures within the target game engine or interactive application to ensure optimal performance. Use profiling tools to identify any performance bottlenecks and make necessary adjustments.
Remember, optimizing textures and models is a balance between visual quality and performance. Regularly test and iterate on your models to achieve the desired results.
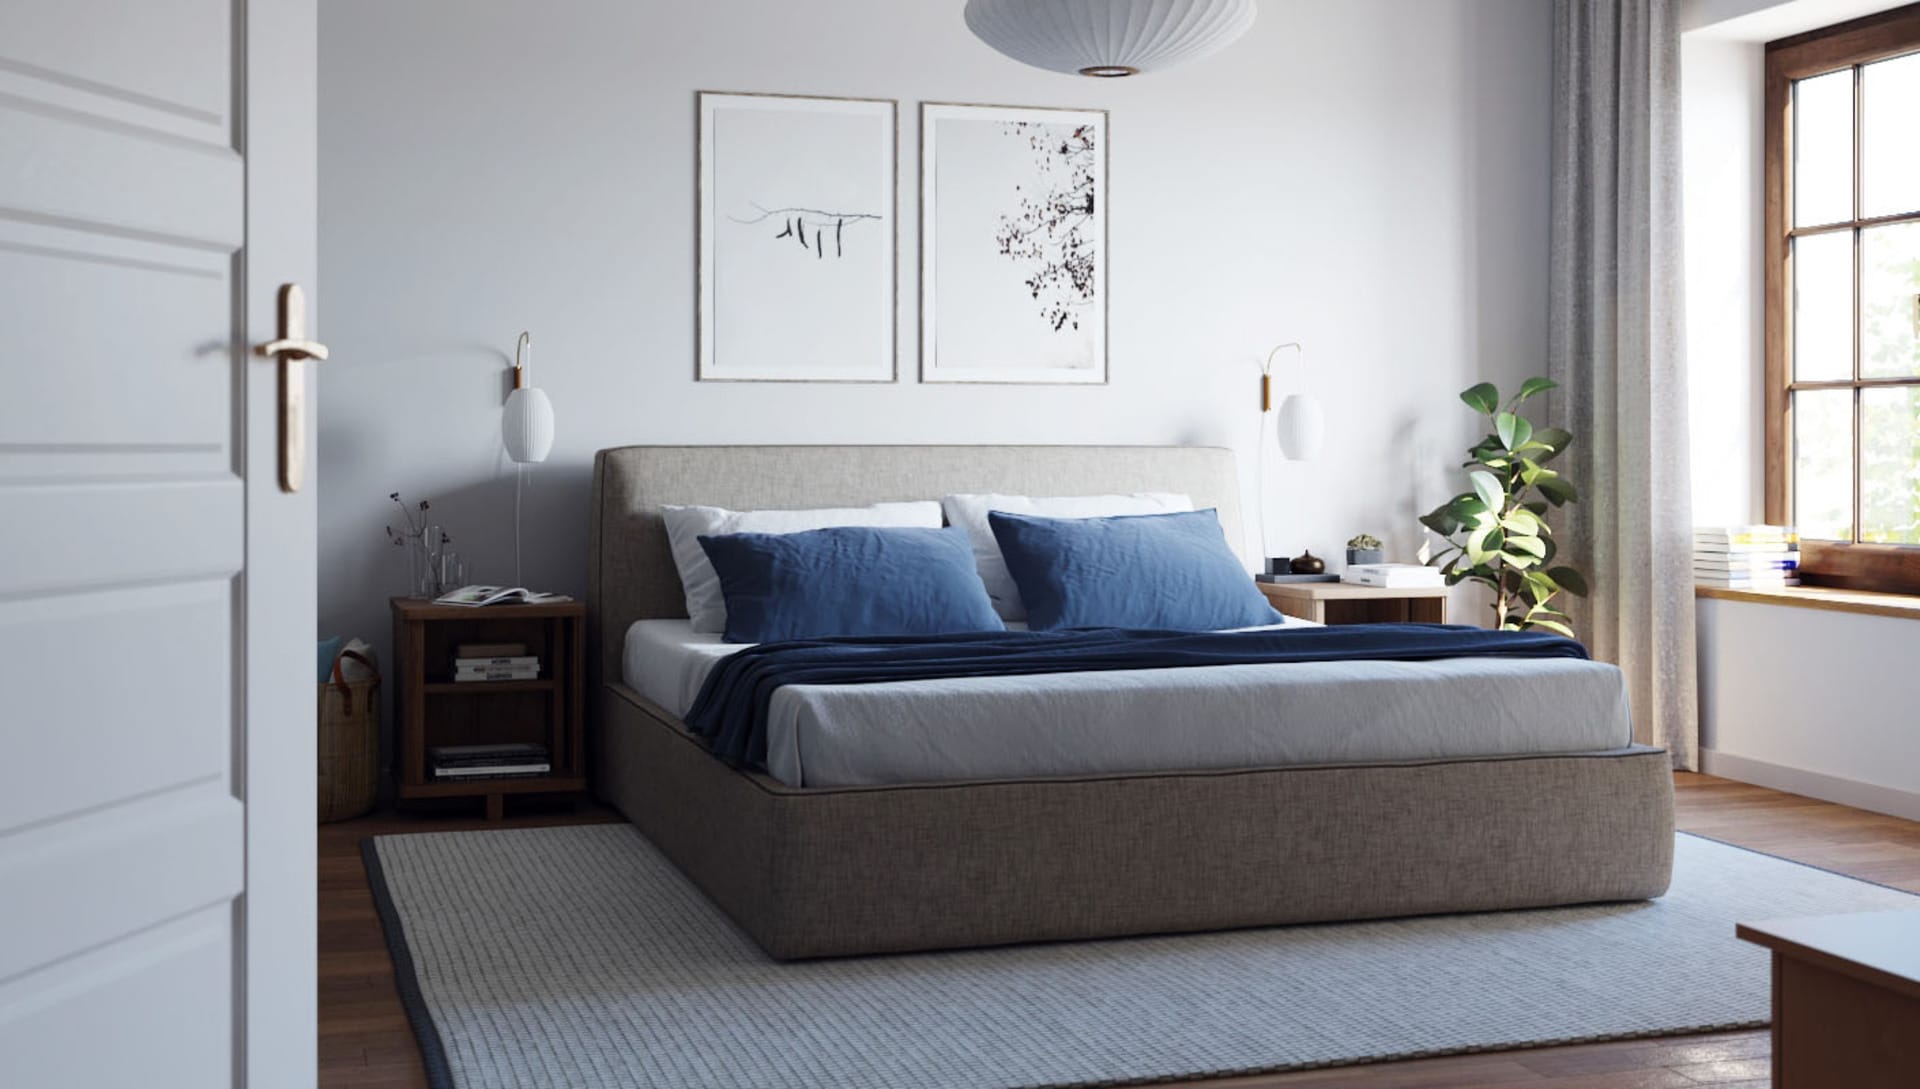
Showcase your models with textures
When showcasing textured 3D models, rendering and visualization play a crucial role in presenting your designs with exceptional detail and realism. Here are some tips to enhance the visual quality of your models using V-Ray for SketchUp.
1. Optimize lighting
Proper lighting is essential for highlighting textures in your models. The more textures you add to your scene, the more you should experiment with different lighting setups to create the desired mood and emphasize the details of each texture. Use V-Ray's lighting tools, such as area lights, HDRI maps, and light portals, to achieve realistic and visually appealing results.
2. Fine-tune material properties
V-Ray allows you to adjust various material properties to enhance your textures' appearance. Experiment with parameters like glossiness, roughness, reflection, and bump to achieve the desired level of realism. Take advantage of V-Ray's material editor to fine-tune the texture properties and create visually stunning materials.
3. Pay attention to texture mapping
Proper UV mapping techniques are crucial for accurately applying textures to your models. Ensure that the textures are mapped correctly to avoid stretching, distortion, or visible seams. Use V-Ray's UVW randomizer feature to add variation and realism to the texture placement.
4. Post-processing and compositing
After rendering your textured models, consider post-processing techniques to enhance the visual impact further. Use image editing software like Photoshop to adjust colors and contrast, and add additional effects if desired. Compositing techniques can help blend multiple render passes together for a more polished final result.
Remember to experiment with different settings, lighting conditions, and the material's opacity properties to achieve the desired look for your textured models. Regularly preview and iterate on your renders to fine-tune the visual quality of each new texture you add.
It's time to play around with textures
We hope this article has provided valuable insights into expanding your creativity with textures in SketchUp and that it helps enhance your scene. You are now also equipped with useful tricks for finding your own textures, empowering you to improve your SketchUp designs.
By utilizing the resources and techniques discussed, you can take your projects to new levels of visual appeal. So, whether you're a seasoned SketchUp user or just getting started, don't hesitate to explore these texture options and elevate your creations. It's time to find that awesome new texture for your project! Happy browsing!