
Good and evil clash in tense short film The Dark Is Rising. Find out how the latest tech helped its creators at Gnomon School create powerful visuals and hit tight deadlines.
Team Dark Horse had their work cut out. As part of their full-time study at Gnomon school, the five-strong team had just 10 weeks to create a 90-second short film of their choosing, handling everything from the initial storyboards to the final edit.
Fortunately, Susan Cooper’s genre-defining young adult fantasy novel The Dark Is Rising provided a perfect jumping-off point for the film. The story features deftly drawn characters and evocative environments, but there’s room to bring in influences from other fantasy universes.
We spoke to Team Dark Horse about how the latest rendering technology helped them hit that tight deadline — and create an atmospheric short at the same time.
What inspired the project?
Team Dark Horse:
We chose The Dark is Rising because the dark fantasy aspects of the story presented an opportunity to create an interesting blend of characters, environments and VFX. We got excited about the idea of a standoff between a Harry Potter-type character and a magic zombie in a Dark Souls-style cathedral.
What were your first steps in planning the short film?
Team Dark Horse:
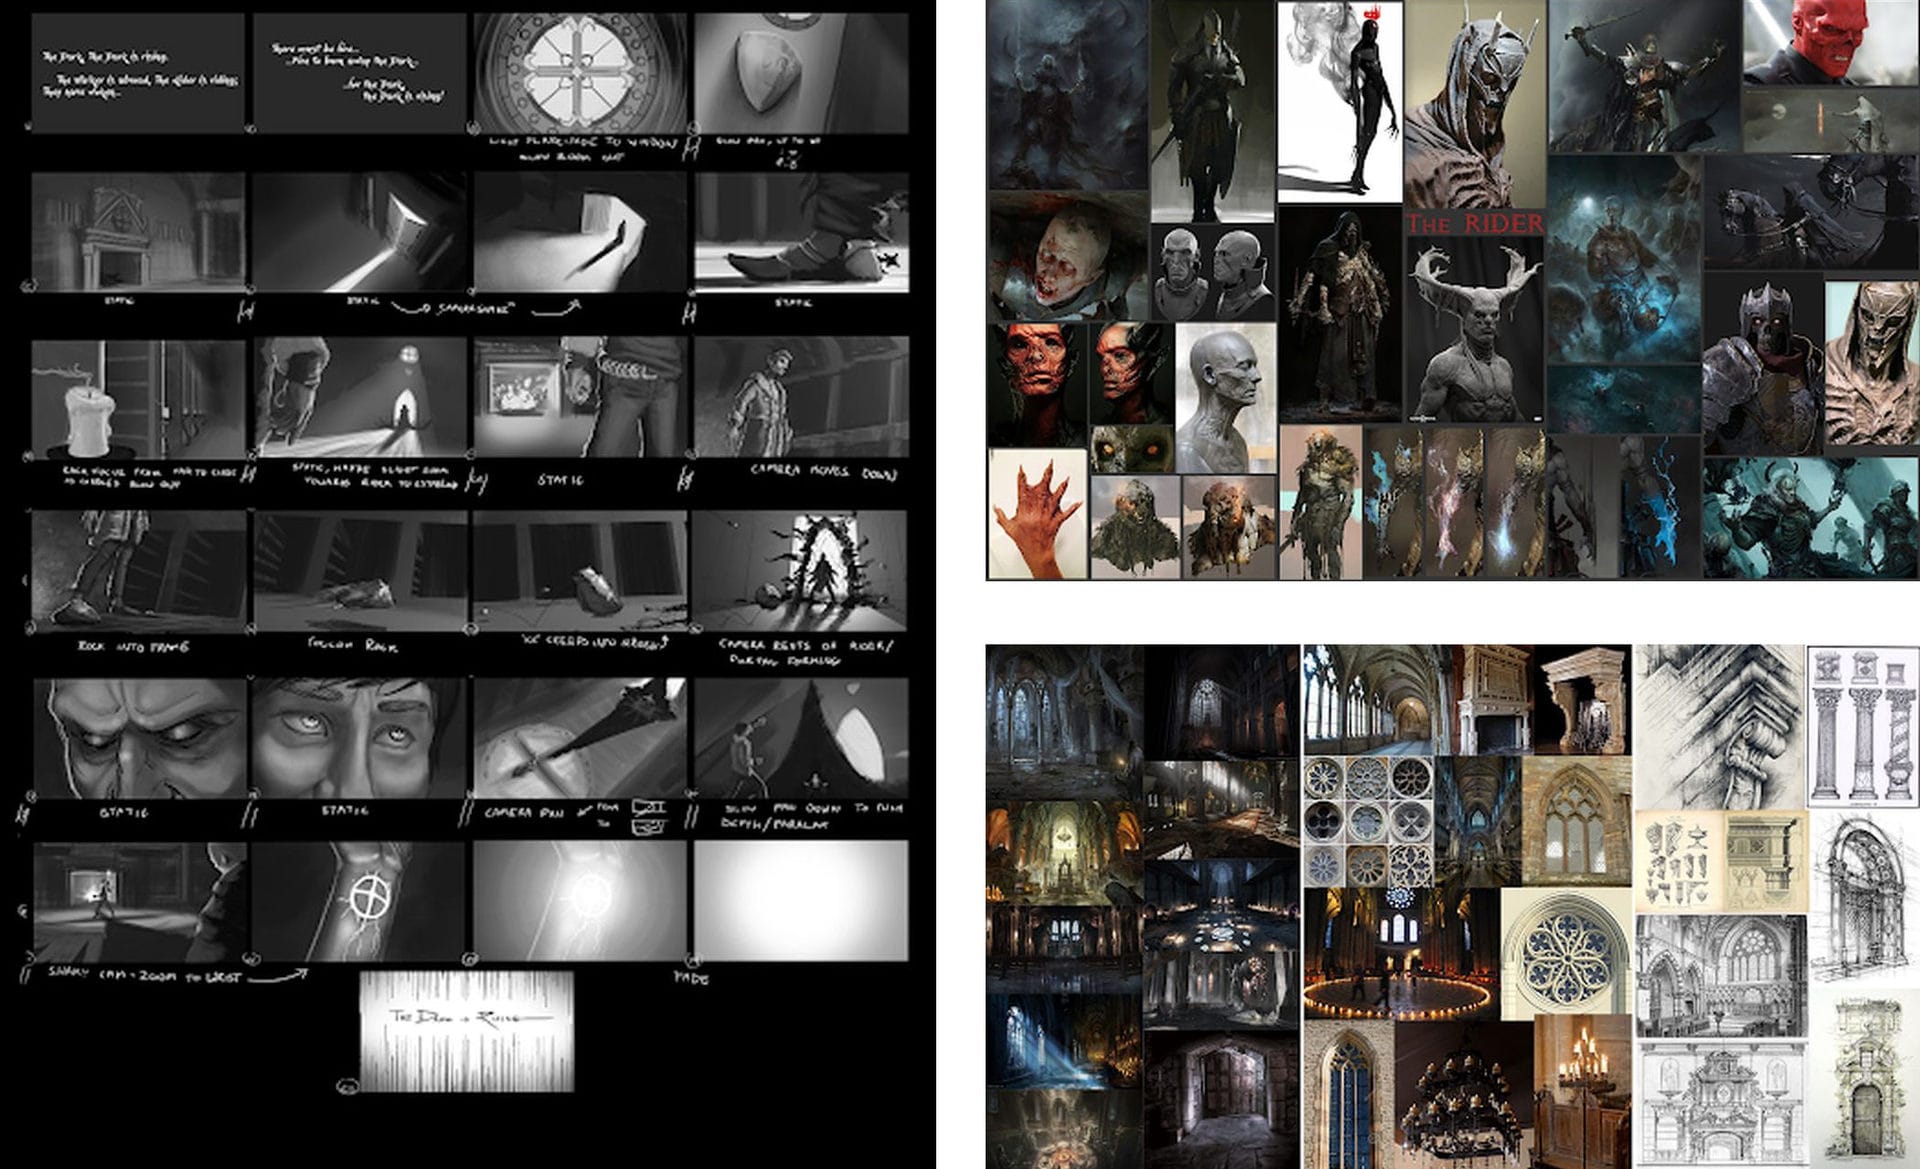
We set out to find reference and influence in existing work and the companies where we aspire to work. We began with a storyboard to start moving in the direction we envisioned. From this, we developed our vision for the project and it served as the main guide when creating the shots and cameras.
What influenced the way you designed the characters and environment?
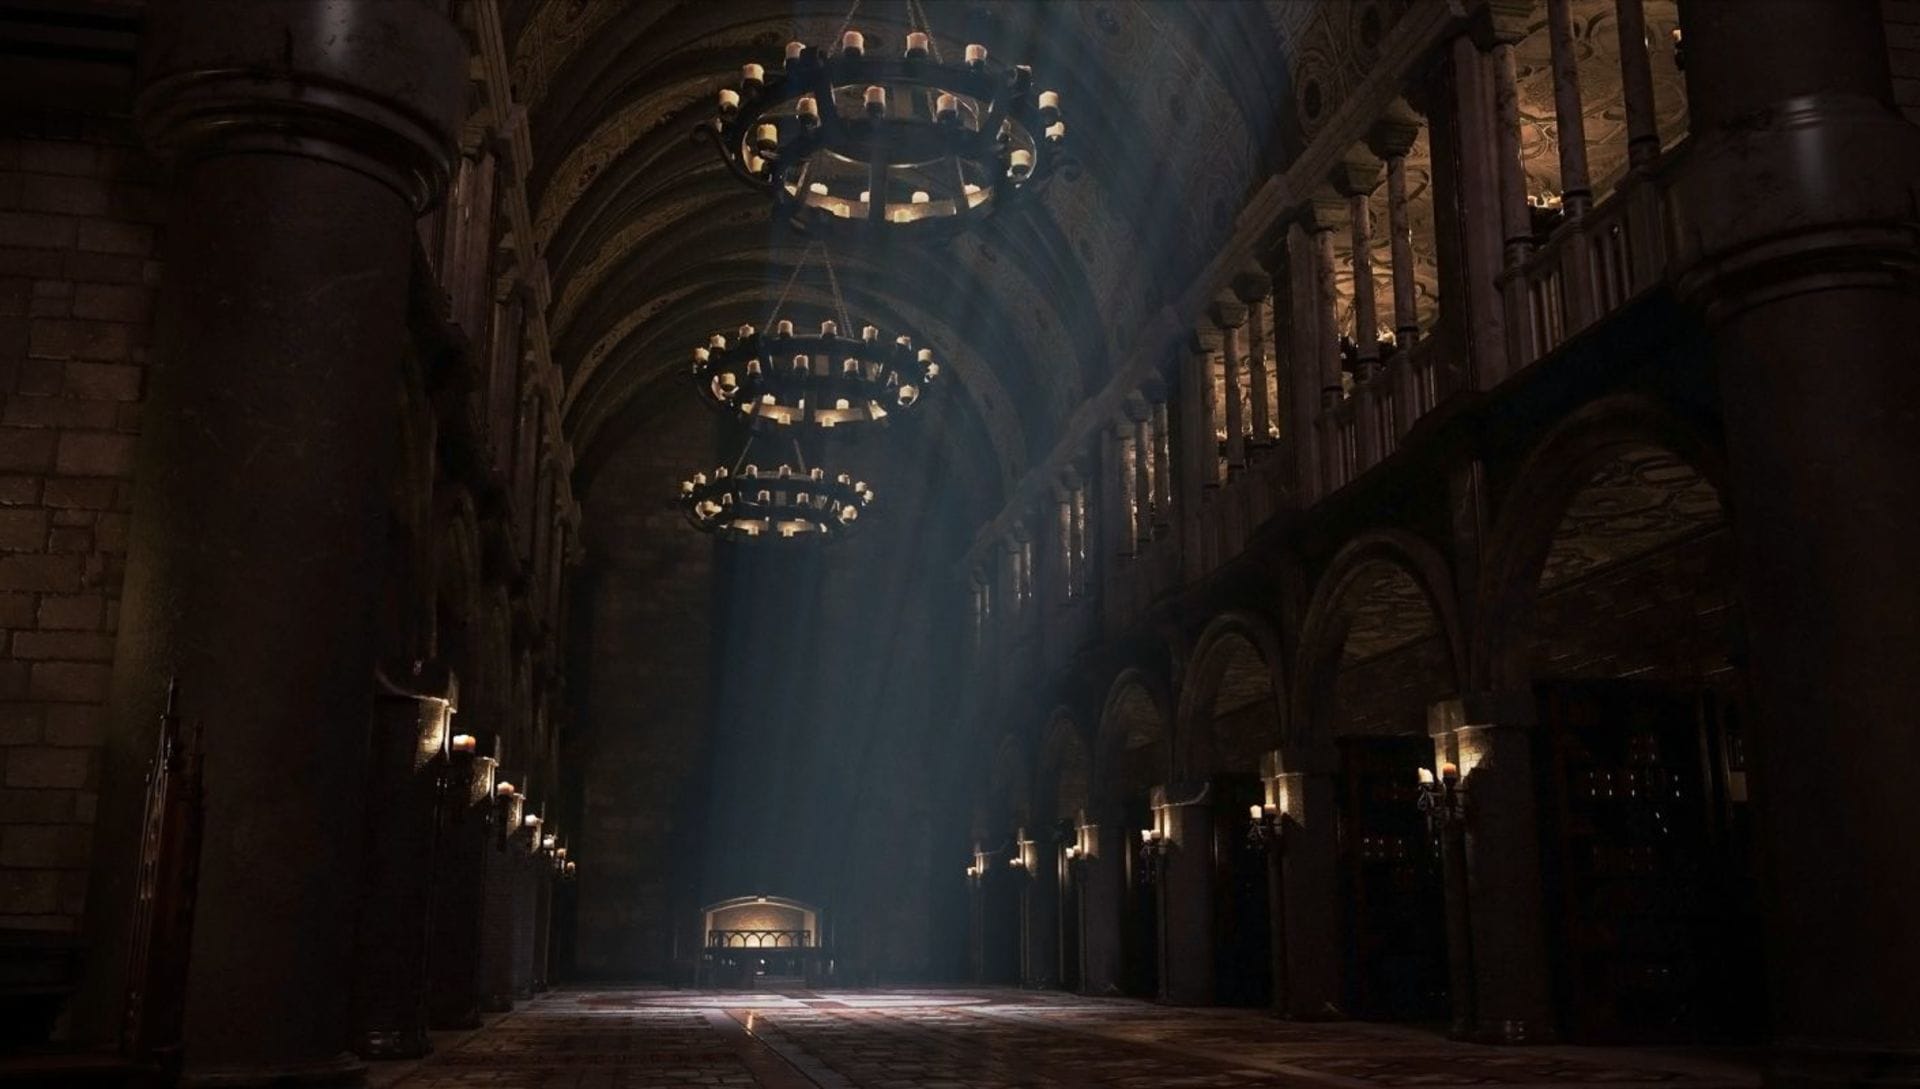
Carlos Rizo: Environment — Architecture modeling and texturing:
The Dark is Rising novel gave us a detailed description of the world. Buildings and props described in such depth were really helpful when designing the environment. Capturing the epic scale was my goal from the beginning. I used references from the real world and The Order 1886 and Uncharted game cinematics to build upon the novel’s details.
This was the first cinematic environment I worked on, and time wasn’t on our side, so optimization was very important. Most of the assets were on the low-poly side, to lessen the amount that each polygon would tessellate.
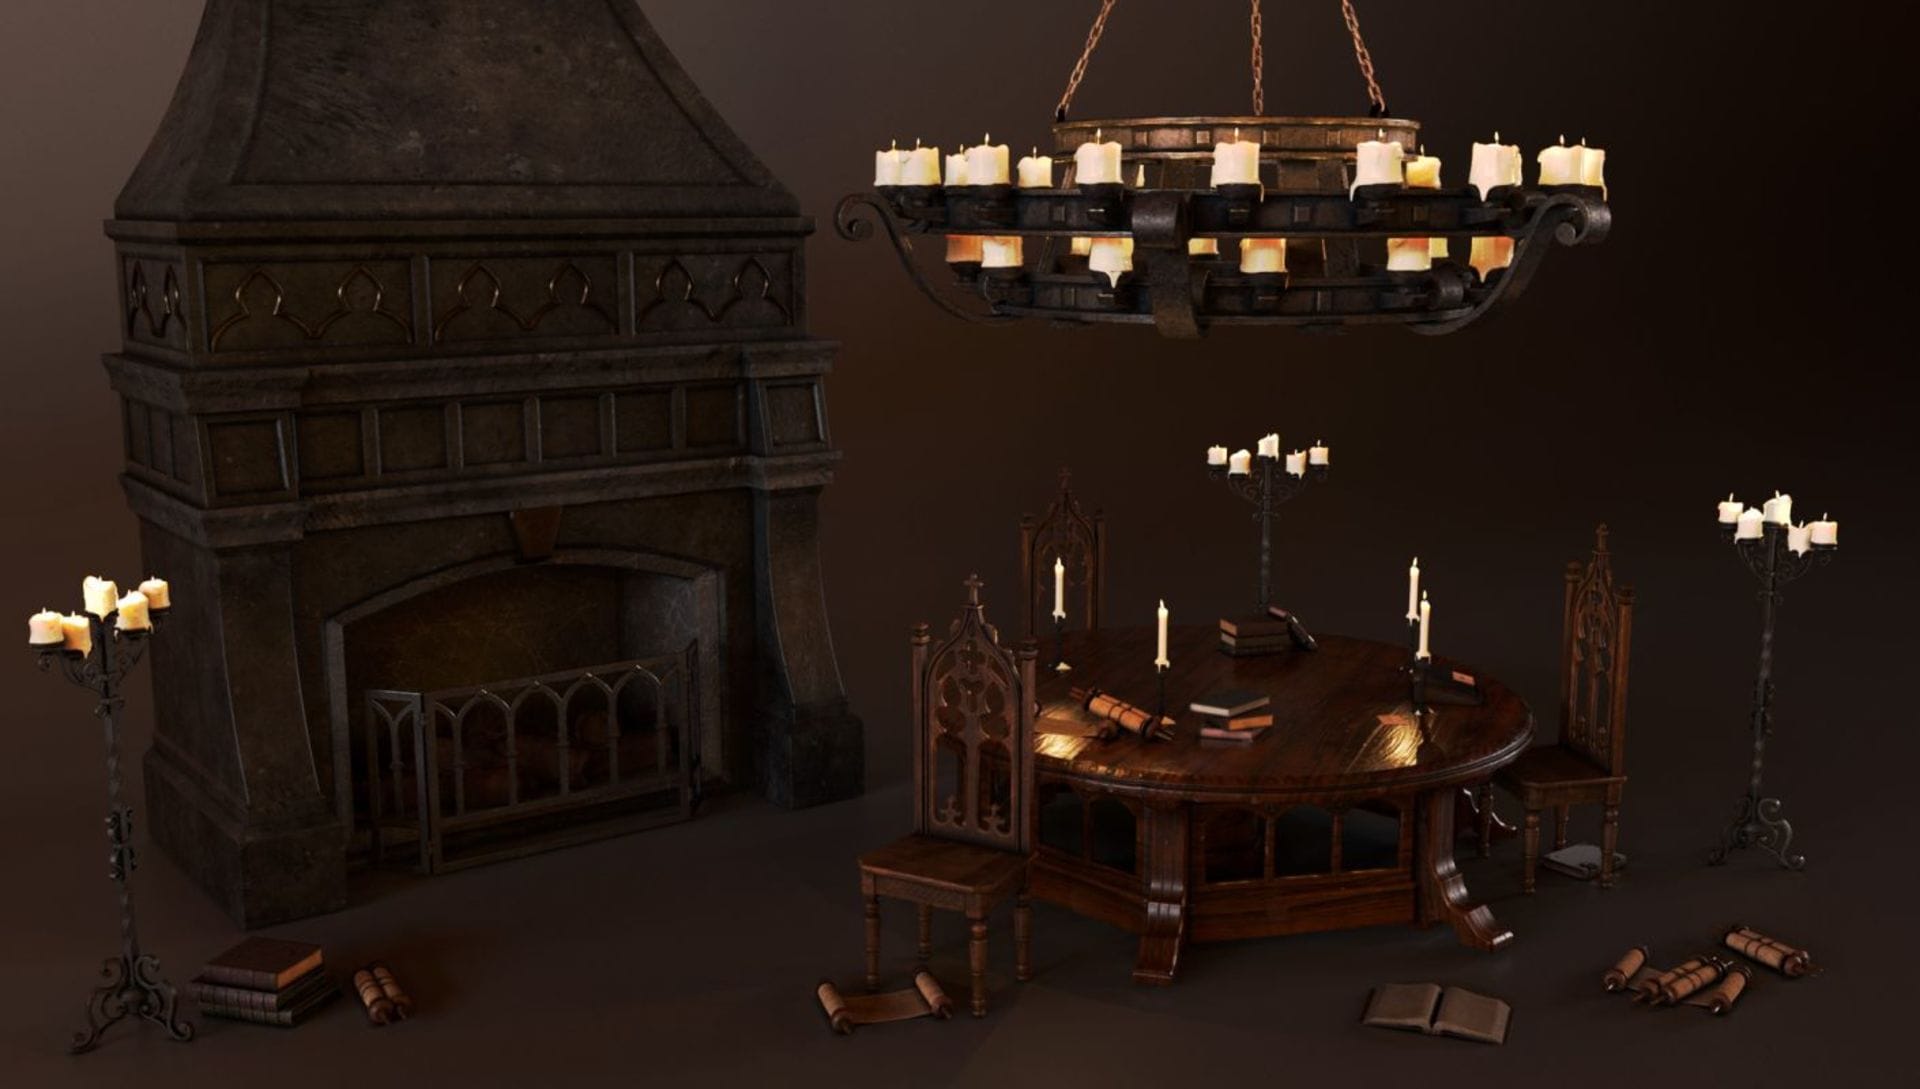
Alex Rivera: Environment — Assets and prop modeling/texturing:
I consulted our environment reference board to make sure all of the props felt like they belonged in our scene. Throughout the entire process, I wanted the scene to have a consistent polycount so that my team and I would have a good frame rate when working in the viewport inside Maya.
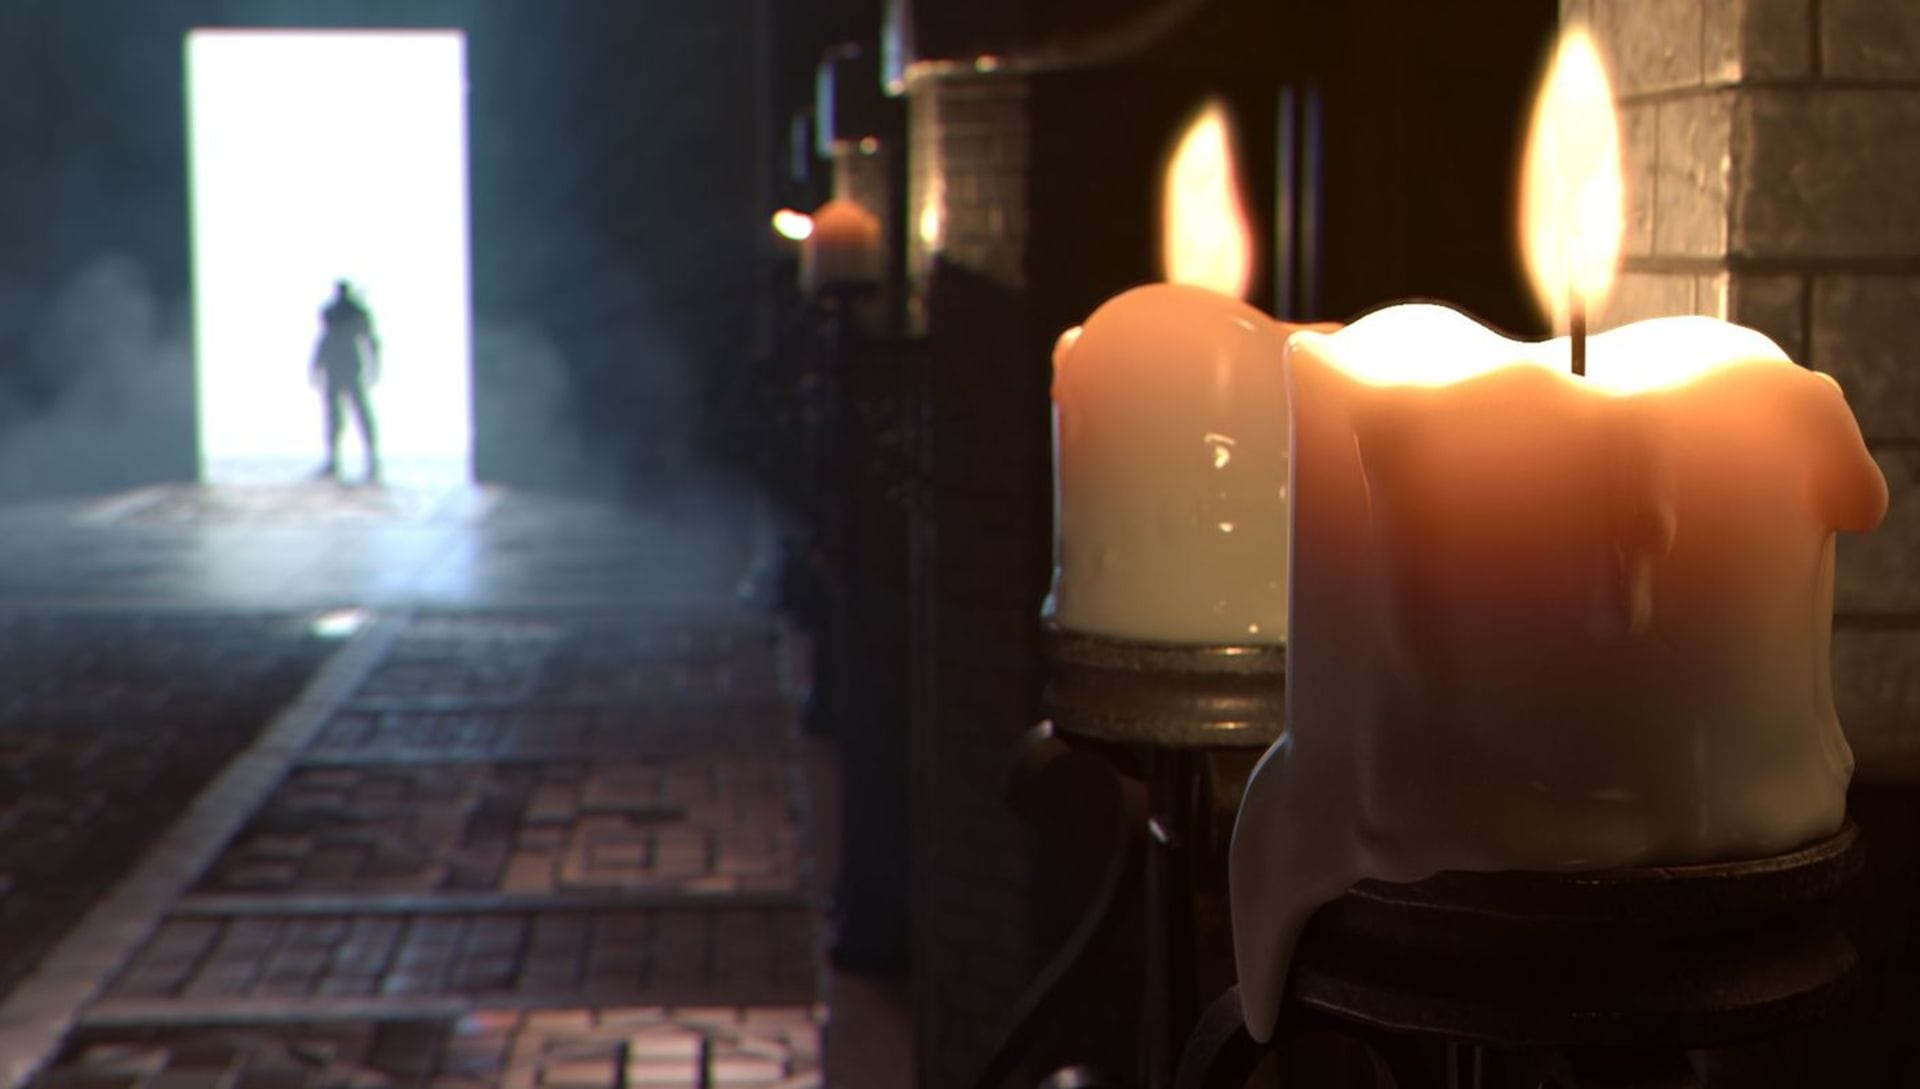
For modeling, everything had to be made low-poly and baked over with the high-poly in Substance Painter, because the assets we would have to duplicate a lot — such as the candles and books — would take up a lot of the polycount if they were subdivided. I designed the assets to reference the 12th Century when Gothic art was beginning to spread throughout Europe. I was also inspired by games like Dark Souls, Darksiders and Bloodborne.
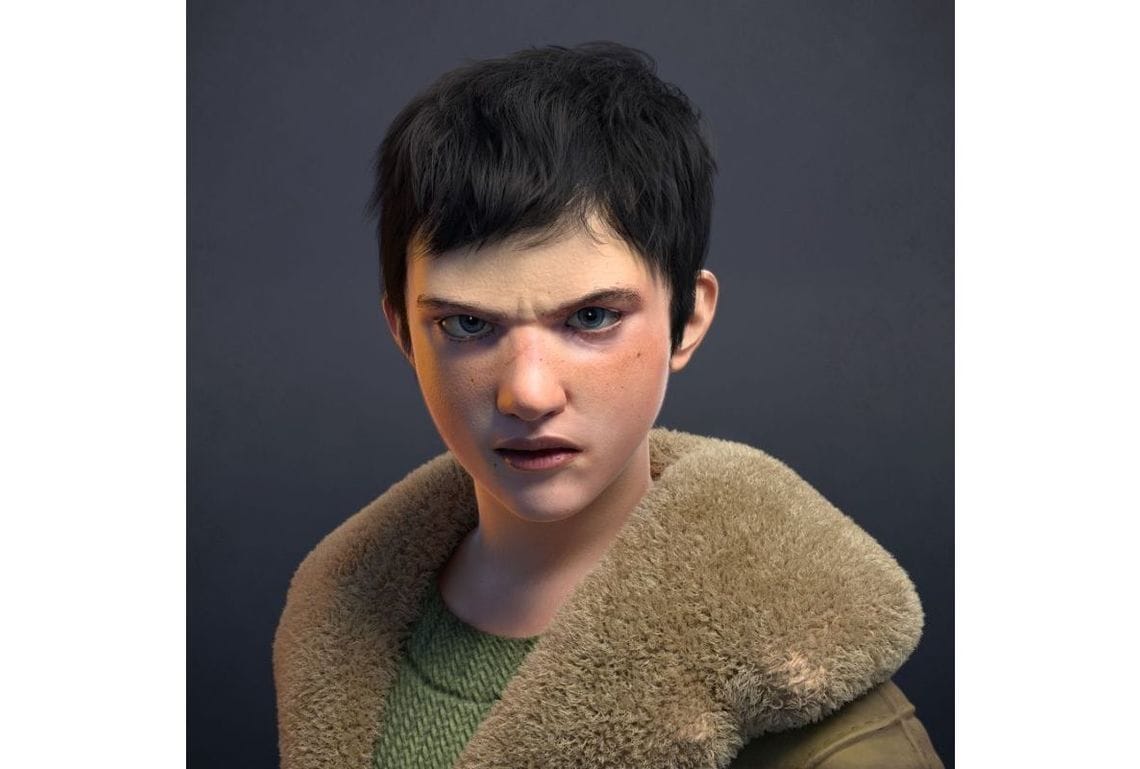
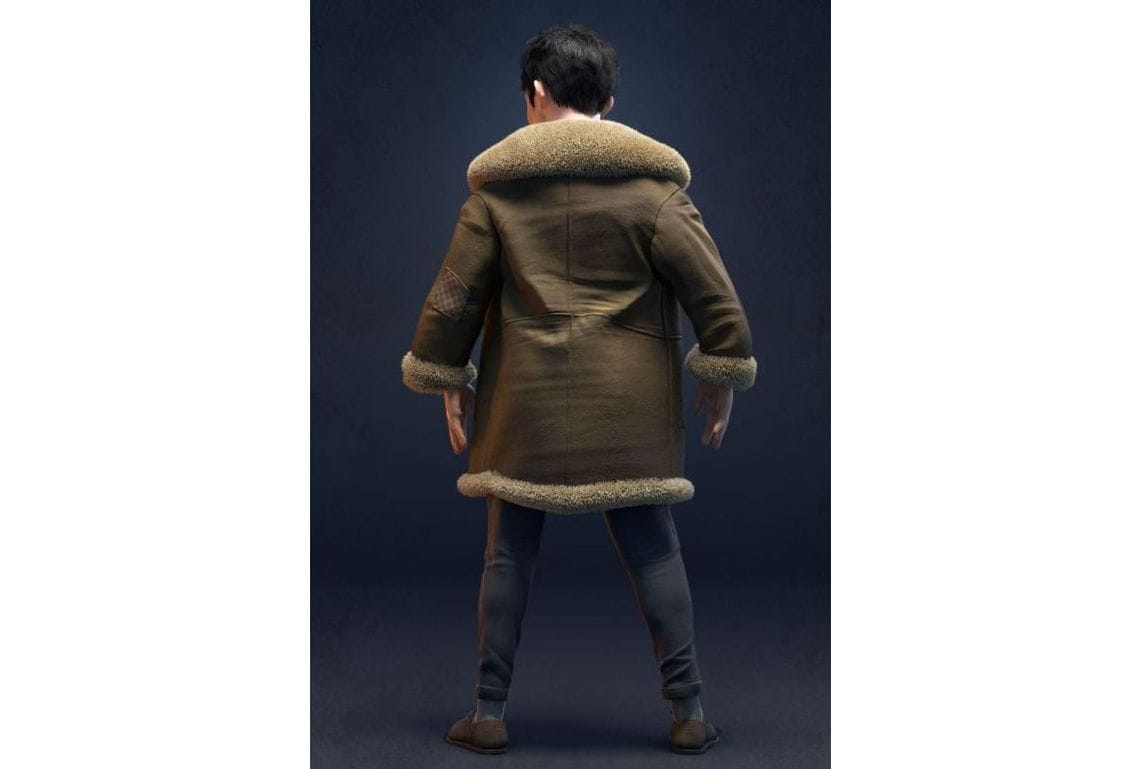
Damon Cimarusti: Characters — Will Stanton:
After reading the book I visualized a young English boy akin to Harry Potter or some of the characters from The Chronicles of Narnia. I sketched out an idea and then jumped right into ZBrush to start iterating and building. I was constantly referencing my favorite kid sculpts from Arda Koyuncu and Rafael Grassetti, while looking at real-world references to try and capture the spirit of a young boy. I worked very closely with Alec to try and stay on the same page when it came to quality.


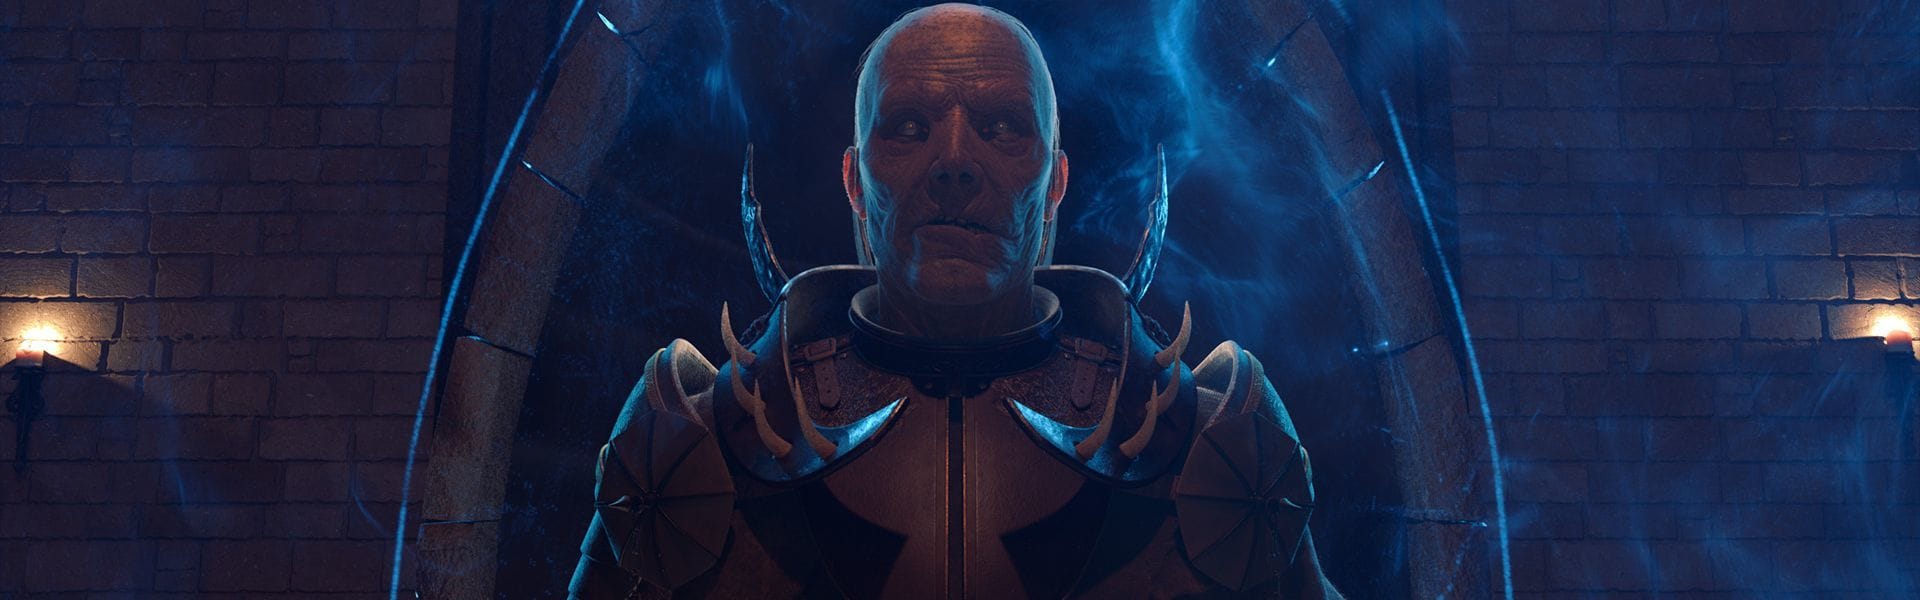
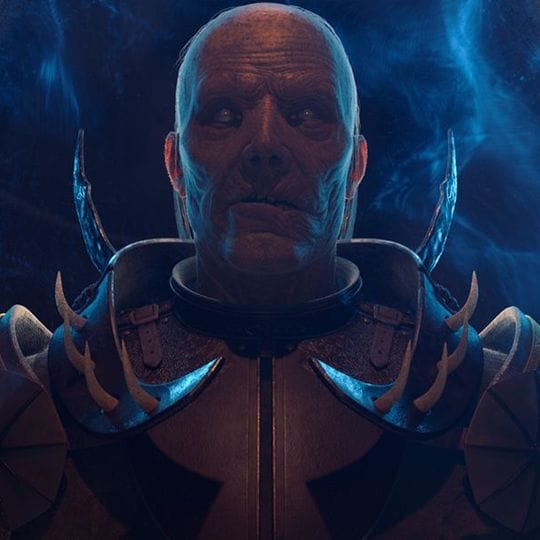
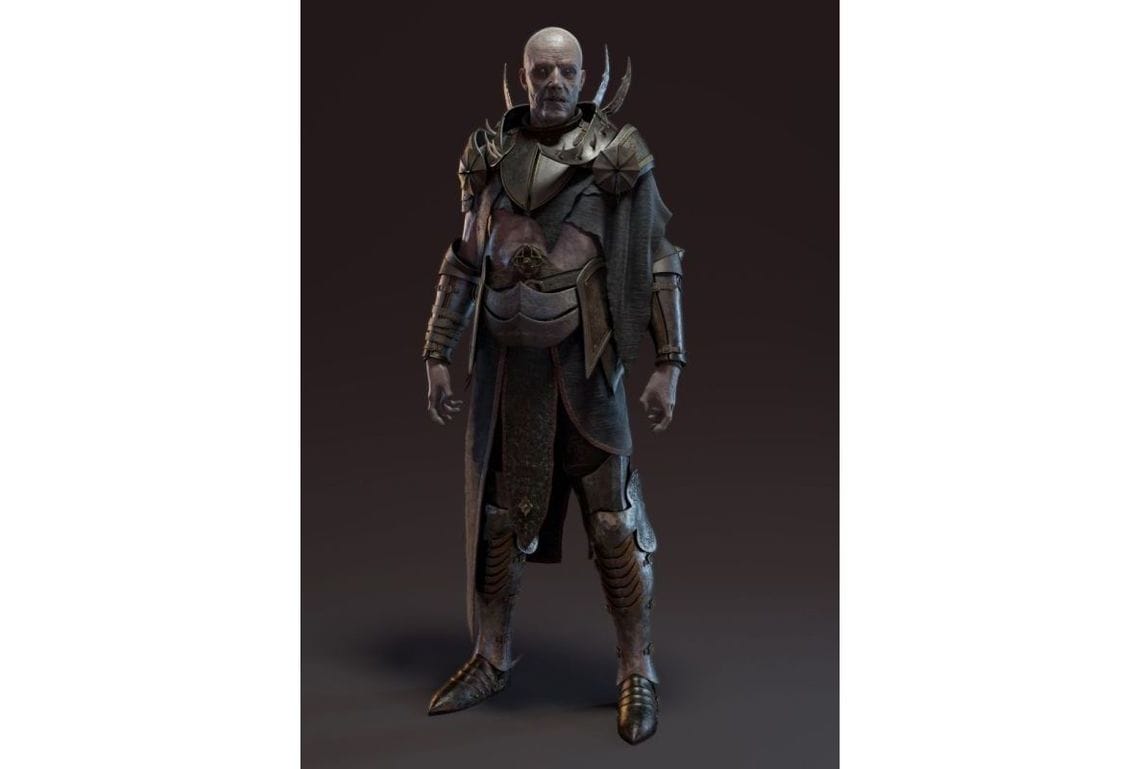
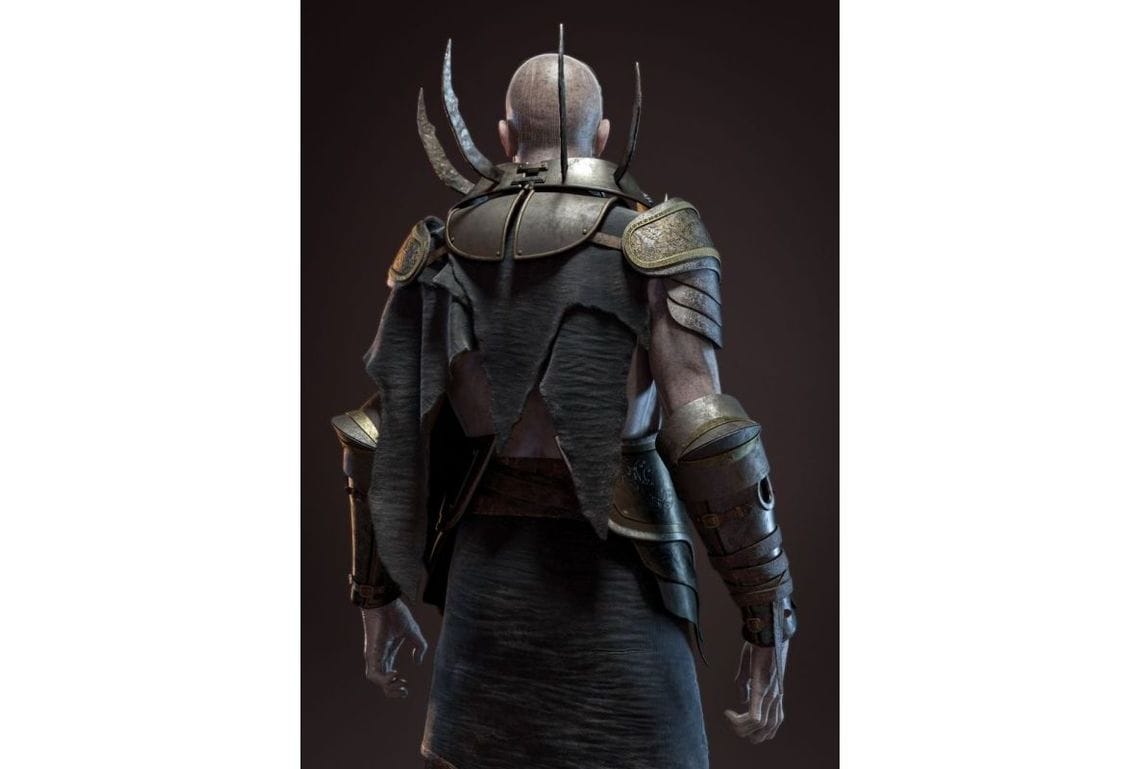
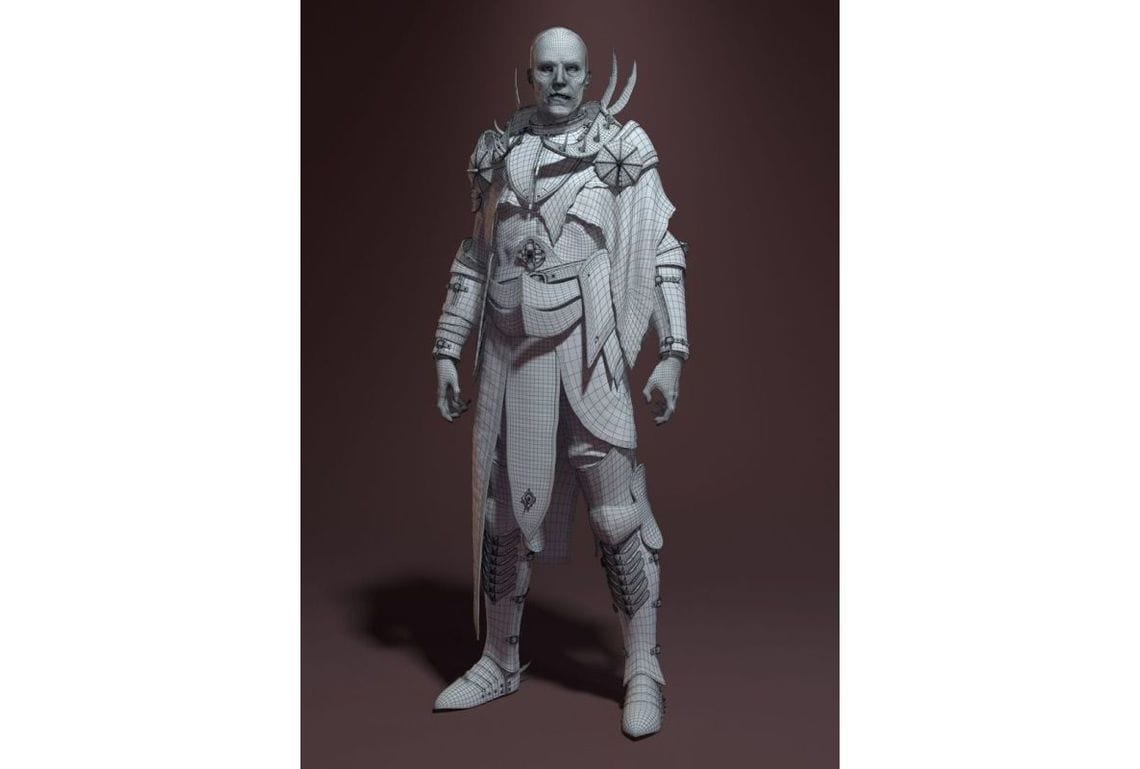
Alec Hunstad: Characters — The Rider:
We knew from the start of the project that we wanted to create a dark fantasy cinematic in a Gothic setting. With that in mind, I immediately saw The Rider as a menacing, scarred villain in Gothic armor whose only purpose was to overtake “the Light.” Even before I began reading the book, I had an idea of the direction in which I wanted to take The Rider. Like Damon, I referenced some of my favorite artists for inspiration and found real-world images of armor and scars to observe for shape and texture. I also found high-res images of Weta’s practical armor sets from The Lord of the Rings and The Hobbit that heavily influenced The Rider’s design.

What did you use for the particle animations?
Manan Bachkaniwala — VFX:
For the FX side, I created the blizzard when the doors open using Maya fluids. The fluids were advected using a particle system outside the doors and the motion was controlled mainly through the Maya’s volume axis fields. I used the same fluid system to advect particles, on which I later used to instance snowflakes.
The portal particles were created using Maya nParticles. There was a particle system for the base with a lifespan of less than 0.05. This was later used to drive fluids with high velocity and turbulence, which acted as the base from which the final particles were advected. These particles were later partitioned and rendered using Krakatoa and composited with the shots from V-Ray using NukeX.
I handled the rigid body dynamics for the portal using Houdini. The portal was fractured in a normal fashion and then I used the timewarp node to reverse the whole simulation once it was cached as an Alembic.
Did you use any cool or interesting V-Ray features?
Team Dark Horse:
We made heavy use of V-Ray’s Interactive Progressive Renderer (IPR) feature to help us develop everything from lighting to textures and to see our results quickly. This allowed us to make changes on the fly and get the best result as quickly as possible. Using V-Ray’s Al Surface Shader with some material blending techniques, we could develop a believable look for the skin with a lot of flexibility.
We also leveraged many V-Ray Render Elements such as Normals, Cryptomattes and Atmosphere to ensure flexibility when building the final shots in compositing. Small things like using “override shape lights” to keep the V-Ray Environment Fog limited to only one driving light were essential to keeping render costs low and quality high.
V-Ray is very deep and tuneable, which allows for constant tweaking and iteration. This meant we could leverage V-Ray’s capabilities and achieve a quality of work that we wouldn’t be able to in other renderers.
Team Dark Horse, Gnomon School
What do you like about using V-Ray for these projects?
Team Dark Horse:
We’ve all been using V-Ray for a while now and are the most comfortable with its workflow. V-Ray is very deep and tuneable, which allows for constant tweaking and iteration. This meant we could leverage V-Ray’s capabilities and achieve a quality of work that we wouldn’t be able to in other renderers. The most useful part of our V-Ray workflow was the ability to work with low settings to check our progress, and then crank the values up to get a final render. This eliminates most of the guesswork when waiting for renders.
You were up against a tight deadline — what did you do to ensure your renders were fast but good-looking?
Team Dark Horse:
We knew early on that the length and complexity of our project would absolutely halt us when we came to render time but Carlos found a service called Zync, a render farm that Google offers, that allowed us to get high-quality renders done in a very timely manner. Though that proved to be challenging in itself, we were able to develop an efficient workflow for getting our renders done and focus more on the artistic quality of our shots.
We had to tweak a lot of settings, such as V-Ray thresholds and GI calculations, to find a balance of speed and quality. When sending to the farm, we used V-Ray standalone to ensure stability and improve upload speed. We made use of local subdivs to improve efficiency in our renders and eliminate waste on things that didn’t need high subdivisions.
How did you find working together?
Team Dark Horse:
We were very lucky to have the opportunity to work as a team on this project. We’d been in classes together for a few terms and we had a shared respect for each other’s work. We built chemistry fast and there wasn’t any conflict because we used our strengths for different parts of the workflow.
We worked side-by-side on every step of the project, constantly pushing it forward. In the last half of the project, we would meet on our campus every night and work until the school closed to ensure that everything got done. The biggest factor was that we all had fun together! Work sessions would be full of dumb jokes and constant teasing, which kept spirits high in the face of our daunting deadline.
What’s next?
Team Dark Horse:
We’re all going to miss working together as we move forward through Gnomon and out into the industry, but we’ll always remember doing this project. Right now, we’re each working individually on our various Gnomon assignments and trying every day to improve ourselves as artists and people.
See more Best of Term-winning artwork from Gnomon School students in Hollywood.