

Ray tracing and cameras
When you want to create a photorealistic CG image, ray tracing has a clear advantage over rasterization. By its very nature, a ray tracer works just like a real work camera, where it not only simulates the way light travels inside a space, but also how that light enters the camera. With V-Ray’s Physical Camera you can imitate all the effects of a real-world camera including F-stop, shutter speed, depth of field, bokeh effects, lens distortion, tilt/ shift and more. But until now, this required a manual process to adjust the settings for exposure, white balance, etc.
For some pro photographers, adjusting camera settings is like second nature and they only shoot in manual mode. But for most of us, it’s nice to have the option to automate these settings. It makes it easier to just point and shoot (or render) without worrying about it. We've applied the same idea to V-Ray Next Beta 1 for 3ds Max, where we've added Automatic Exposure and Automatic White Balance controls.
Automation in V-Ray Next
Like many of the new smart features in V-Ray Next, the new Automatic Exposure and Automatic White Balance controls rely on our adaptive learning techniques to render the best result. By looking at the entire scene, V-Ray can automatically determine the proper exposure and white balance just as a modern camera would — but with one added advantage. V-Ray automatically adjusts the ISO value without changing the F-stop or shutter speed, which lets you control depth of field and motion blur separately.
Automation speeds up your workflow
Have you ever tried lighting a scene, and you find yourself tweaking light intensities to get the right exposure? Or you set your F-stop to a perfect depth of field, only to have your render come out overexposed? Maybe you used an HDR that was a bit too blue, and you had to manually fix the HDR or the camera’s white balance to compensate. No matter what tricks you used, that process can take up valuable time.
With the new automatic exposure in V-Ray Next, you no longer have to worry about dialing in your settings. You can simply pick your lens and aperture and V-Ray will create a neutral exposure for you. And with automatic white balance, you can use almost any HDR to light your scene without having to worry about the overall color cast.
How Automation can affect quality and speed
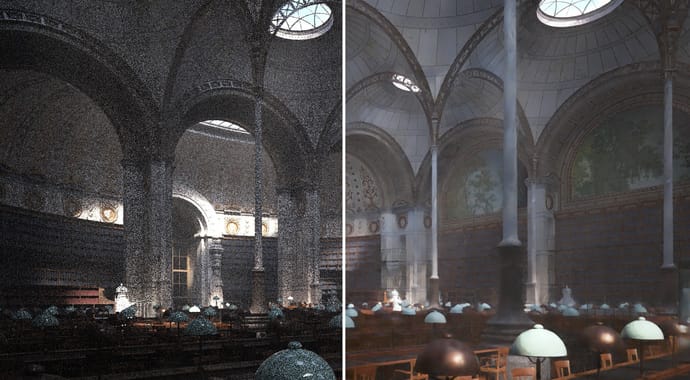
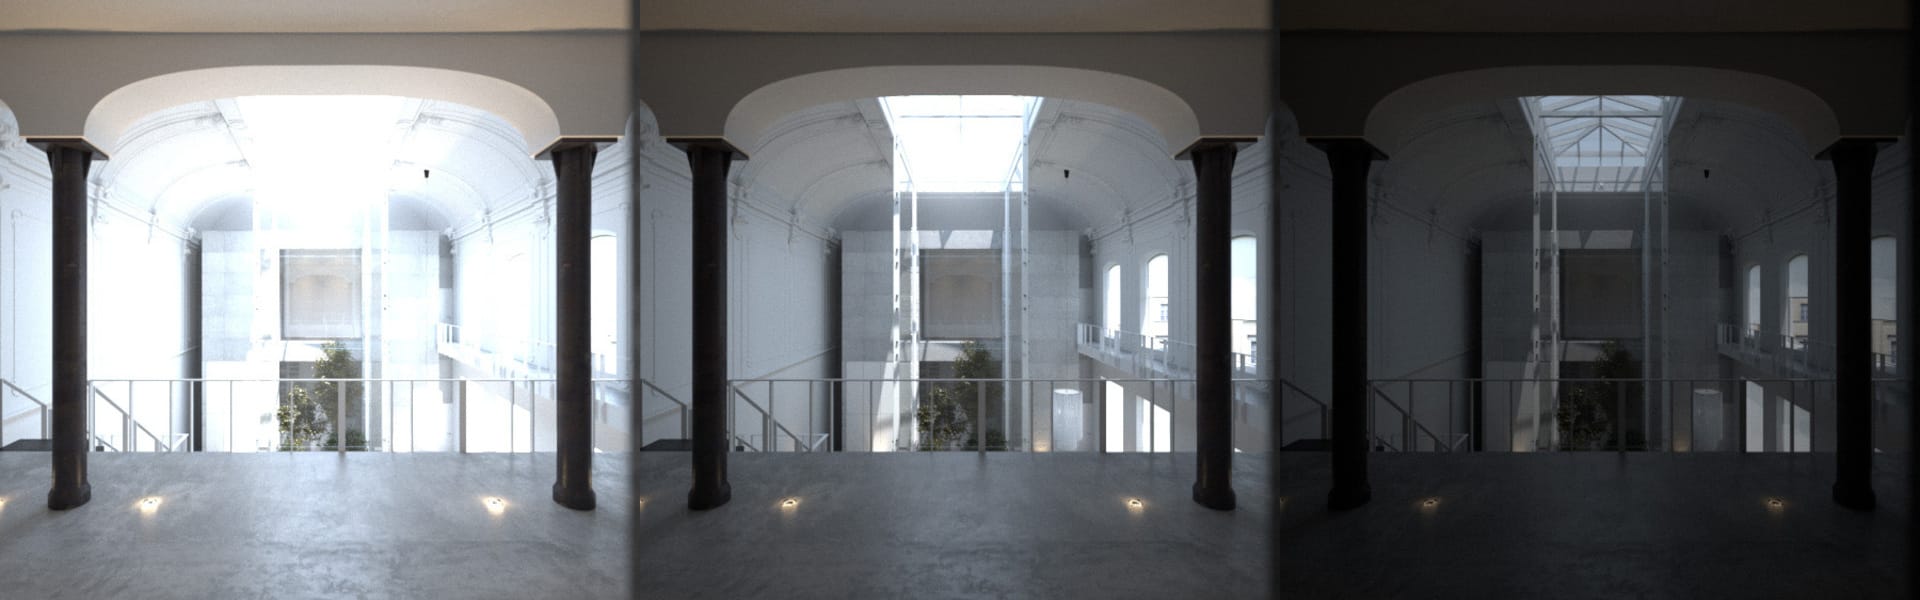
Manually setting up a camera can take a bit of guesswork and trial and error to prevent your renders from being under or overexposed. You may even adjust the exposure in post, but this can negatively impact both your image quality and your render times.
For example, if your rendering is too overexposed, it calculates extra samples in overly bright areas, and your render times may take longer as a result.
Render with Automatic Exposure enabled: 4 mins 4 secs
Render overexposed by 1 stops: 6 mins 7 secs

Overexposed image with exposure lowered by one stop in post.
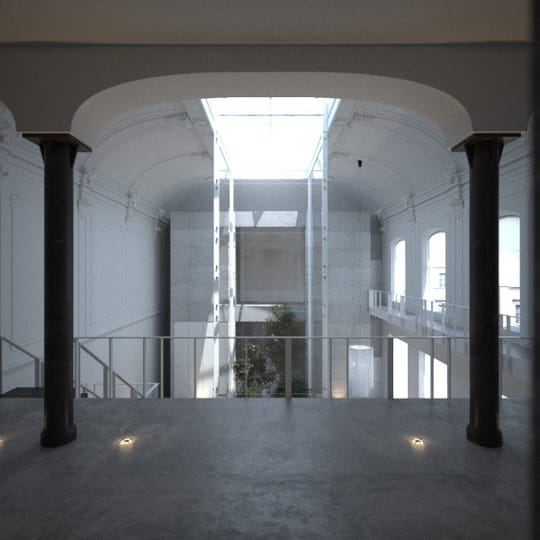
On the other hand, if your rendering is underexposed and you increase the exposure in post, you’ll reveal noise in the dark areas. In both cases, you miss the optimal noise threshold. Auto exposure fixes that problem.
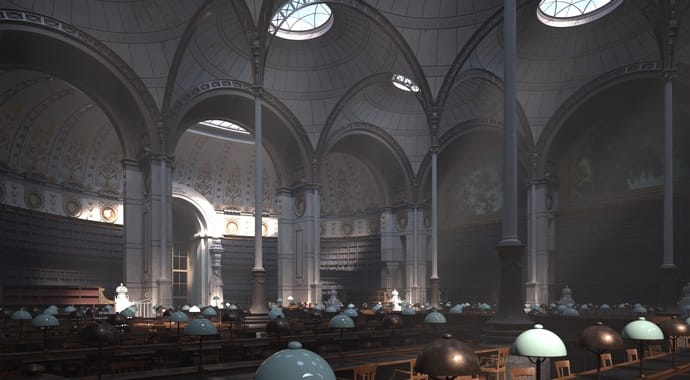
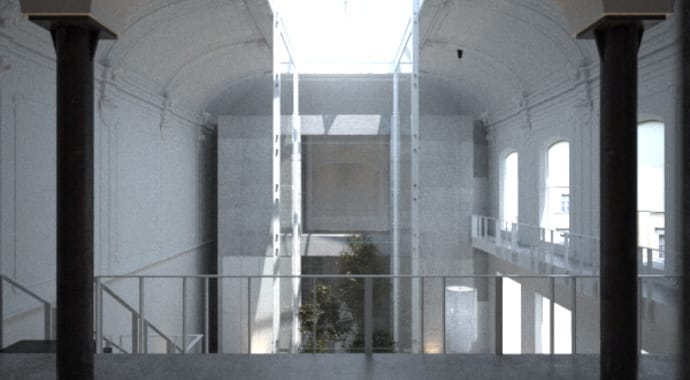
Render with Automatic Exposure enabled
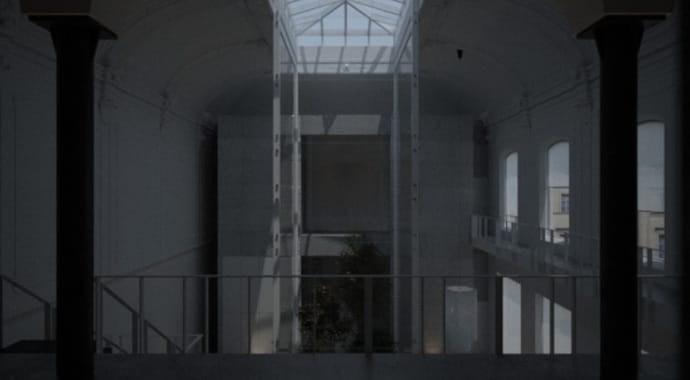
Render underexposed by 2 stops
Underexposed image gained up by 2 stops revealing noise
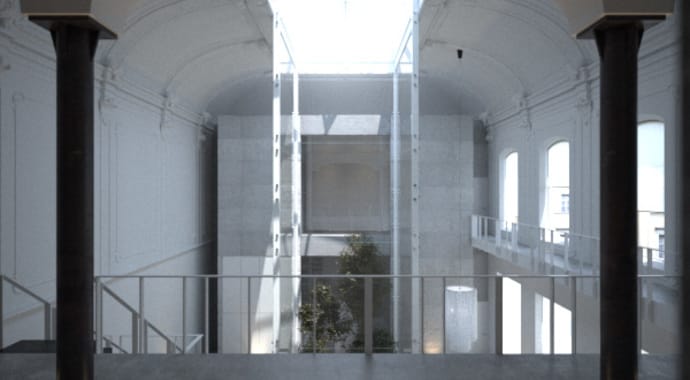
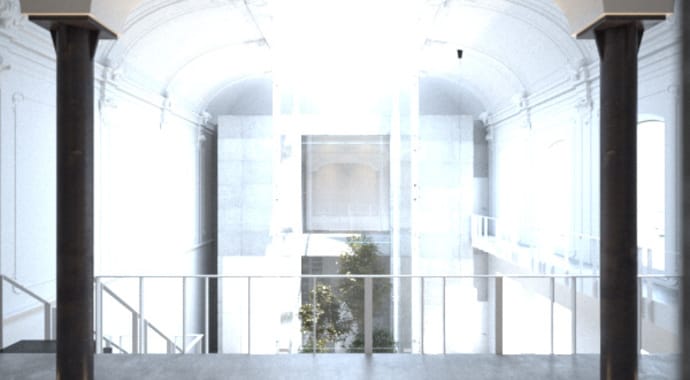
The same is true for white balance. If you use a very warm-toned HDR, you may need to adjust your render in post to cool it back down. But when you gain-up the underexposed blue pixels, your image may become noisy.
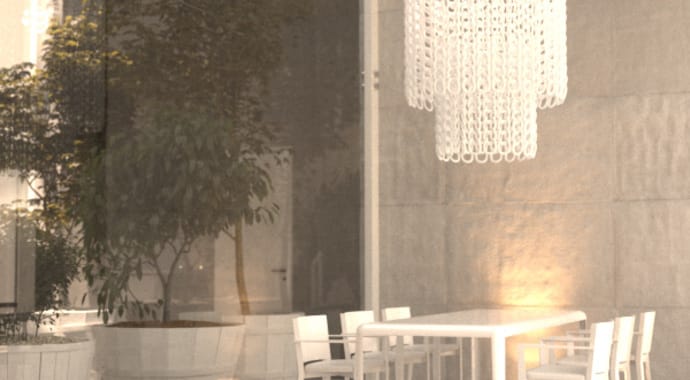
Render with an HDR that is overall too warm
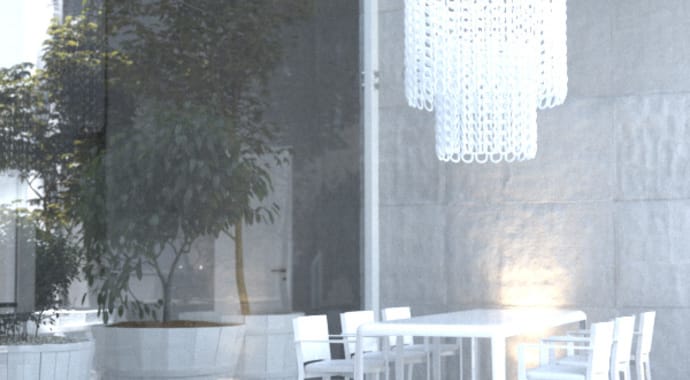
Same render with Automatic White Balance turned on
That’s not to say you shouldn’t adjust your render in post. The key is that a proper exposure will give you a better balance of speed, quality and noise.
Conclusion
The new Auto Exposure and Auto White Balance in V-Ray Next are perfect for anyone looking for a shortcut around using manual cameras. Not only will it help save you set up time, you’ll also get a better balance of render speed and quality as well. It’s also much easier to explore a scene and work in IPR without having to constantly adjust the camera exposure.
V-Ray 3.x for 3ds Max customers can register for the V-Ray Next Beta and try out the automatic camera controls right now. Many V-Ray Next features will also be available for other platforms in the future.