Chaos
Architecture

Industry solutions

Explore our ecosystem

Products

Media & Entertainment

Industry solutions

Explore our ecosystem

Products

Product & E-Commerce

Industry solutions

Explore our ecosystem

Products

Education & Community
The State of AI in Architecture.

New insights from 1,200+ architects.

Help

Chaos Help Center


What are you looking for?

Untextured clay render of 3D female character model
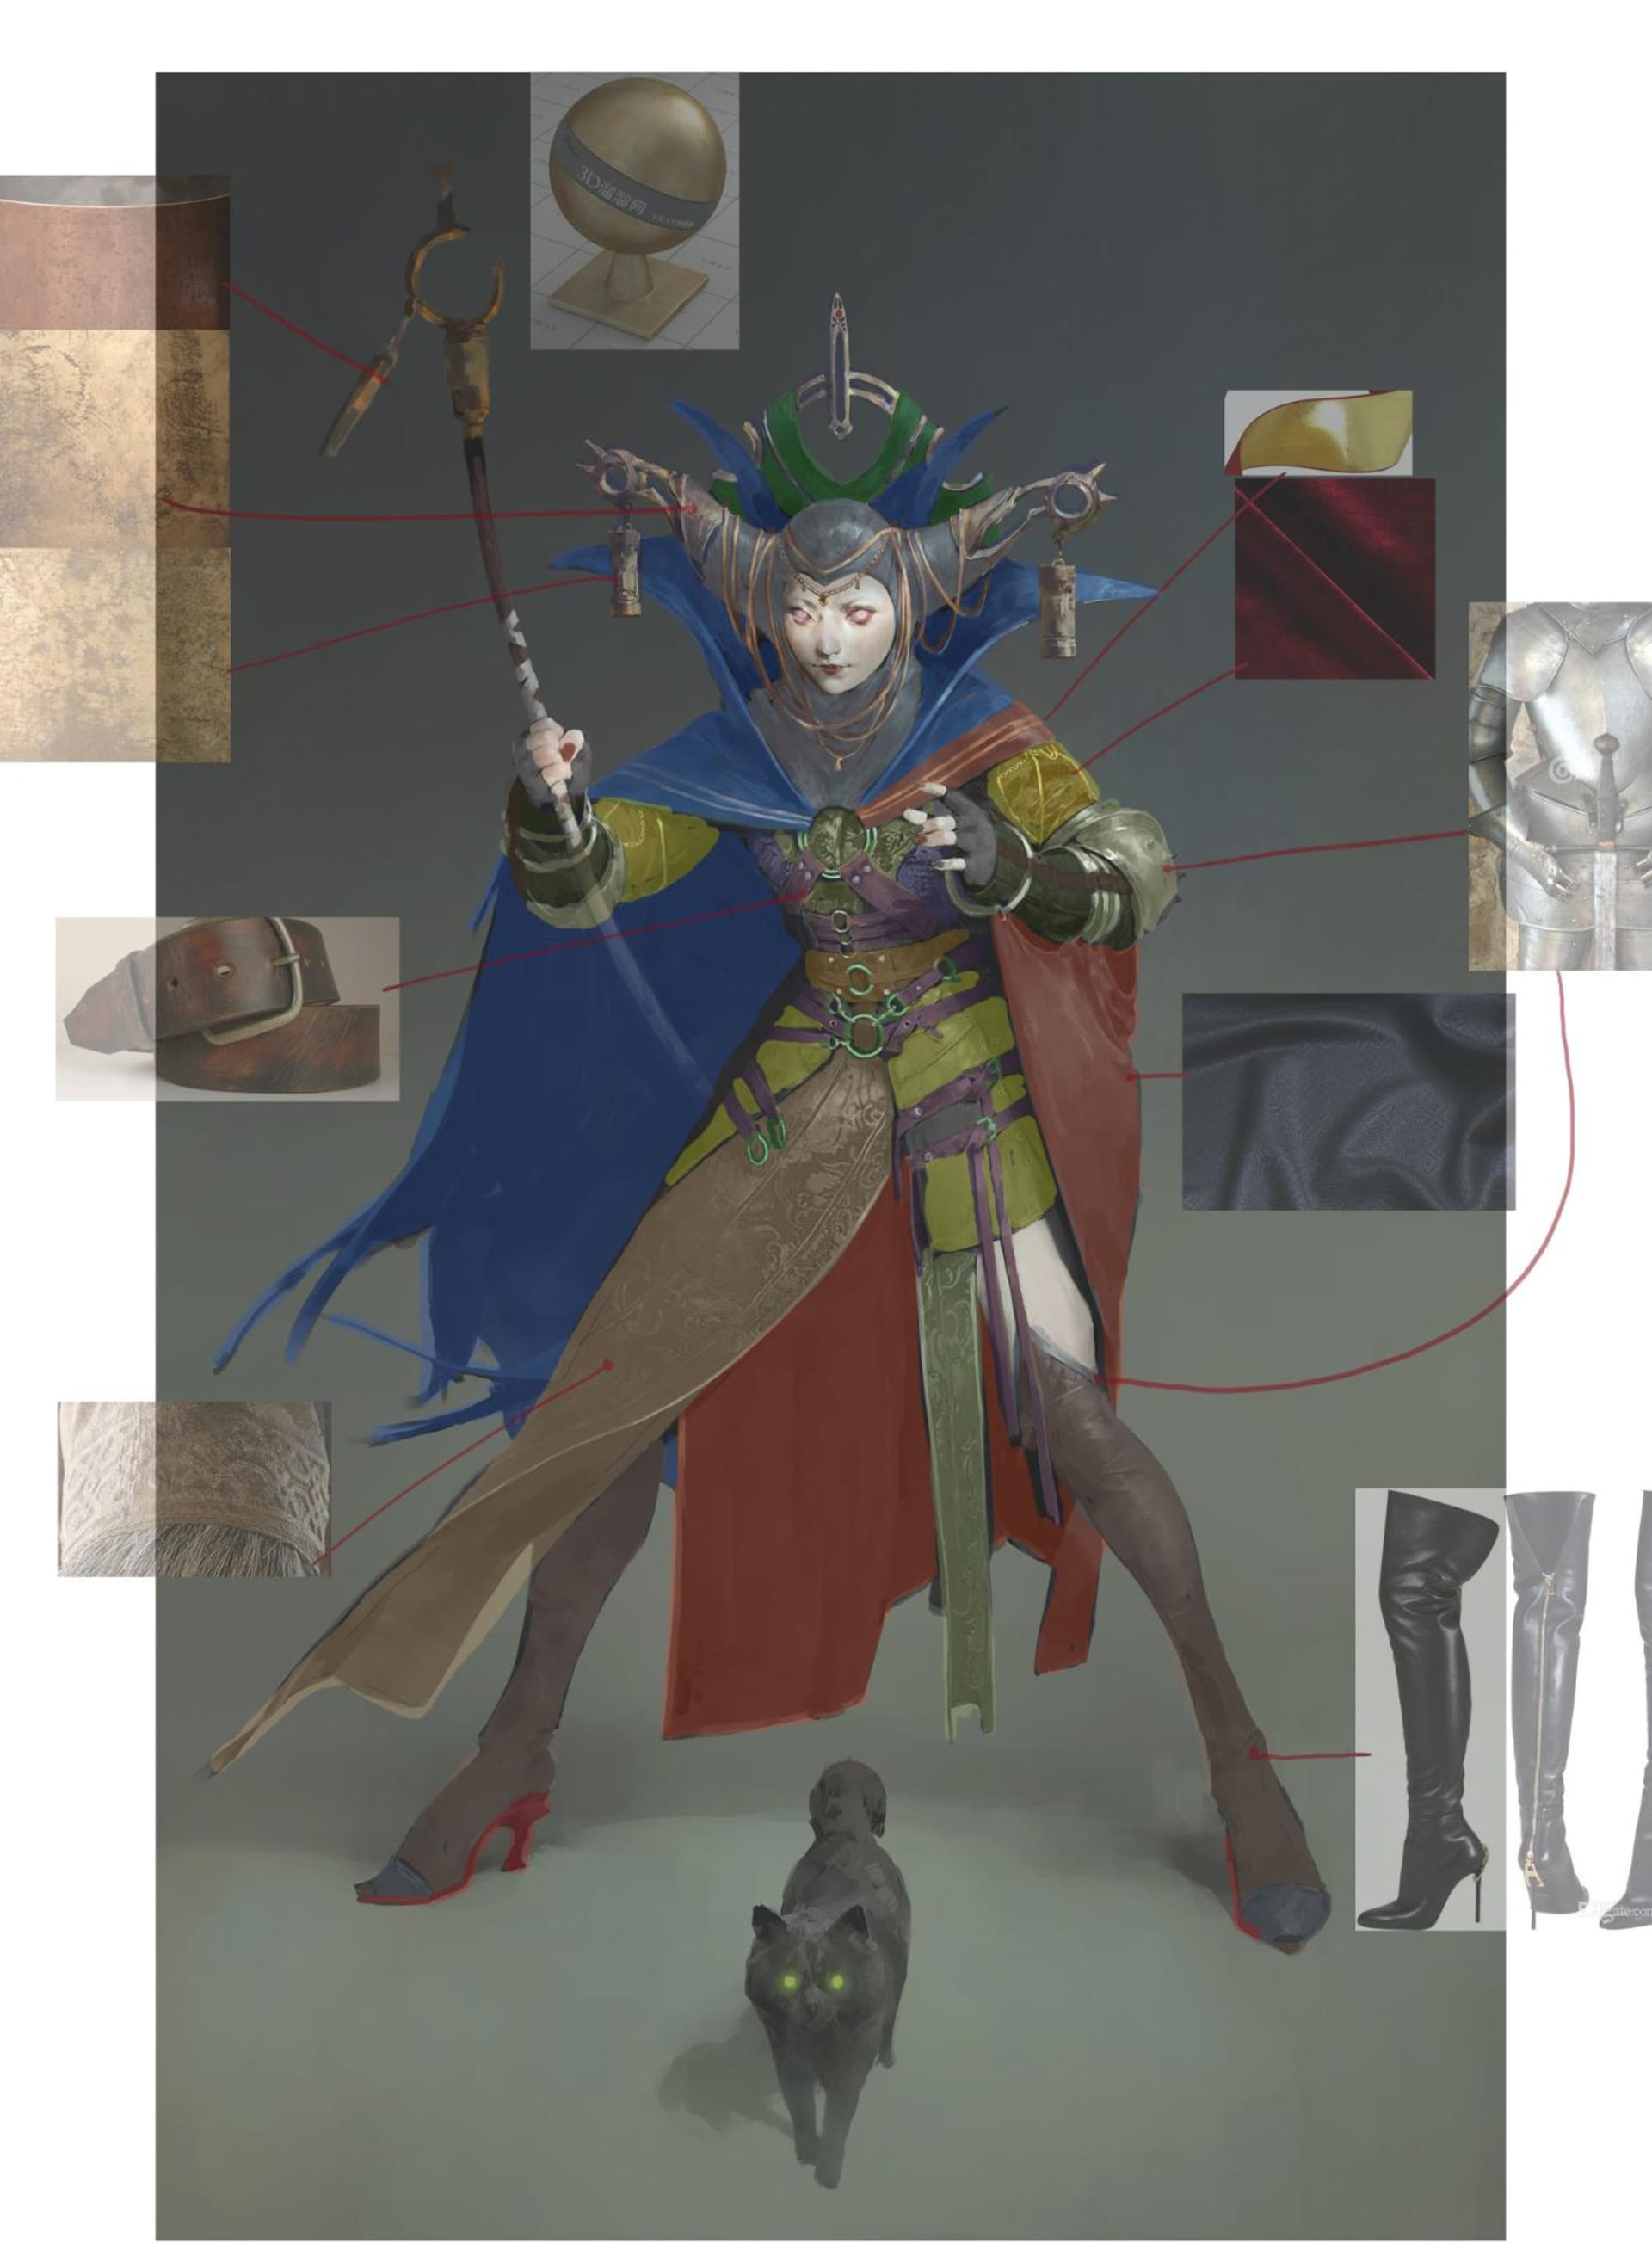
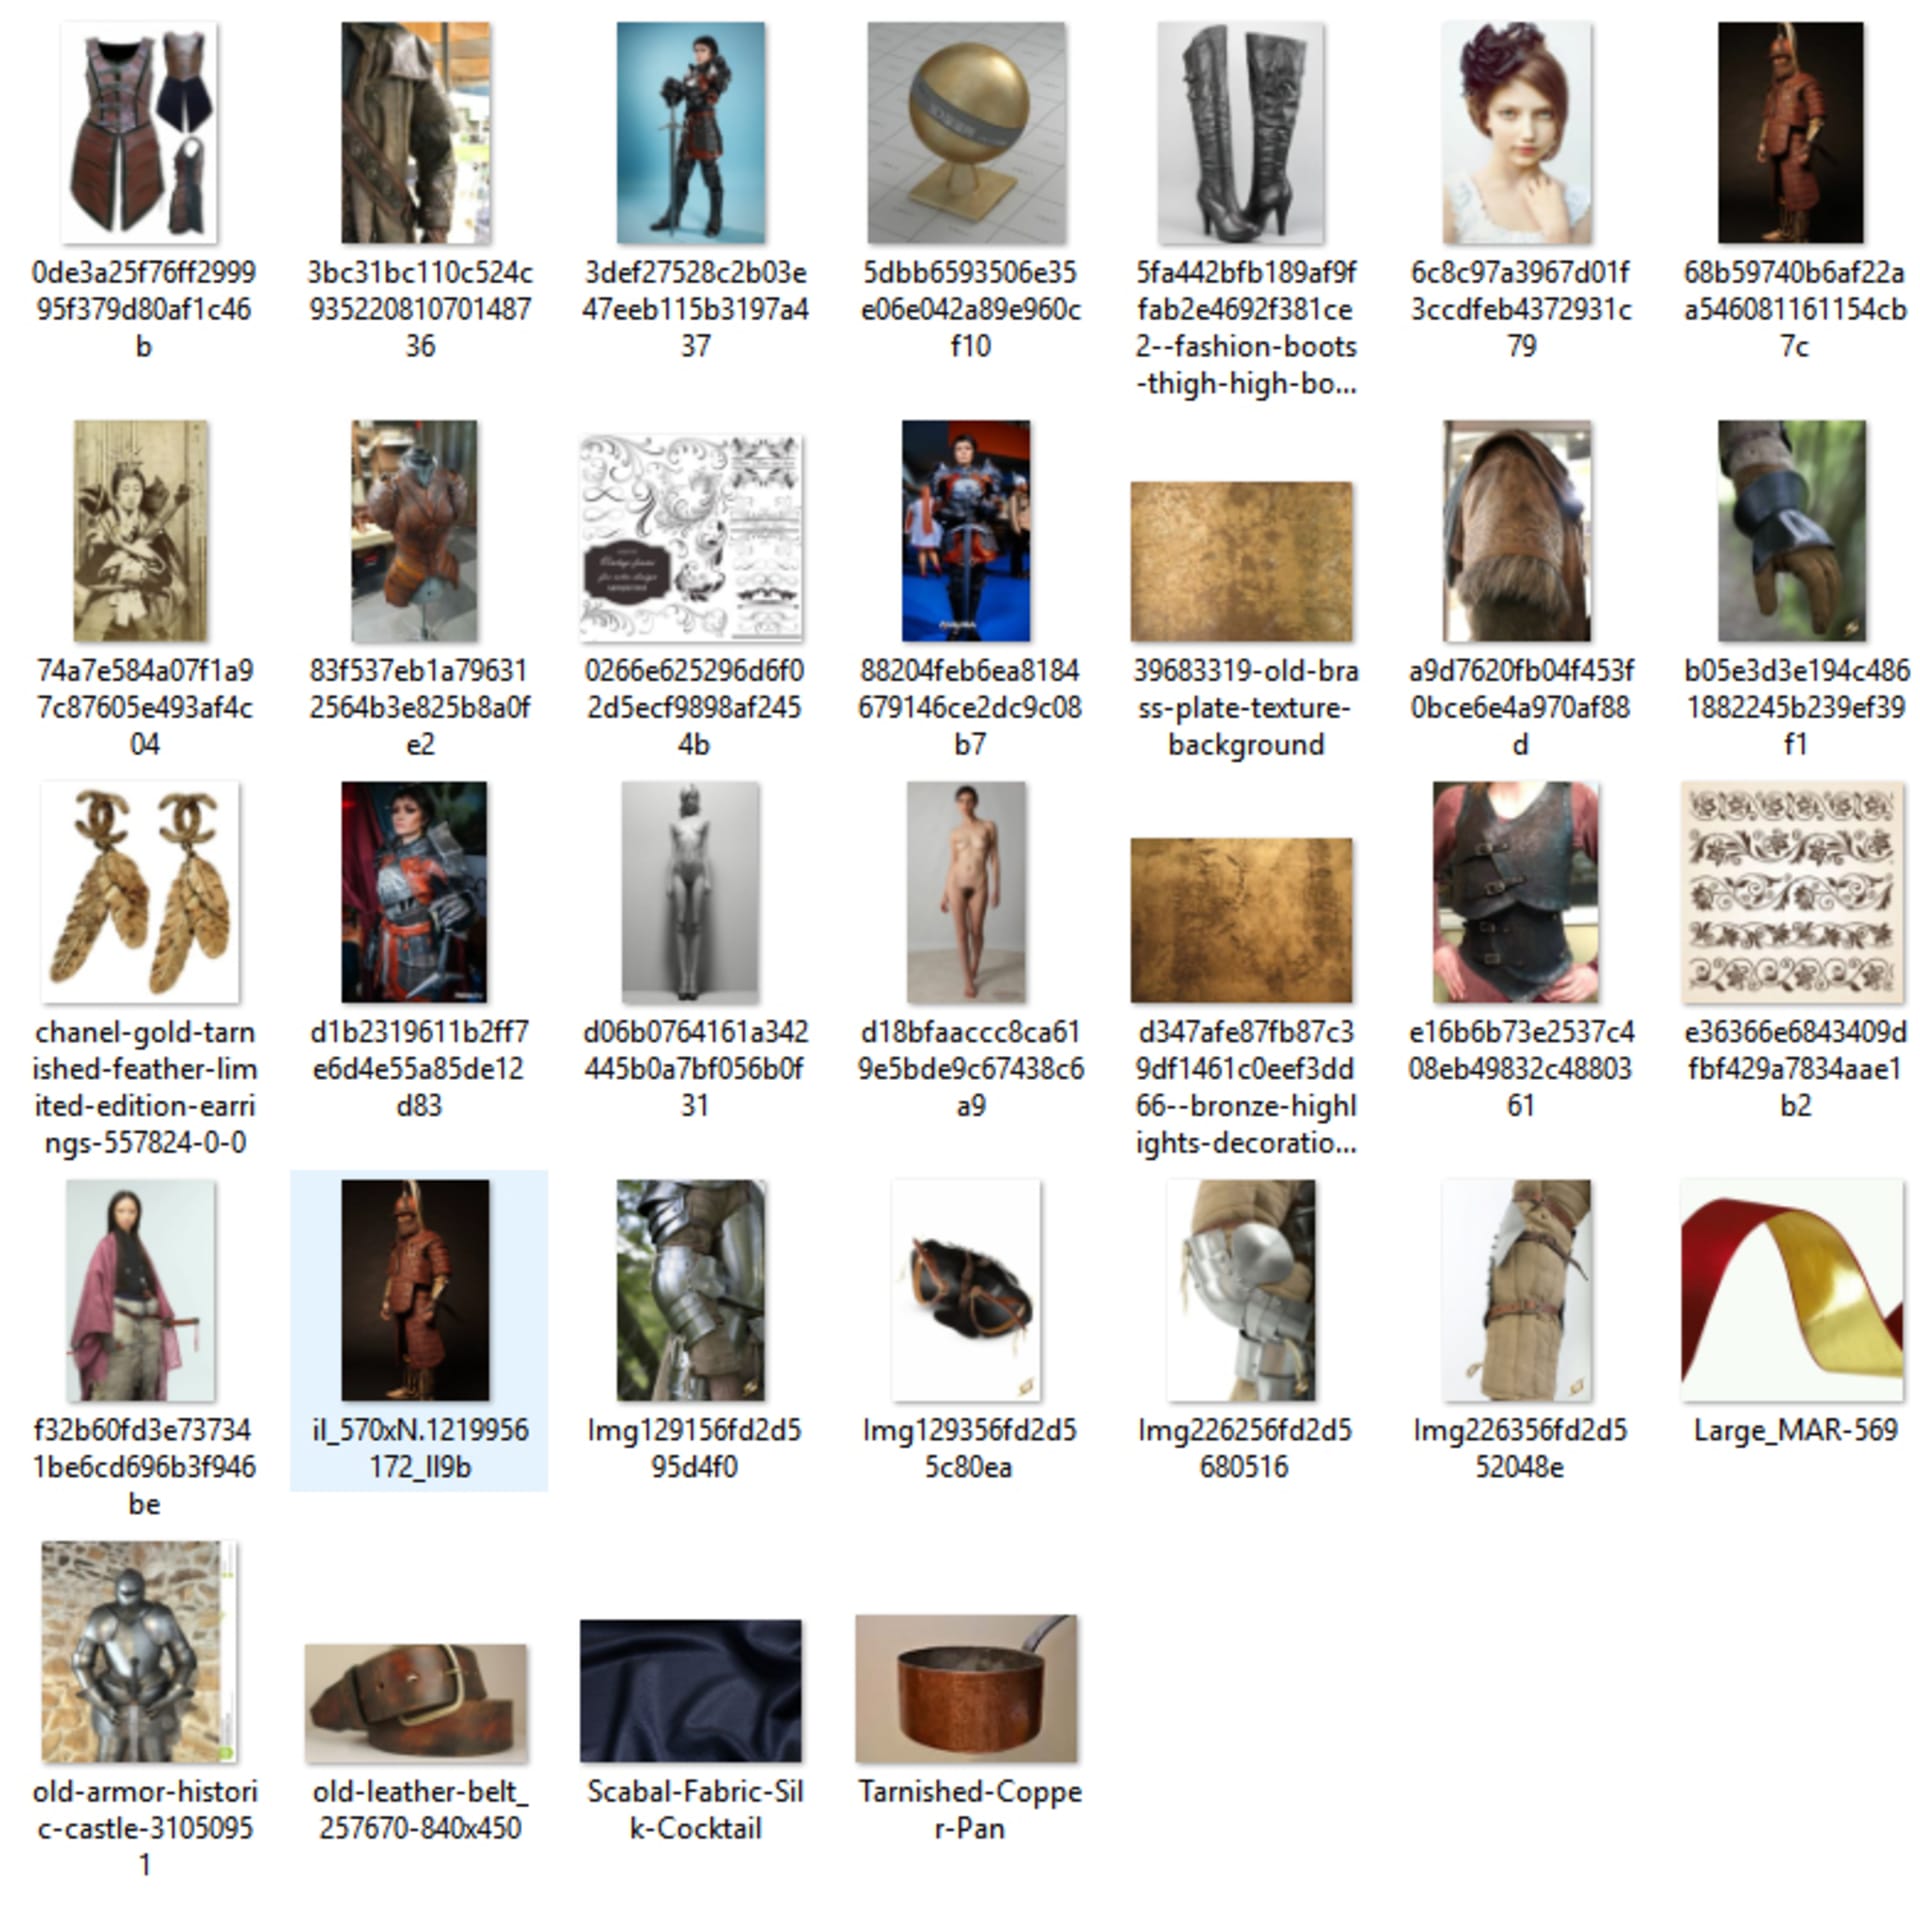
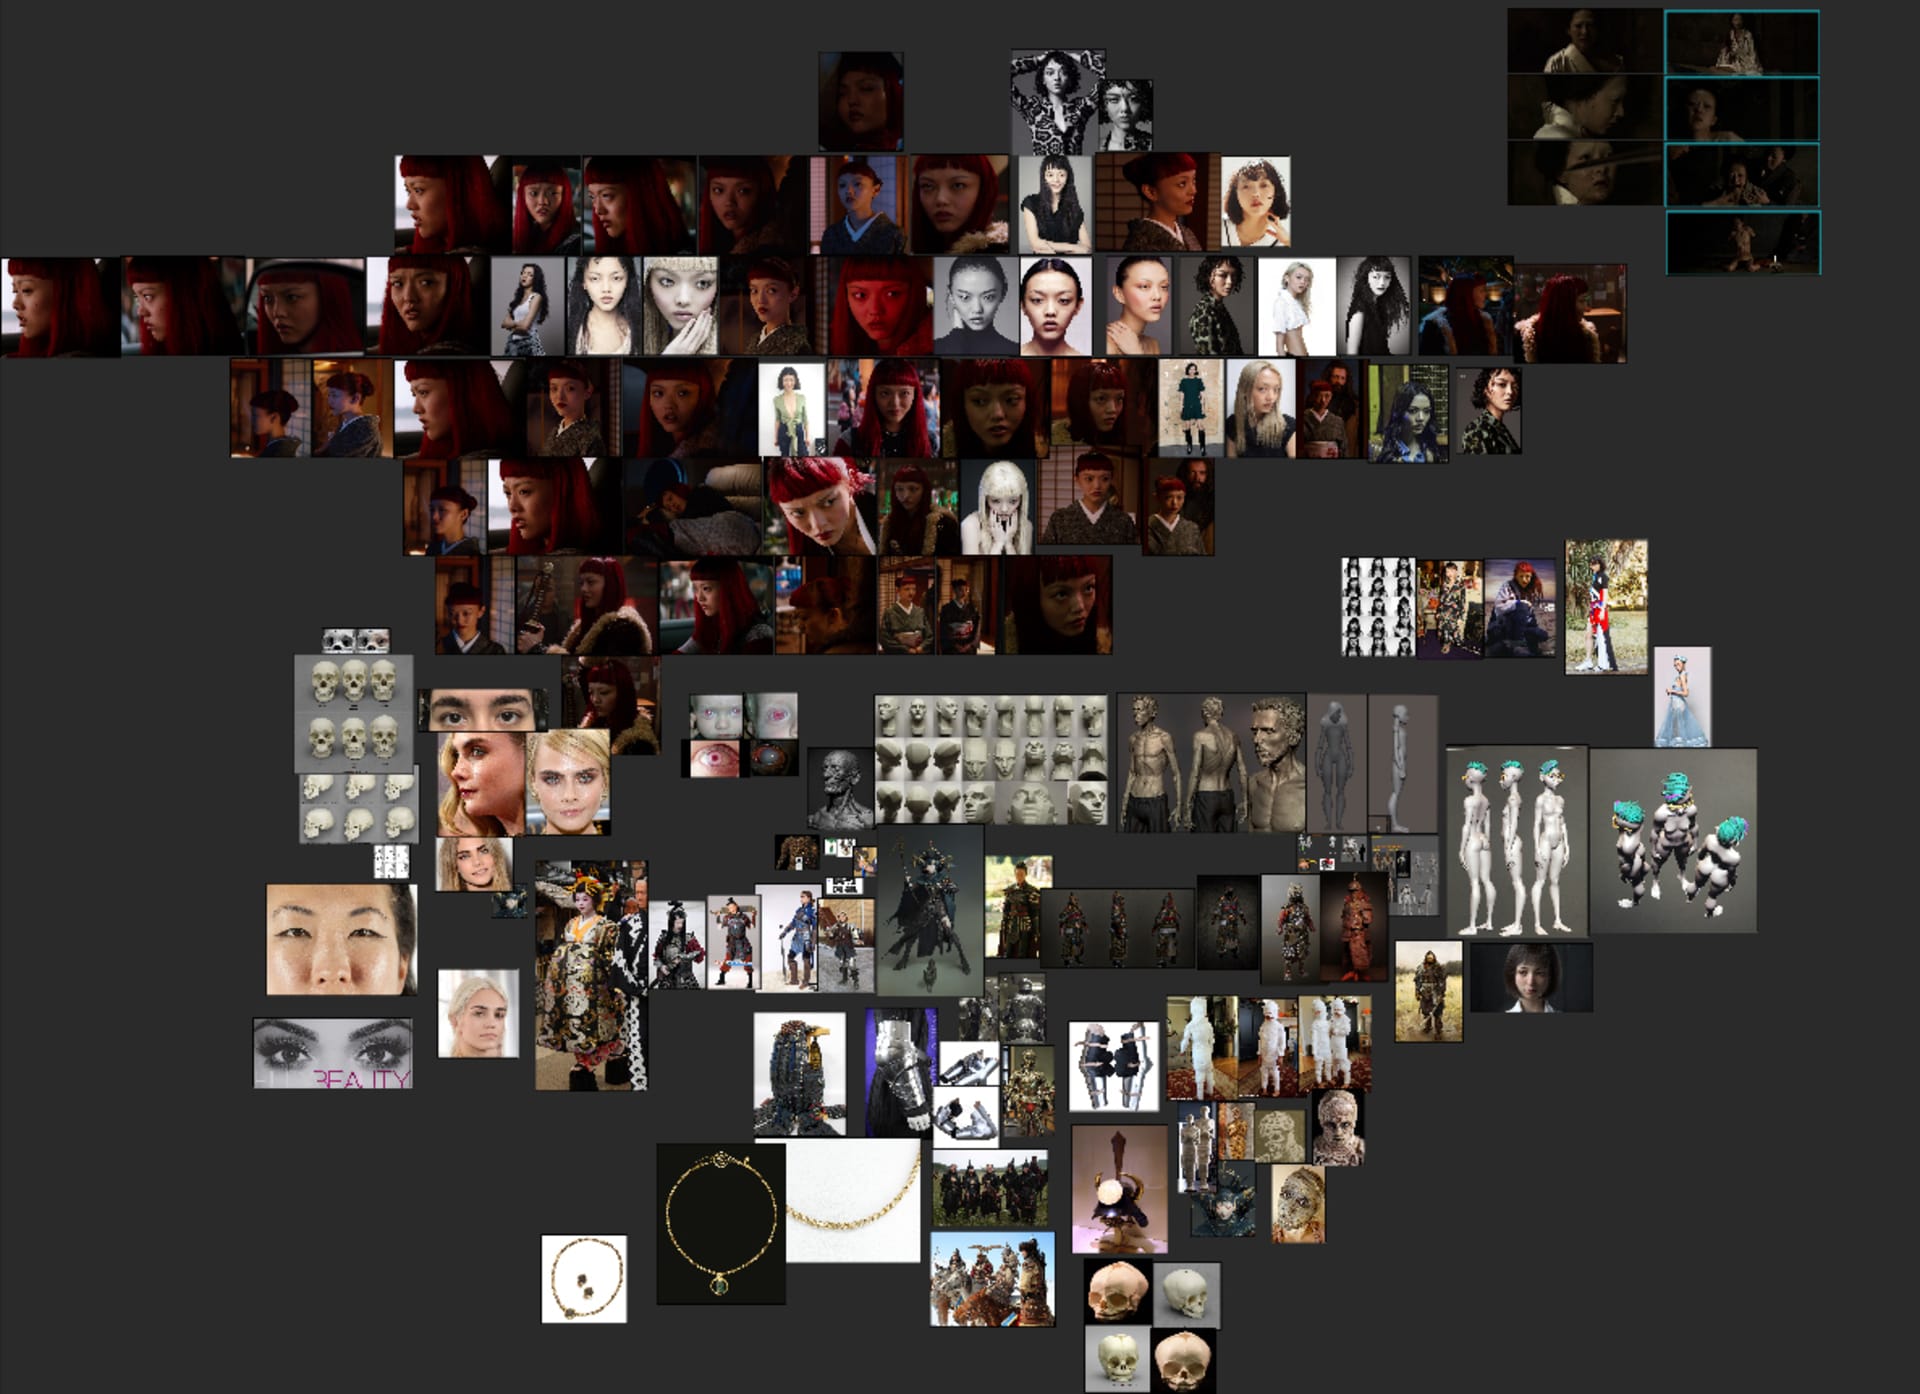
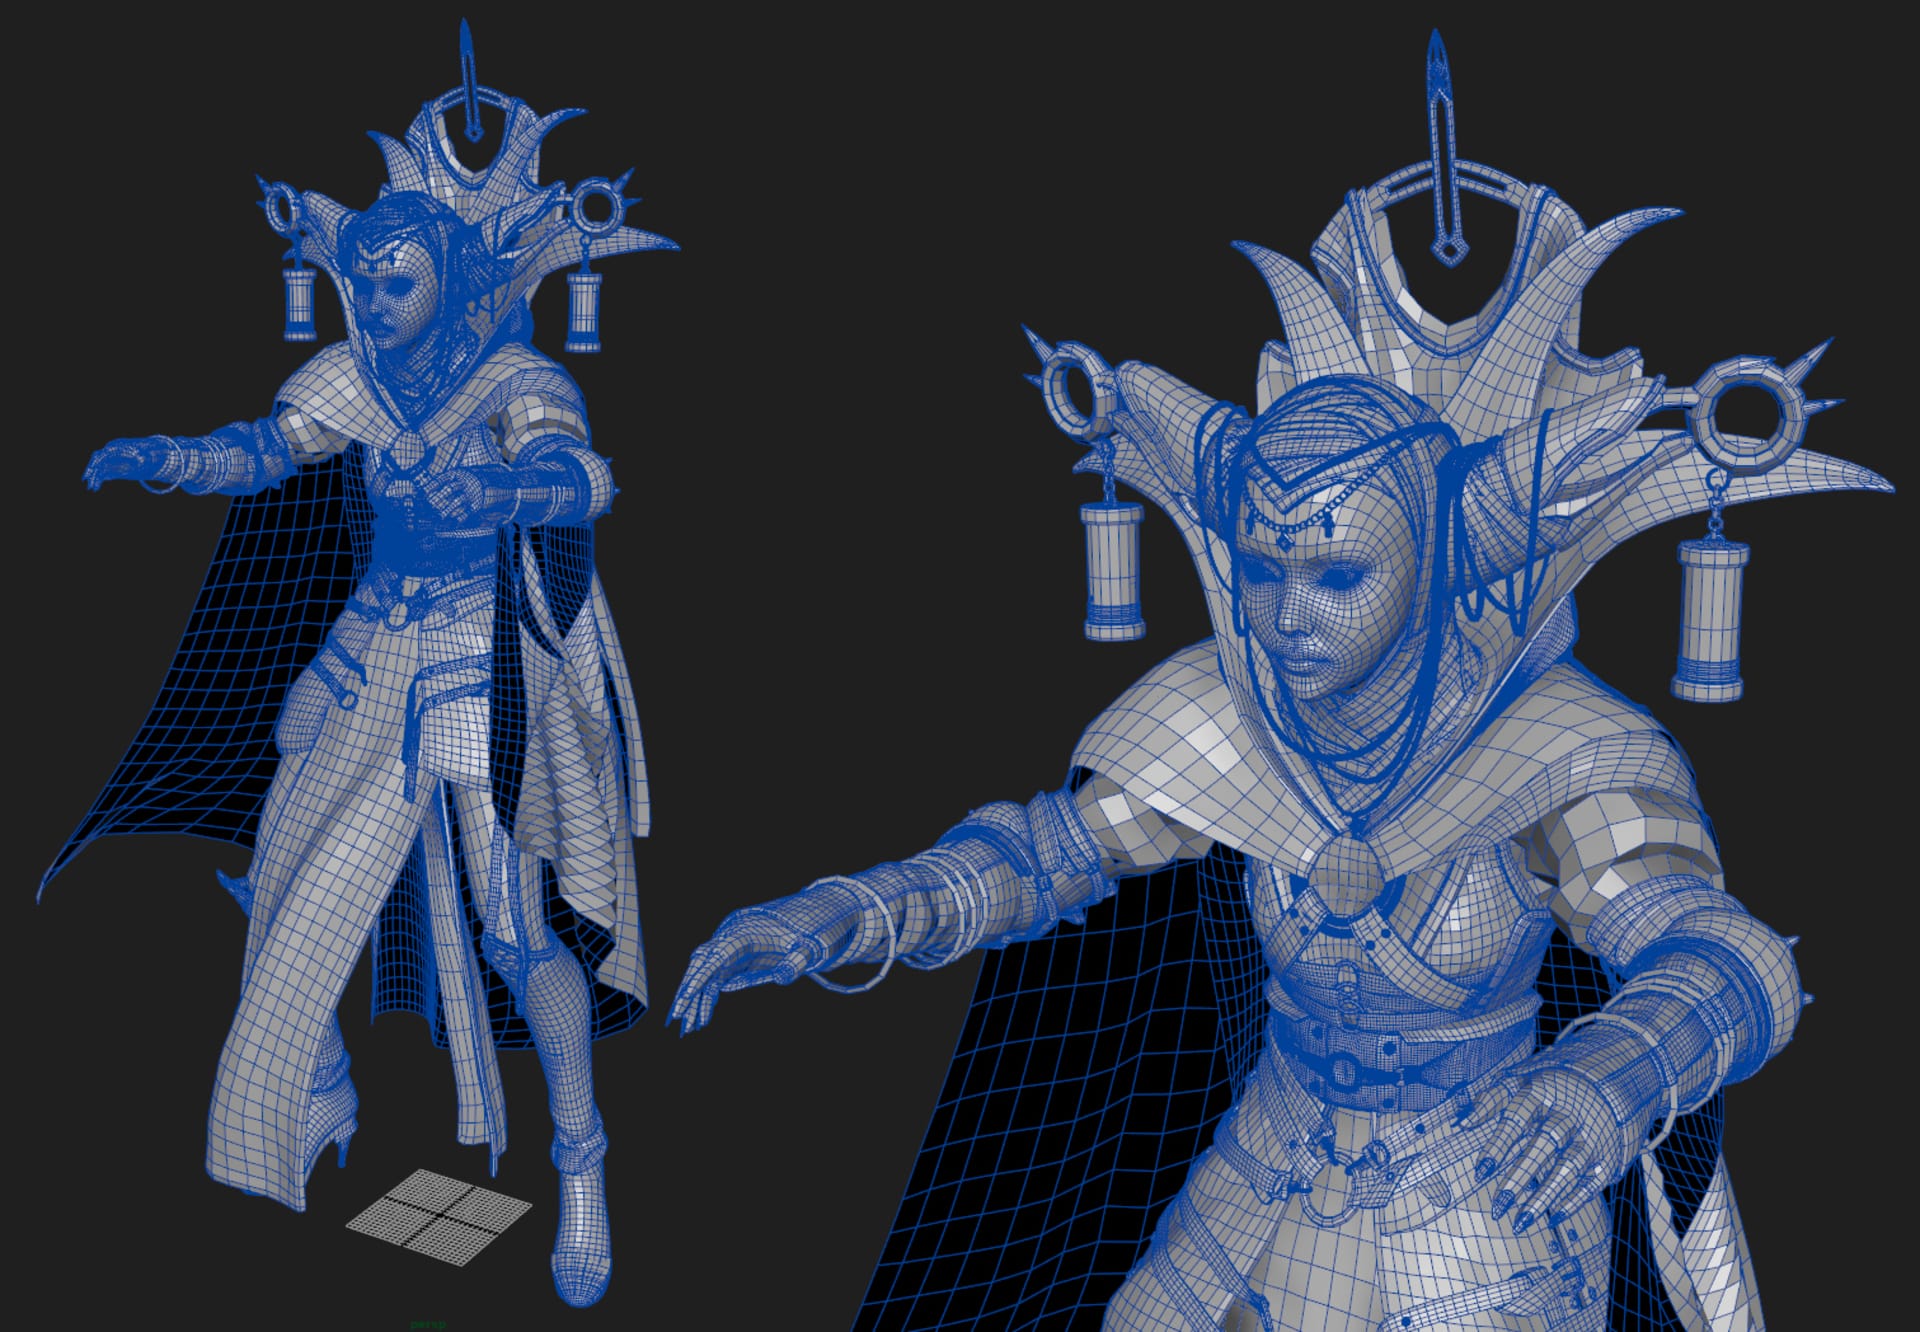
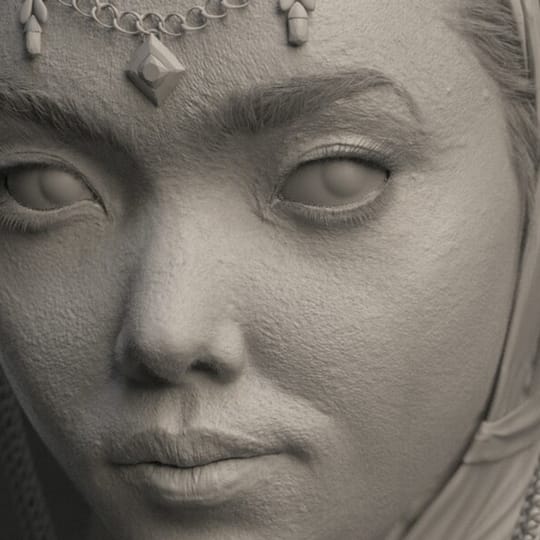
Image by Taj Nabhani. Concept © Roman Kupriianov.

Making of Jjahawa: Part 1 — 3D character modeling tips


Taj Nabhani reveals the making of Jjahawa, a 3D character based on a concept by Roman Kupriianov. Part 1 details the modeling, 3D cloth and model optimizations.

Jjahawa started as a project by Taj Nabhani while being mentored by Bruno Câmara. The goal was to push his skills to the next level while creating an awesome portfolio piece to showcase his upgraded talents. Key to the mentorship by Bruno was learning how to translate 2D characters into 3D artworks. For this project, Taj followed an original concept by Roman Kupriianov.

Taj has pretty much always been responsible for sculpting, modeling, as well as texturing and handling all the shader work on his characters. He enjoys having a well-rounded knowledge of the character/creature pipeline as it offers him the opportunity to continuously learn new tools and to polish his work to new degrees.

In this 3-part series of articles, Taj Nabhani reveals the making of Jjahawa and discusses the processes he went through using Maya, ZBrush, Marvelous Designer, Photoshop, Mari, R3DS Wrap, Substance Painter, Nuke and V-Ray for Maya.

In part 1, Taj takes us through the important modeling stage, as well as some of his top tips for simulating 3D cloth using Marvelous Designer.


Final render of Jjahawa based on an original concept by Roman Kupriianov.

About Taj Nabhani

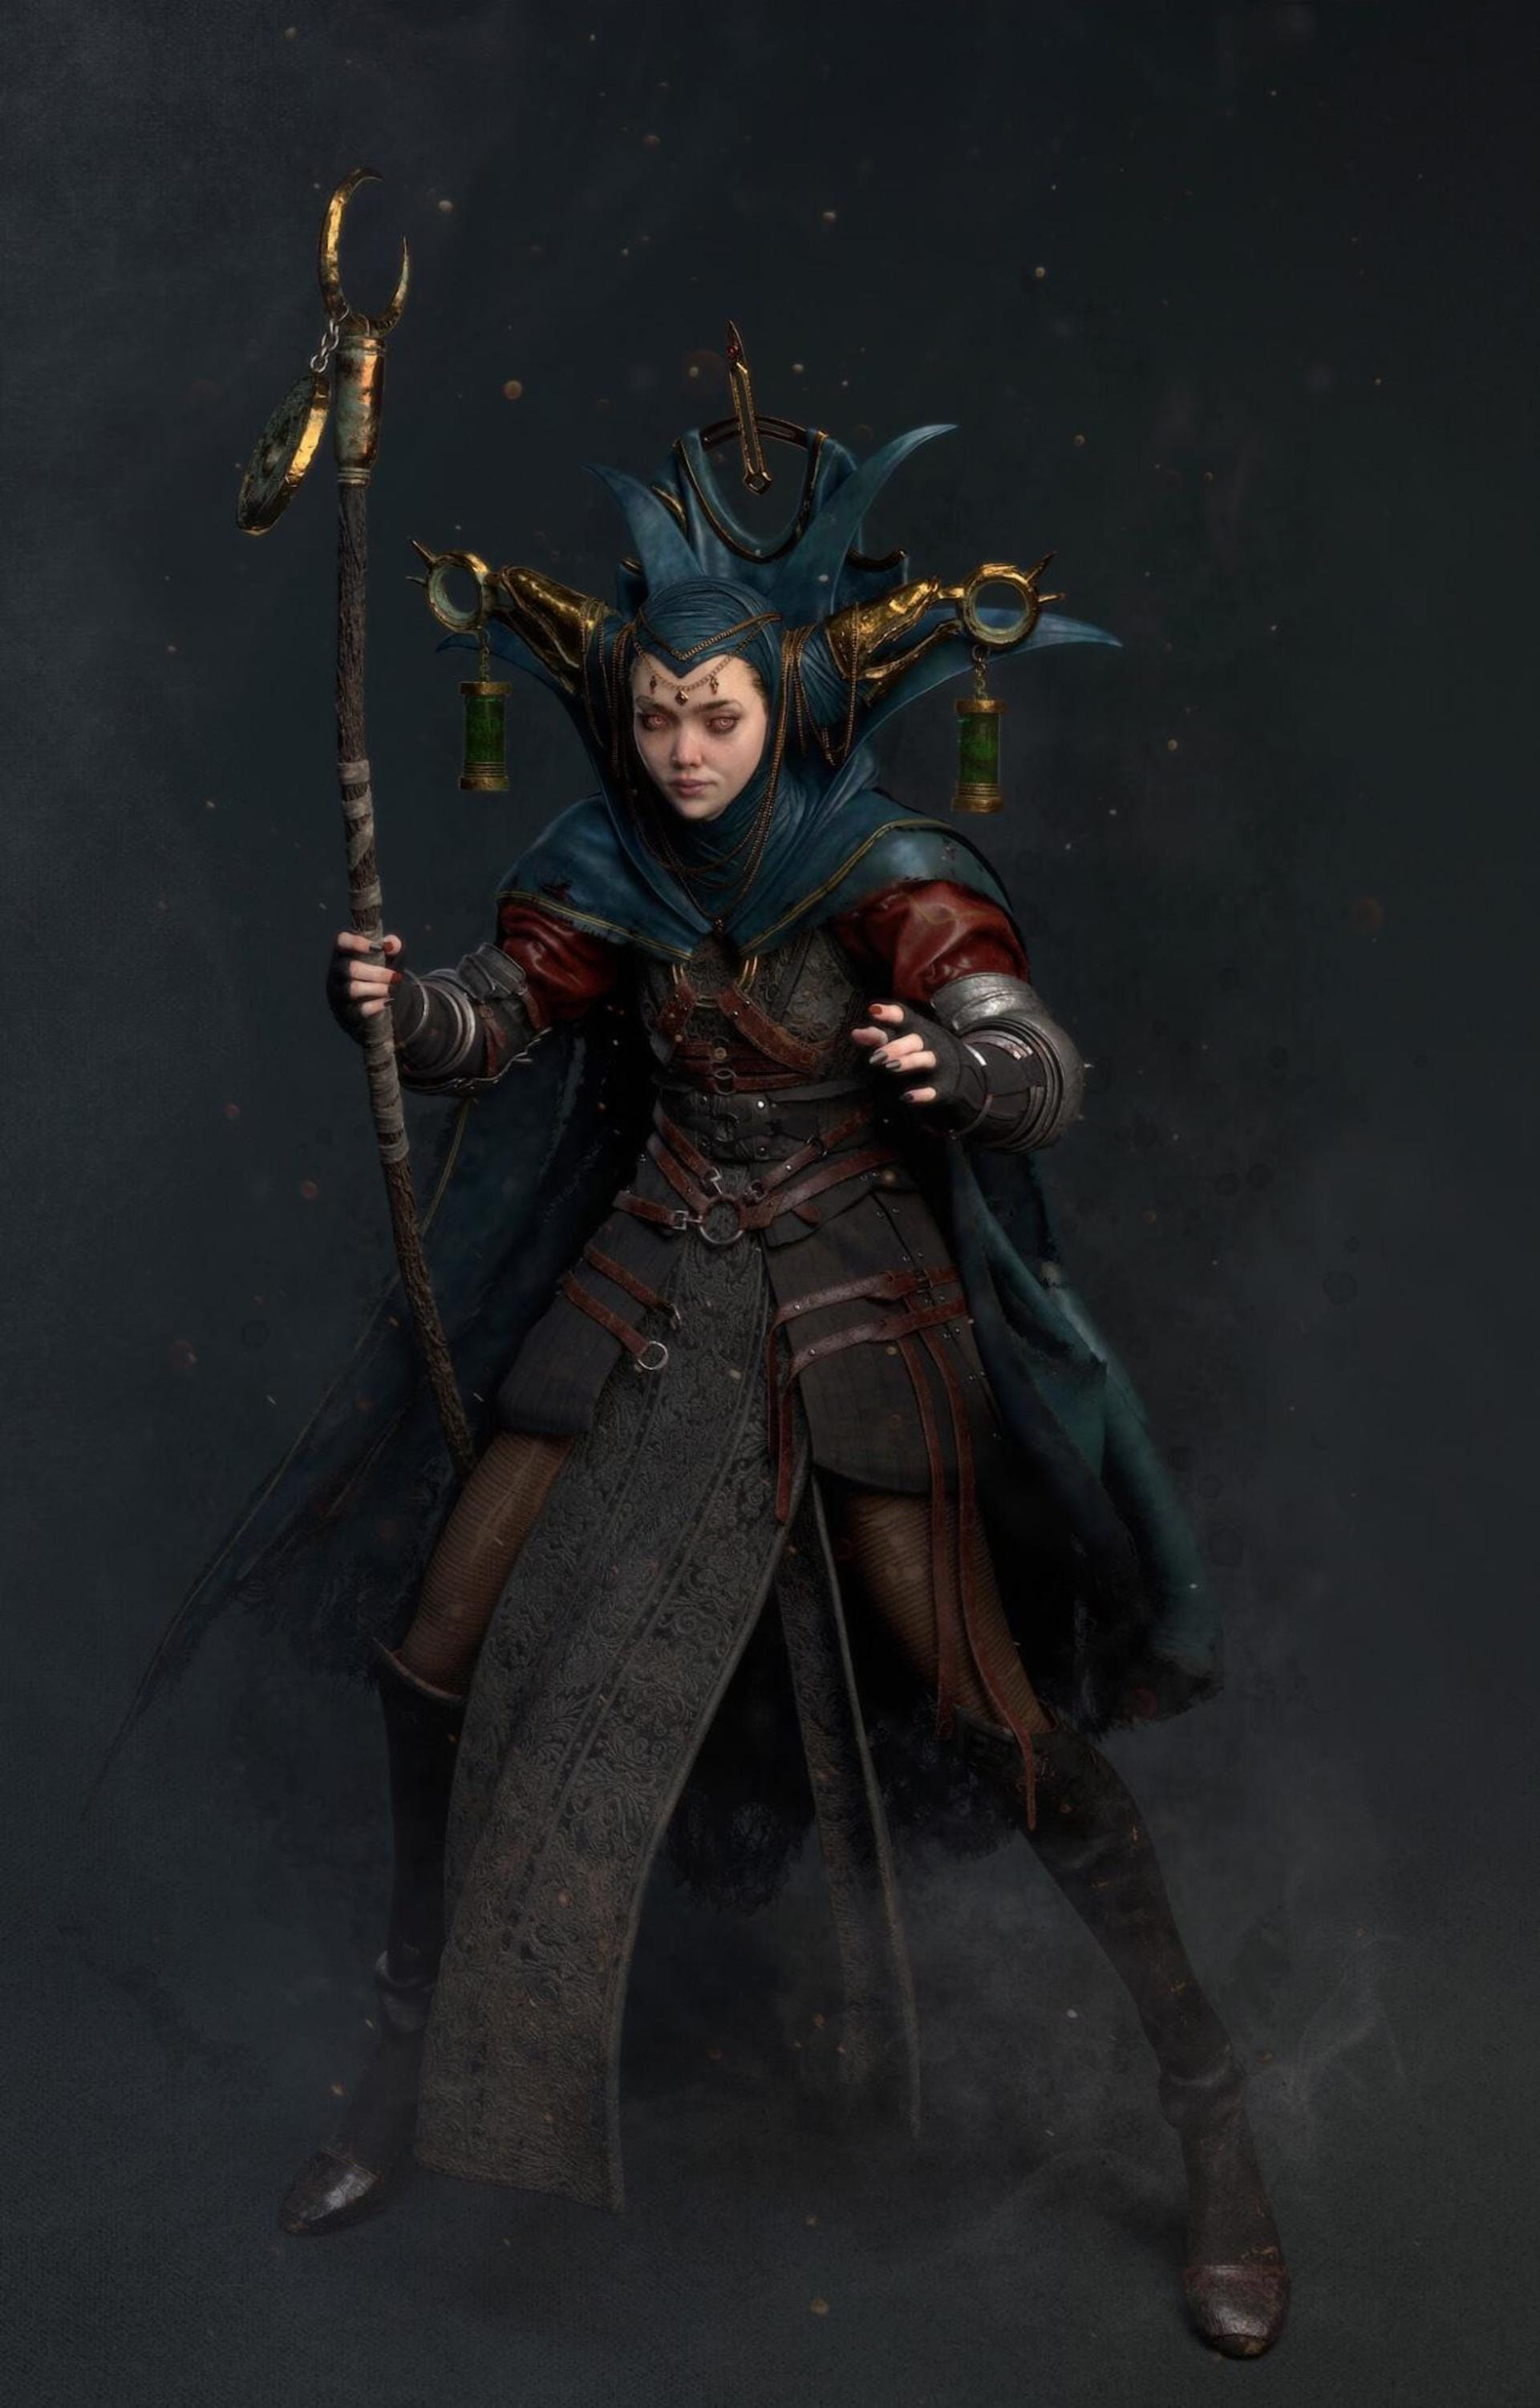
Taj Nabhani is a 3D artist based in Montreal, Quebec, currently working as a Modeler at Framestore. He’s been working in the VFX industry for over 6 years after graduating from OCAD University with a Bachelor of Design in Illustration and a post-grad at Sheridan College in Computer Animation. Drawing, sculpting, visual storytelling and staying creative are lifelong pursuits of Taj’s and he is constantly developing his skills while looking to learn from other people. You can follow or contact Taj on Instagram via @tajnabz.

Choosing a concept

The first step of this project was finding a concept that could hold my attention for the long haul. As part of my mentorship, I presented Bruno Câmara with a selection of character art from a variety of concept artists that I follow and admire. He helped guide my choice towards the amazing character concept by Roman Kupriianov. 

I really wanted to work on a fantasy character. So, when I found Roman’s work, I was immediately taken by how captivating and appealing his unique vision for the fantasy genre is. I quickly learned as the project progressed that there was a subtle complexity within Roman's art and character that made it a much more challenging choice than I could've ever imagined. 

The subtle asymmetrical design and clean, powerful silhouette made me realize that I underestimated the piece at first glance, but I was ready for the challenge!


When choosing a concept for a personal project, make sure it’s a challenge that you can learn from.

Once you’ve found a challenging concept, start to look at and break up the figure into simple shapes — these will guide the proportions, form and silhouette while you model. Also make a note of the costume, breaking down each piece of the garment and counting all the sections that make up the design. You can even make a list if it helps.

Pay attention to anything in the 2D concept that looks possibly unresolved, particularly if you're only working from one angle. You should also examine the various material properties on all the various surfaces.

Here is a list of the tools I used to create Jjahawa:

  • Maya — for retopology, box modeling, unwrapping UVs, rendering, light rigging/posing.
  • ZBrush — for sculpting primary, secondary and tertiary detail, modeling, baking out maps, unwrapping UVs, and posing.
  • Marvelous Designer — for simulating 3D cloth.
  • Photoshop — alpha creation, making notes, light compositing.
  • Mari — for texture painting.
  • R3DS Wrap — for transferring geometry from the block-in to base mesh, and transferring cross-polarized images to textures.
  • Substance Painter — for material painting/definition and texture painting.
  • Nuke — for light compositing and processing images from Texturing.xyz.
  • V-Ray — for rendering and optimizing files.
  • PureRef — for image collection, organization and as a reference board.
  • XnView — for image navigation and organization.

Be sure to hunt down references for everything. Start anywhere and build your PureRef board — do it for everything, even if it's just a simple glove. There is a plethora of references out there, so the hardest part is just narrowing down where to look.


PureRef is a great tool for organizing your references and building a mood board to work from.

Modeling the concept in 3D

When it comes to modeling, there are no real shortcuts other than just taking your time and using references. As with most creative fields, modeling is a lifelong journey of learning, interpreting, combining and simplifying the world around you.

At this part of the workflow, I simply use Photoshop, Maya and ZBrush. I see the modeling stage as a way of sculpting form through simple shapes to create bigger, more complex and intricate forms. The goal is to keep things simple and build/refine slowly. 

This idea really sunk in with me when I took a class with Mold3d Academy, taught by Gio Nakpil. He broke sculpting down into a very simple structure: primary, secondary and tertiary forms. You should always respect the proceeding form and use the forthcoming form to complement it — and not overpower the previously constructed forms.


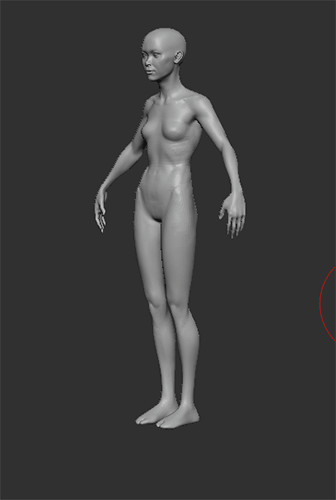
Don't be afraid to take frequent breaks during the modeling stage. You need to take time and distance from your work so you can see it with fresh eyes — this helps you to spot mistakes more easily and alleviates tunnel vision. 

You should also be sure to play around with lighting in your scene, as this helps you to read the forms and analyze how various lighting situations affect your sculpture from different angles. Look for highlights as light rolls over your sculpture and adjust any imperfections accordingly. Clean, simple forms should be your only mantra at this stage.

Optimizing character models

When the time came to render my model, I tried a few render engines before settling on V-Ray. It was recommended to me by my good friend and talented artist Atilla Ceylan at Zoic Studios. I needed something that could render fast and also handle multiple large texture sizes. I don't have a top-of-the-line machine or a render farm at home and, as a result, most other renderers failed me. For this project, I found V-Ray was the best 3D rendering software for me.

I learned a lot about optimization in this project to avoid long render times. And when I started using V-Ray Next with its incredible GPU-rendering capabilities, my life was suddenly a whole lot easier. The quick render times and simplified-yet-robust settings were perfect for helping me achieve a cinematic-quality render without getting too bogged down in the technicalities of it all.

For this model, I opted to retopologize everything and work with normal maps and displacement. This is pretty standard optimization within the industry but you can also work with a decimated model and get a decent enough result — as long as you don't plan on rigging or deforming your mesh.


Everything was retopologized and detail was added with normal mapping and displacement.

3D clothing tips for characters

Making clothing is a relatively fun and simple process. You can approach it in 2 ways: 

  • Simulate clothing over your figure using a program like Marvelous Designer or Houdini's Velum system.
  • Model your clothing and sculpt it by hand using references. 

With some of the more rigid pieces — reinforced, padded leather — I opted for the latter method. But for some of the more flowing and loose clothing pieces, I chose Marvelous Designer.


You can achieve great results with either method. But note that Marvelous Designer is really a block-in tool. You'll need to manipulate and accentuate whatever you make using ZBrush or Maya afterward — regardless of how perfect your results may look from Marvelous Designer.

I'm still learning Marvelous Designer myself, but some of my favorite go-to resources are the free sewing patterns you can find online (simply search Pinterest and Google Images for these), as well as Lori Griffths’ YouTube channel, a fantastic tutorial by Paul Liaw available from The Gnomon Workshop and this really great tutorial by Seth Nash

In the following parts, we'll go through the creation of the hair, eyes, the texturing and shading process, and finally look at the lighting, rendering and post-production stage.

Want to see how quick and easy it is to render your own character concepts in V-Ray?
Try V-Ray for Maya free for 30 days.

© Škoda Design

Subscribe to our blog.

Get the latest news, artist spotlight stories, tips and tricks delivered to your inbox.

By submitting your information you are agreeing to receive marketing messages from Chaos. You can opt-out at any time. Privacy Policy.

Chaos
© 2024 Chaos Software EOOD. All Rights reserved. Chaos®, V-Ray® and Phoenix FD® are registered trademarks of Chaos Software EOOD in Bulgaria and/or other countries.